How to Make a Simple Coat Rack
 Updated: Mar. 08, 2023
Take advantage of a free afternoon in the woodshop to create this timeless, Craftsman-style coat rack.
Our editors and experts handpick every product we feature. We may earn a commission from your purchases.
A half day
Beginner
$50 - $150
Introduction
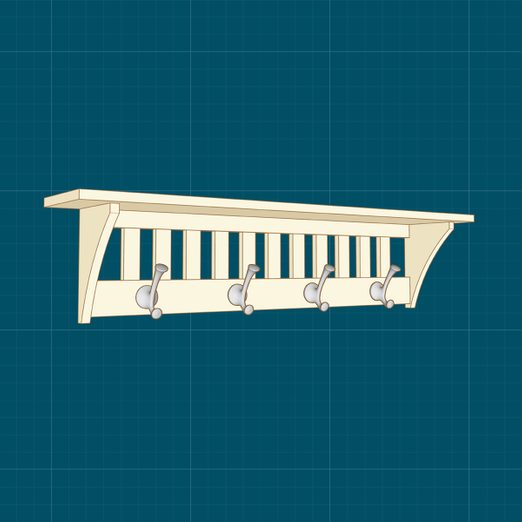
A coat rack is a useful and welcome addition to any foyer or entryway. This simple, mission-style rack can be assembled in one afternoon with a single board and some coat hooks that suit your style.Tools Required
- 3/8" Countersink bit
- 3/8” plug cutter
- Basic woodworking tools
- Clamps
- Drill/driver
- Jigsaw or band saw
- Pocket hole jig
- Random orbit sander / belt sander / sanding block
- Safety glasses / hearing protection / dust mask
- Speed or framing square
- Table saw
Materials Required
- 1 - 1x8x10' Hardwood board
- 1-1/4" pocket hole screws
- 4 - Coat hooks
- Appropriate lenght #8 screws for installation
- Wood glue
Project Overview
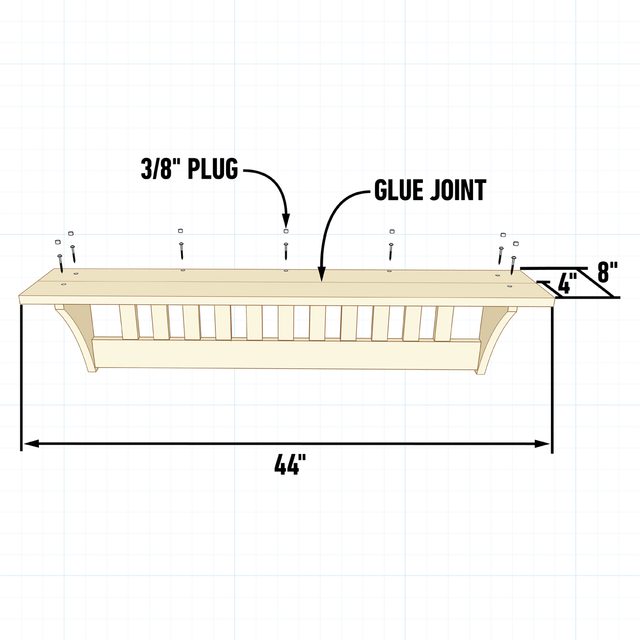
Finished dimensions: 8-in. deep x 10-1/4-in. tall x 44-in. long.
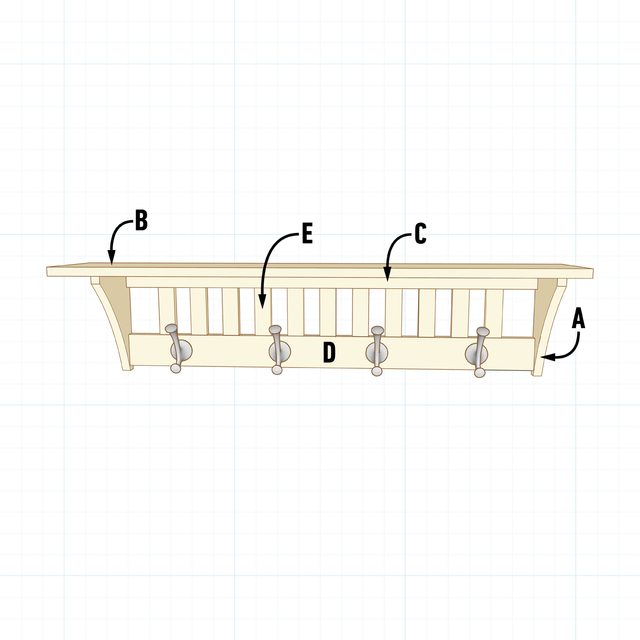
Cutting List
| KEY | QTY. | DIMENSIONS | PART |
| A | 2 | 3/4″ x 6-1/2″ x 9-1/2″ | Ends |
| B | 2 | 3/4″ x 4″ x 44″ | Top shelf |
| C | 1 | 3/4″ x 1-1/2″ x 38″ | Top rail |
| D | 1 | 3/4″ x 3″ x 38″ | Bottom rail |
| E | 11 | 5/8″ x 1-1/2″ x 4-1/2″ | Stiles |
Project step-by-step (7)
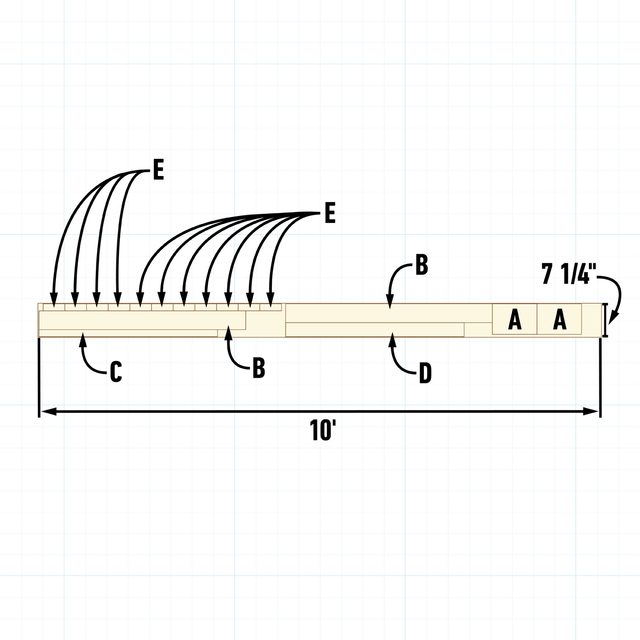
Cut Your Parts
Start by cutting the parts for your coat rack. Refer to the cutting layout diagram above to see how each component fits on the board.
In this diagram, we assume you purchased a 10-foot board at a home center, surfaced on all four sides with exact dimensions of a 1 x 8: 7-1/4-in. wide by 3/4-in. thick. The cutting diagram includes a 1/8-inch buffer around the perimeter of the board, and assumes your blade’s kerf is also 1/8-inch.
The last step: Trim the stile (E) thickness from 3/4-in. to 5/8-inch. If you’d rather do this on a thickness planer than a table saw, keep all the stiles together and plane them down to 5/8-in. before cutting them to 4-1/2-in. lengths.
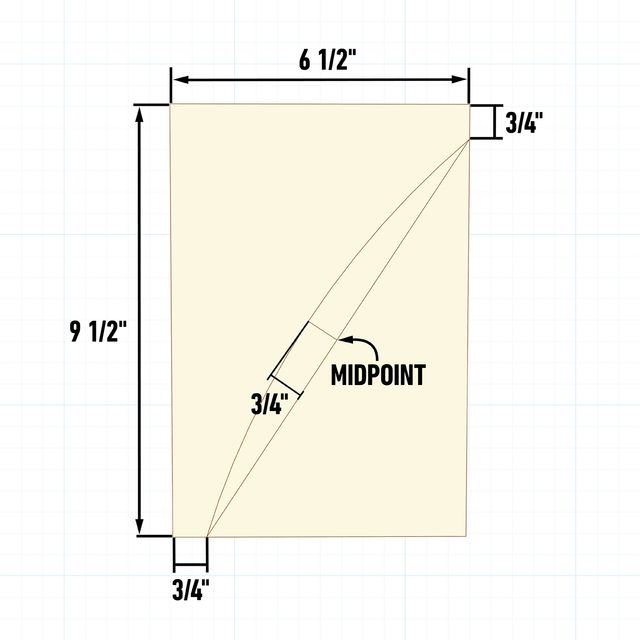
Shape the End Pieces
To lay out the curve, measure down 3/4-in. from the top right corner and 3/4-in. along the bottom from the bottom left corner, then mark these points. Draw a line between the points with a straightedge. From the midpoint of your line, draw a 3/4-in. perpendicular line towards the upper left corner of the board.
Now you can now create your arc. Utilizing a thin piece of plastic or aluminum (a ruler works here), bend a curve through these points and trace it on the board.
After tracing the curve, cut along the inside of it with a bandsaw or jigsaw. To ensure any irregularities are uniform at each end, copy the curve cut made on the first end to the second end, then cut it.
Sand the edge to remove any milling marks left by the bandsaw or jigsaw blade. The best tool for this task is a spindle sander. However, a hand or belt sander, in conjunction with a square to ensure the curved edge remains square to its face, will suffice. After that, finish sanding both ends to your preferred grit and proceed to the next step.
Assemble the Back
With your two curved ends (A) cut and sanded, it’s time to drill the pocket holes in the stiles (E) and ends of the top (C) and bottom (D) rails. My preference would be drilling two pocket holes to prevent the piece from rotating while being glued. However, there are so many stiles you can probably get away with one hole per end.
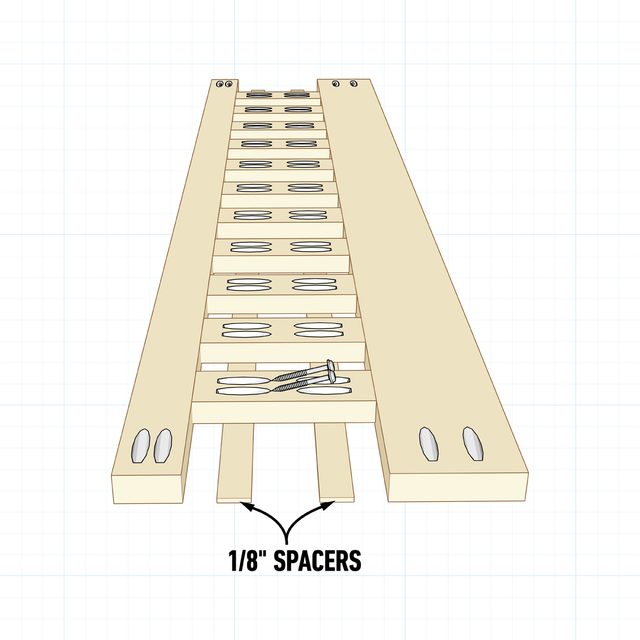
After drilling your pocket holes, lay out your stiles and rails for glue-up. Place all the pieces face down on your bench with the pocket holes facing up. Then rip a couple of 1/8-inch strips of scrap wood as a spacer, so the backs of the stiles are flush with the backs of the top and bottom rails.
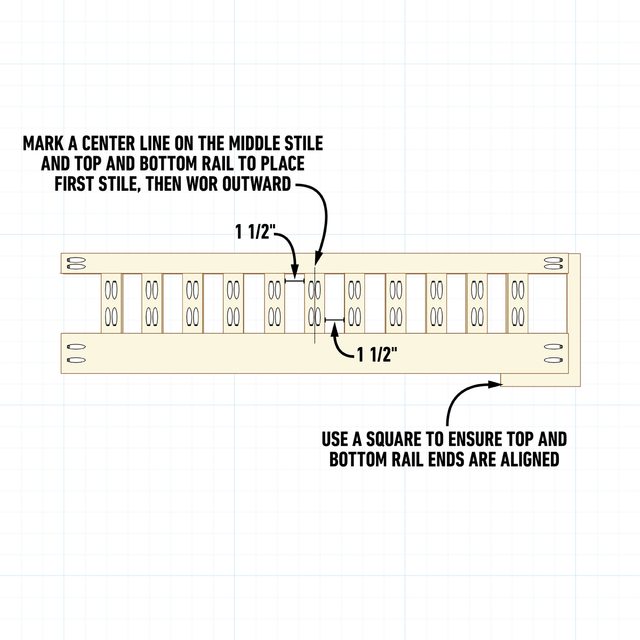
Since there are an odd number of stiles, mark the center of your top and bottom rails and center your first stile on those marks. Work your way outwards from the center, leaving a gap of 1-1/2-in. between each stile.
This is the most finicky part of the project, and not a time to rush. I laid these all out and dry-clamped the entire assembly together to ensure the rail ends are in alignment with a square. Then I screwed the pieces together.
When all the stiles have been positioned and the rail ends squared up, glue and re-clamp the assembly. Let the glue set for a few minutes until it becomes tacky. This will prevent the stiles from moving or spinning when the pocket screws are fastened into the rails. Pro tip: Keep a wet rag nearby to control glue squeeze out.
Finish this step by setting all your pocket hole screws, making sure the back of the stile is flush to each rail.
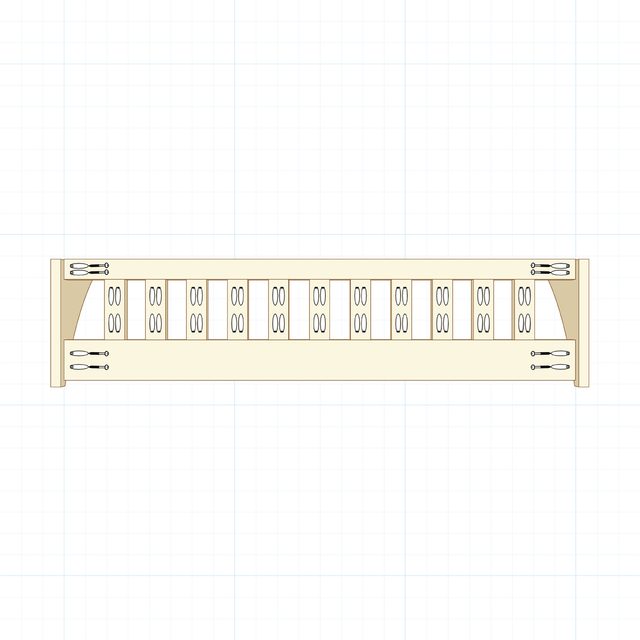
Attach the Ends to the Back Assembly
With the most difficult step behind you, it’s time to screw the top (C) and bottom (D) rails to the curved ends (A). Flush the ends of the two rails to the top and back edge of the curved ends. Secure them with wood glue and pocket hole screws.
Construct the Shelf and Attach It to the Back and Ends
Edge glue the two four-inch-wide top shelf (B) pieces from the cut list, using biscuits or dowels if you wish. When finished, you should have one board measuring 8-in. by 44-inches. However, if you must clean up the edges to achieve a tight glue joint, a slightly narrower top shelf will be just fine.
While the top shelf is clamped and drying, cut a dozen 3/8-in. plugs to cover the screws in the top and later for installation.
Once the top shelf dries, clean up the glue squeeze-out, sand the entire board and lay out the holes for attaching the top to its back and sides. Do this by laying the top upside down on your bench with the end and back assembly on top of it. Then draw the outline of the top with a pencil. Before tracing the outline, make sure that the sides are perpendicular to the back and the entire assembly is centered on the top.
Using the outline, lay out the screw placement locations and drill 9/64-in. holes from the bottom side of the top shelf all the way through the board. It doesn’t matter how many screws you use here. Just make sure you fasten them in both ends (A) and the top rail (C) to hold the coat rack square and keep the top shelf from warping or twisting.
Once you’ve drilled the through holes, sand or erase the outline you traced on the bottom of the top. Turn it over and countersink the 9/64-in. through holes 5/16-in. deep with a 3/8-in. countersink bit.
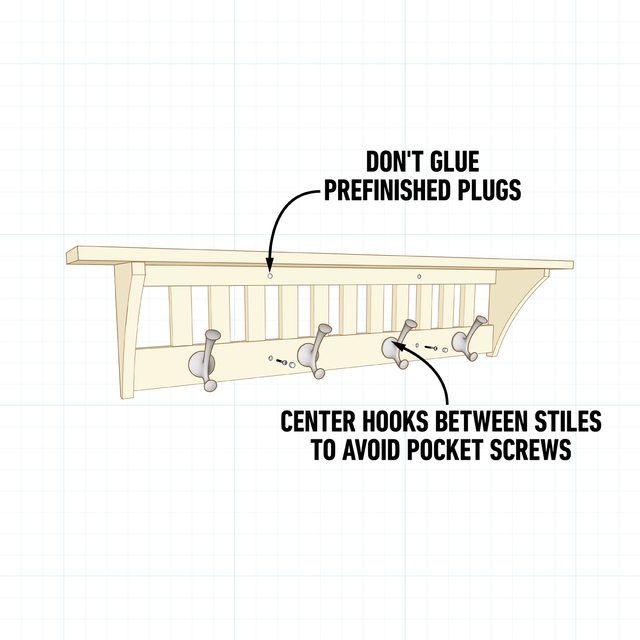
Attach the top with wood glue and #8 x 1-1/4-in. flathead or trusshead/pocket screws. When you’ve tightened all the screws and secured all the coat rack pieces together, glue in the top plugs. Let them dry and sand or trim them flush.
Sand and Finish
With the coat rack assembled, sand and finish the piece and four extra 3/8-in. plugs to your desired liking. If you live in a wet or snowy climate, apply polyurethane as a topcoat. This protects the wood from the wet mittens, scarfs and hats that will inevitably collect on the top shelf.
Mount the Hooks and Install the Completed Coat Rack
Lay out and install your chosen hooks on the bottom rail. Mount your hooks under the gaps between the stiles to avoid drilling into any pocket hole screws.
Determine the height on the wall where you plan to hang your coat rack. Find the studs behind it.
In the same manner that you attached the top to the back and side assemblies, mark the stud locations on the top (C) and bottom (D) rails and drill 9/64-in. through holes. Countersink them 5/16-in. deep with a 3/8-in. countersink bit.
Level and attach the coat rack to the studs with the appropriate length #8 screws. Cover the screw heads with the four prefinished 3/8-in. plugs without gluing them in. This will make it easier to move or take down when necessary. And you’re done!