
Saturday Morning Workshop: How To Build a Floating Shelf with Secret Drawer
 Updated: Feb. 07, 2023
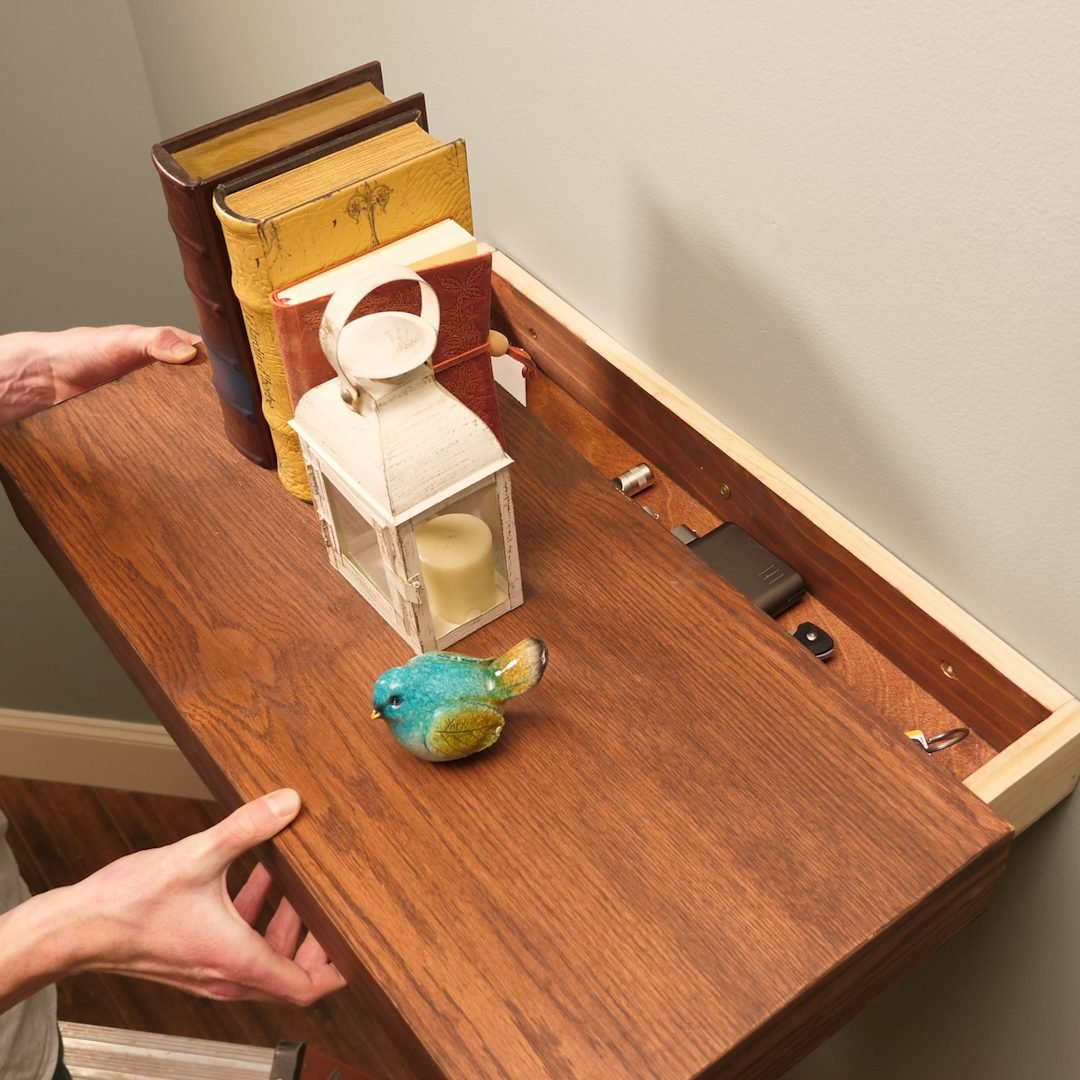
Learn how to make this sleek, modern floating shelf with a secret hiding place for your valuables.
A few hours
Beginner
$20-50
Introduction
Follow the step-by-step plans, video tutorial and tech art below to make this simple floating shelf that includes a hidden drawer for secret storage.Tools Required
- Clamps
- Drill
- Miter saw
- Nail gun
- Table saw
- Utility knife
Materials Required
- 1-1/2-in. 18-gauge brad nails
- 2’x4’ 1/4” Plywood
- 3” Washer-head screws
- 8’ 1x3 Board
- 8’ 1x4 Board
- Self-adhesive veneer
- Wood glue
Hidden Drawer Cutting List

Hidden Drawer Tech Art

Project step-by-step (7)
Rip the 1×4

Rip the 1×4 board to 2-7/8 in. for the shelf sides and front. This will give you about 1/8 in. tolerance for the drawer section of the build and let it slide nicely.
Cut the Plywood to Size

Cut the 1/4-in. plywood on the table saw to (1) 11-1/4 in. x 22-3/8 in. for the drawer and (2) 12 in. x 24 in. for the shelf.
Crosscut the 1×3 and 1×4 Boards

Crosscut the pine boards to size, according to the cutting list above, on the miter saw. Make sure to double-check your measurements!
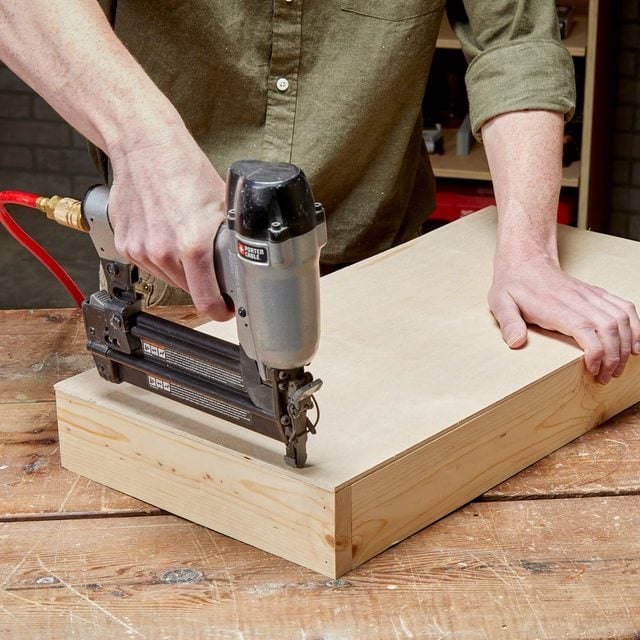
Assemble the Drawer

Fasten the drawer together using glue and 2 in. 18-gauge brad nails.
Assemble the Shelf
Assemble the shelf with glue and 2 in. 18-gauge brad nails. Here are a few tips to help you build and install DIY floating shelves in your kitchen.
Rough Cut the Veneer

Set the drawer on top of the veneer and cut the veneer to a rough size
Apply the Veneer and Cut to Size
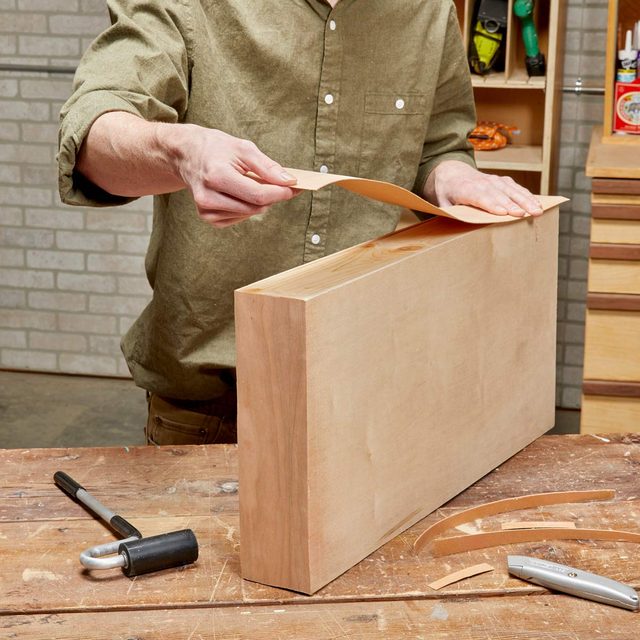
Stick on the veneer and cut along the edges of the drawer with a utility knife to the correct size. Lightly sand the corners and edges with a high-grit sandpaper to get the veneer to match.
If you want to learn more about some veneer techniques, check out this article.