How to Build an Entryway Coat Rack and Storage Bench
 Updated: Oct. 28, 2022
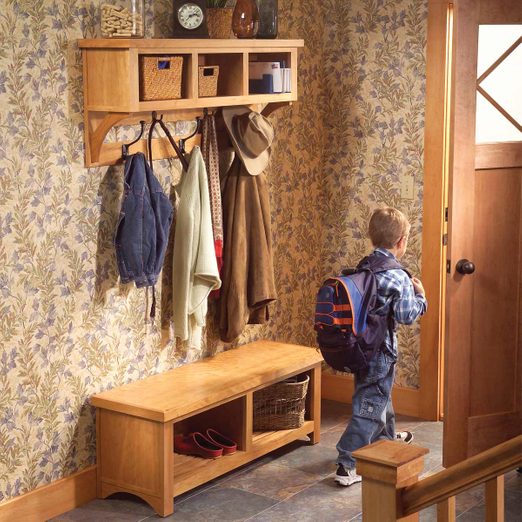
Buy PDF & Cut List If your entryway is littered with shoes and jackets, purses and book bags, this simple bench and matching shelf might be just what you need.
A full day
Intermediate
Varies
Introduction
With coat hook and shelves, this project is an easy way to tidy up a cluttered entryway. And you don't have to be a master woodworker to make it look great!Tools Required
- Brad nail gun
- Clamps
- Drill/driver
- Jigsaw
- Miter saw
- Table saw
Materials Required
- 1-1/4-in. screws
- 1-3/4-in. brad nails
- 2-in. brad nails
- 3/4" plastic or cloth feet
- 36 linear feet of 1x6
- 4' x 8' sheet of 3/4" plywood
- Coat hooks
- Pocket screw jig
- Spray lacquer
- Wood filler
- Wood glue
It doesn’t take long for the entryway to attain the dubious honor of becoming your home’s most cluttered spot. But by giving everyone a handy spot to hang coats, stow their shoes and drop off the day’s mail, you can have your entryway looking good all the time. That’s exactly what this coat rack and storage bench is designed for, giving you a beautiful piece of furniture that solves a messy problem.
Building this set will take you two or three days, plus a few hours of finishing work. We used cherry boards and cherry plywood. Cherry wood is expensive—oak, maple or birch will cost much less. For a more rustic look, use pine and plywood and spend even less.
This project requires two special tools: a table saw to rip solid wood to width and a pocket screw jig to make strong butt joints. If you don’t own a pocket screw jig, buy one. It’s a good investment and is easy to use. In addition, you’ll need a drill, a miter saw, a random orbital sander and a jigsaw. An air-powered 2-inch brad nailer isn’t absolutely necessary, but it’ll save lots of time and give you better results.
Project step-by-step (15)
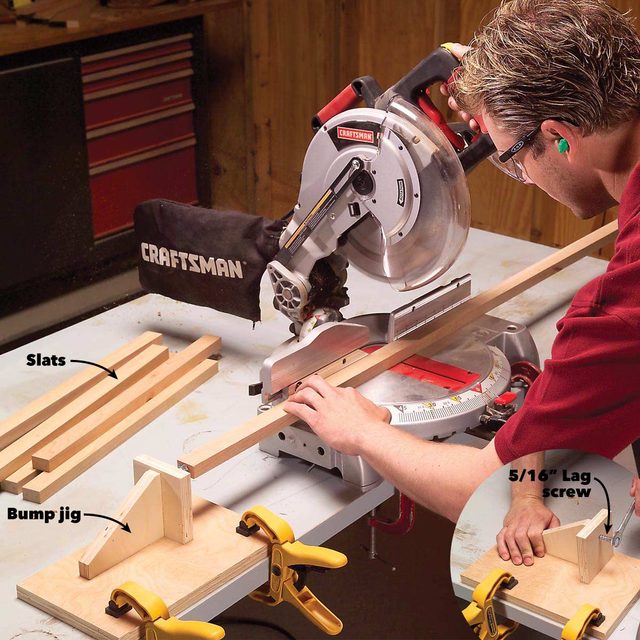
Cut Parts to Size
- Rip the parts for the grille.
- Cut all the slats to identical lengths using a bump jig.
- Make fine length adjustments by turning the lag screw in or out.
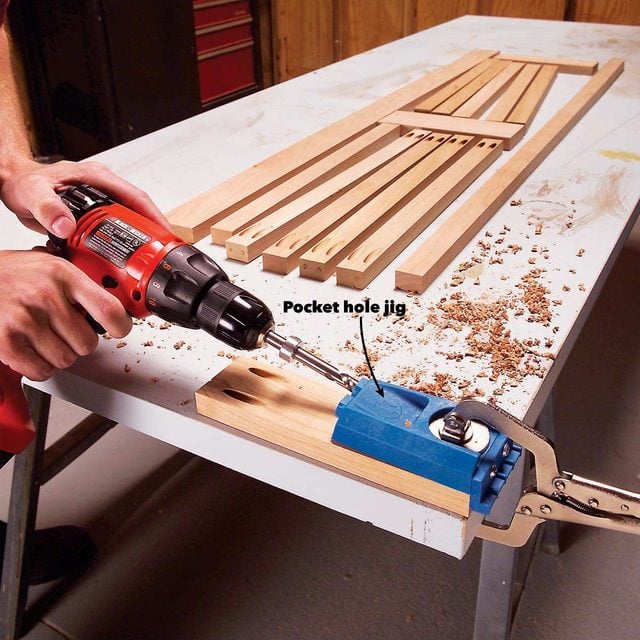
Drill Pocket Holes
- Drill pocket holes in the grille parts.
- Note: Lay out the grille with the best-looking side of each piece face down. Put each part back in place after drilling.
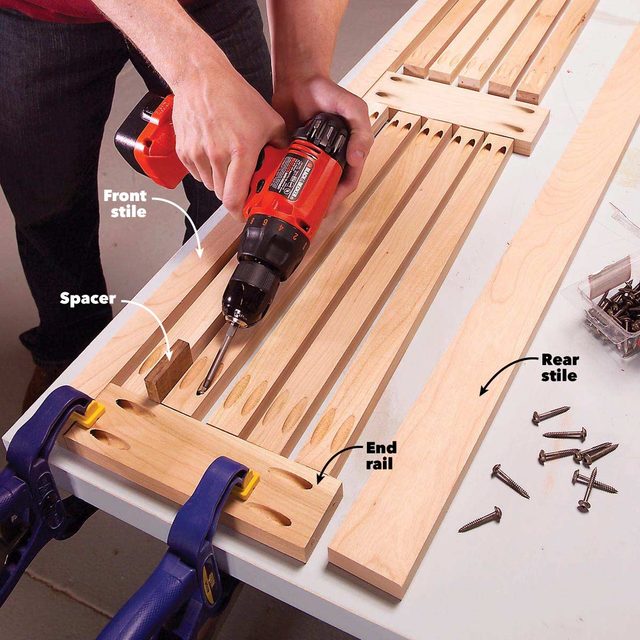
Assemble the Grille
- Assemble the grille with pocket screws.
- Screw the front stile to one end rail first, then position the slats using a 7/16-in. spacer.
- Attach the rear stile last.
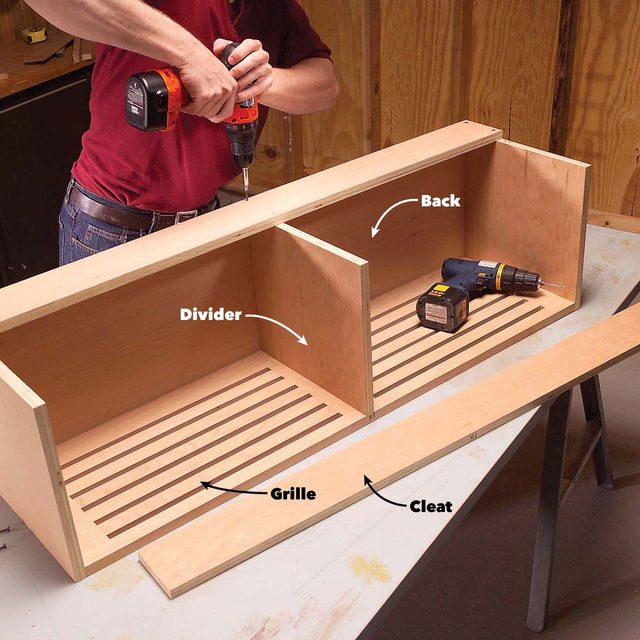
Assemble the Seat Box
- Cut the plywood parts and assemble the seat box, sides, back, partition and grille with 1-3/4-in. brads and glue.
- Predrill and screw the cleats to the top of the box.
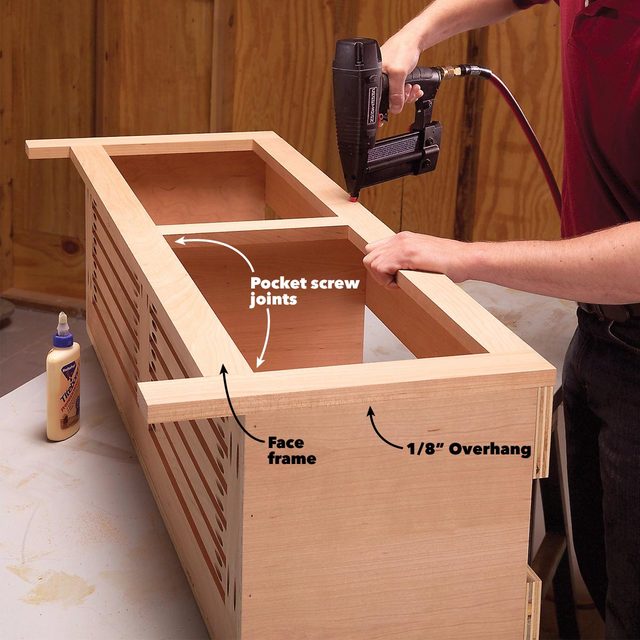
Fasten the Face Frame
- Assemble the face frame with glue and pocket screws and nail it to the seat box.
- Note: Remember that the face frame overhangs the sides of the box by 1/8 in.
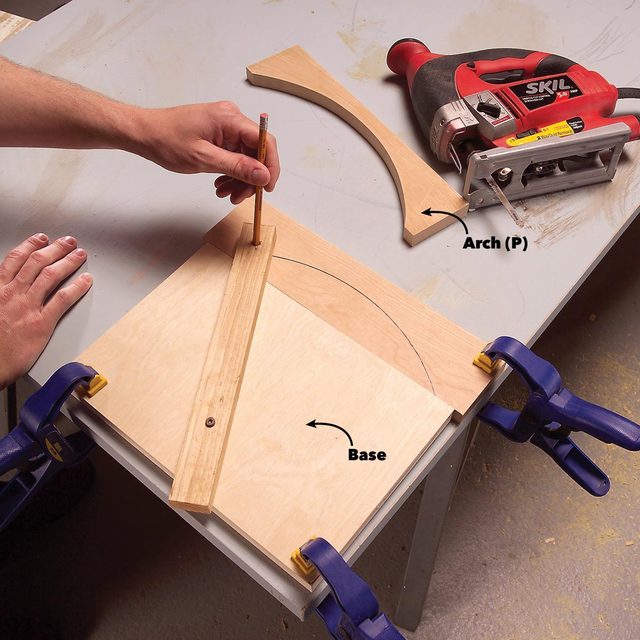
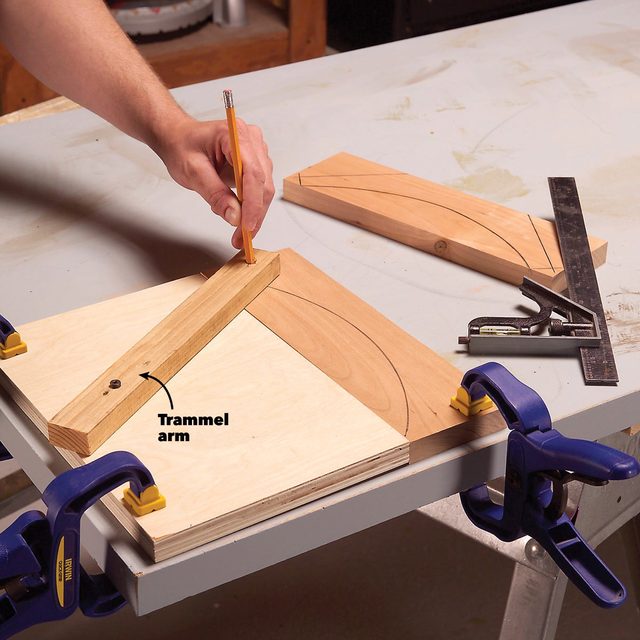
Cut Arcs
- Draw an 8-1/2-in.-radius arc using an arc jig.
- Cut the arch with a jigsaw and sand it smooth.
- Pro tip: When you cut the arch to length, trim from both ends to center it.
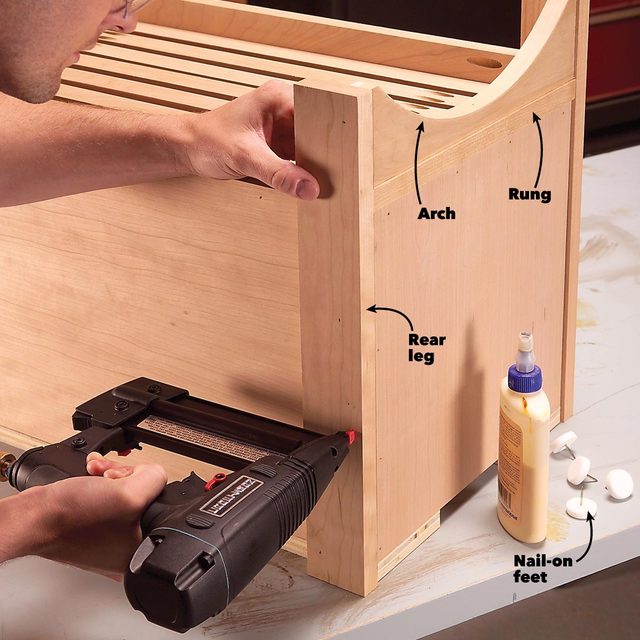
Add the Arches and Legs
- Nail the rungs to the underside of the box.
- Add the arches and rear legs.
- Add plastic feet or felt pads after the glue sets.
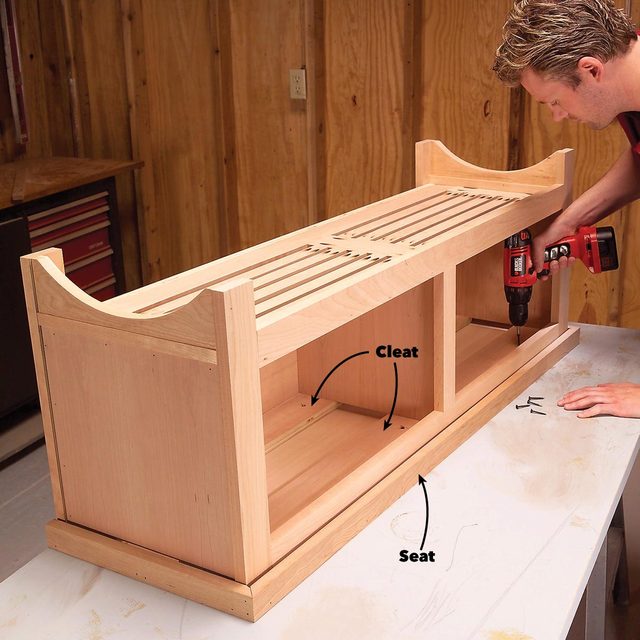
Attach the Seat
- Cut the seat from plywood and cover three edges of it with solid wood.
- Fasten the seat to the bench with 1-1/4-in. screws driven through the cleats.
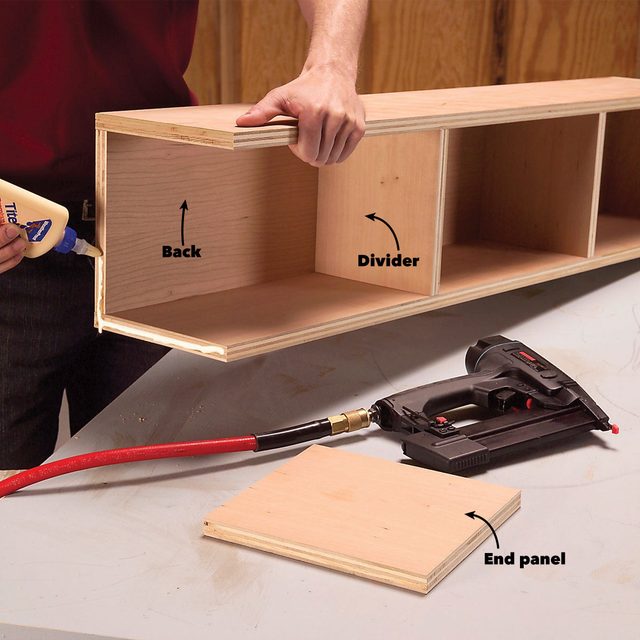
Create the Shelf Box
- Cut out the shelf box parts.
- Glue and nail the bottom to the back first.
- Add the dividers, the top and finally the end caps.
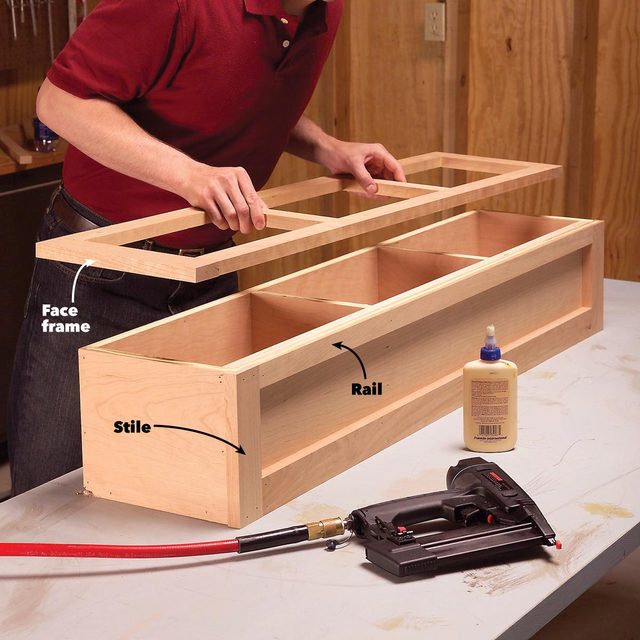
Add the Face Frame
- Nail rails and stiles directly to the underside of the shelf box.
- Assemble the face frame with pocket screws and nail it to the front.
- After the glue sets, sand all the joints smooth.
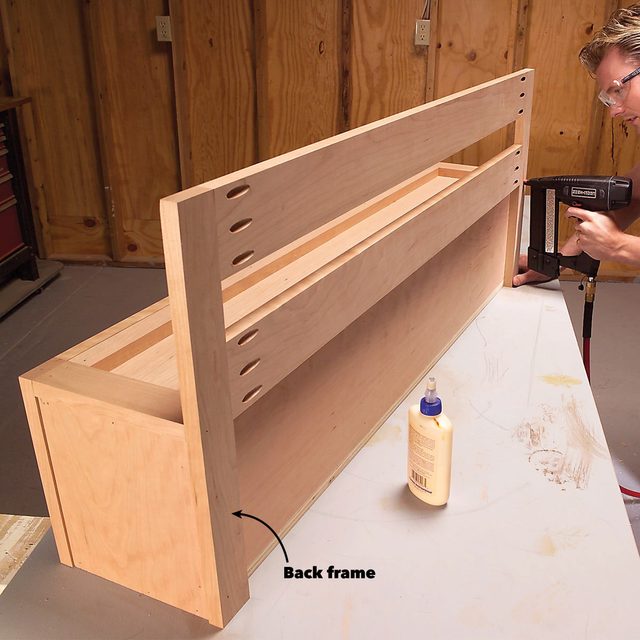
Attach the Back Frame
- Assemble the back frame with pocket screws, sand the joints flush, and fasten it to the shelf box.
- Assemble the shelf top and attach it with glue and brads.
Cut Arcs
- Draw an 8-in.-radius arc for the shelf brackets using the arc jig.
- Cut the arches using a jigsaw and the straight cuts with a miter saw set at 45 degrees.
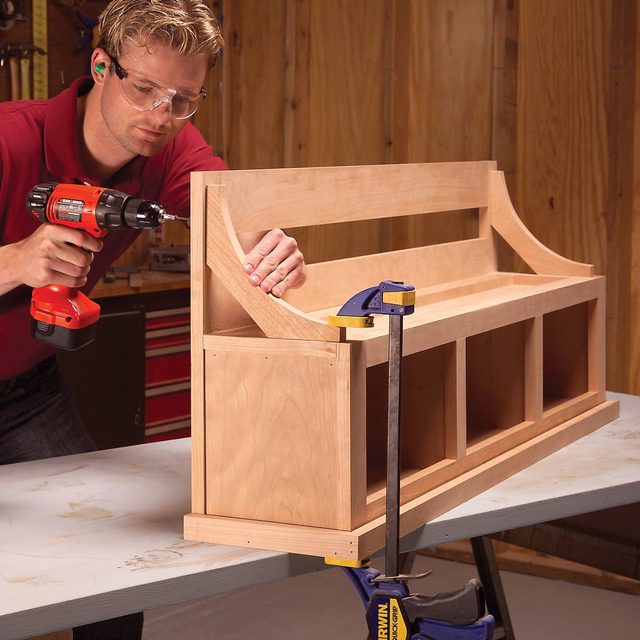
Attach the Arcs
- Glue, position and clamp the upper end of each bracket.
- Fasten the other end with screws driven from behind.
- Pro tip: Predrill so you don’t split the bracket.
A Fast Finish
-
- Note: Since you sanded all the parts before assembly, you won’t have much prep work before finishing.
- Fill the nail holes with putty and inspect all the glued joints for glue smudges.
- If you used cherry wood, apply a clear finish only.
- Pro tip: With the bench and shelf’s corners and cramped spaces, brushing a finish on them would be a nightmare. Choose a spray-on lacquer finish. Lacquer is one of the fastest, easiest finishes to apply.
- Wear an organic vapor respirator mask and spray the lacquer outdoors or in the garage with the door open.
- Spray on two very light coats, wait 30 minutes and lightly sand with 220-grit paper.
- Vacuum off the sanding residue and apply two or more light coats until you get the look you want.
- Note: There’s no need to sand between coats unless specks of dust settle on the finish.
- Let the finish harden overnight before you add the coat hooks and hang the shelf.
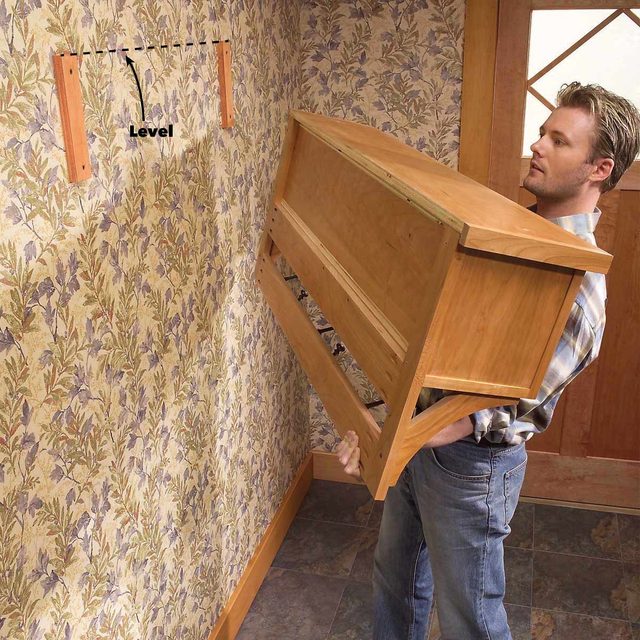
Attach the Shelf to the Wall
- Level and screw 2-in. x 8-in. cleats to wall studs.
- Set the shelf on the cleats and screw through the back of the shelf into the cleats using 1-1/2-in. brass screws and finish washers.