
How to Build Your Own Drawer Slides
 Updated: Feb. 13, 2023
Make your own drawer slides for your next cabinetry project with these easy step-by-step plans.
A few hours
Beginner
$10 - $60
Introduction
DIY drawer slides are easy to make. Some may find it daunting to accurately mill moving parts, but it's all about not making them too precise. Really. It's ideal to have a little bit of play, but not too much. Handmade drawer slides add a stylish, cohesive feel to furniture and cabinetry. And your project's hardwood drops will most likely provide the material required. With these instructions, you'll have smoothly gliding drawers in no time.Tools Required
- 10° Dovetail router bit
- Countersink drill bit
- Drill bit set
- Drill/driver
- Dust mask
- Paraffin wax
- Router table
- Safety glasses
- Sandpaper
- Tape measure
- Wood finish of your choice
Materials Required
- Scrap Hardwood or UMHW
Project step-by-step (6)
Cut Parts
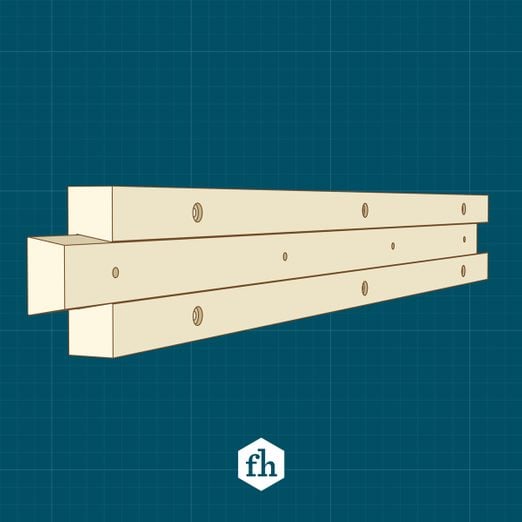
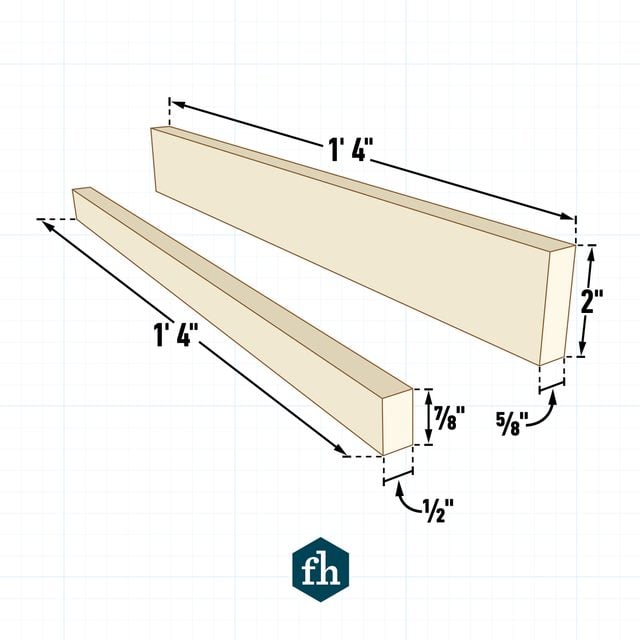
Select straight-grained, clear lumber and mill your parts to size. You’ll need to mill two sets of slides for each drawer box in your project. For sturdy slides, I tend to use maple or ultra-high molecular weight polyethylene (UMHW).
Use whatever tools you have available to ensure these boards are as flat and straight as possible. A planer, jointer or hand plane all work. In most cases, rout the drawer box sides directly with the mount groove instead of having a separate mount piece.
A two-piece slide and mount can be incredibly useful in lots of situations, like building framed cabinetry. In the following drawings, I selected a length of 16 inches. Determined your length by the depth of your drawer box.
Rout the Mounts/Drawer Box Sides
This is the most challenging part of the project. It will require you to adjust the fence with each pass you make at the router table. It takes me three passes, minimum, to complete the process, especially if the material is maple or UMHW.
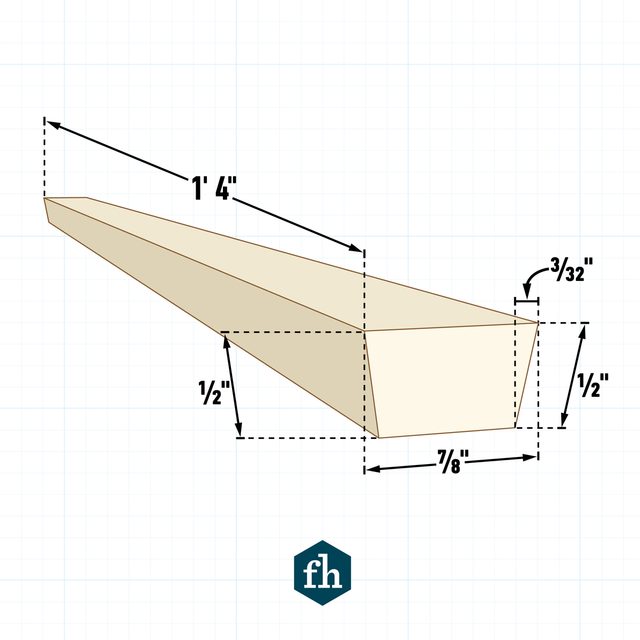
Mark the 10-degree bevel locations on your workpiece and begin your first pass with a dovetail bit set approximately 3/16-in. high. When you’ve completed the first pass, turn the board around and run the opposite edge.
Repeat the process on the second mount/drawer side. Raise the router bit another 3/16-in. and adjust the fence back to the 10 degree bevel line marked on your workpiece. Again run both edges of the workpieces. For the final pass, set the height of the dovetail bit to 1/2-inch. Err on the side of under the 1/2-in. depth rather than over it.
After running both edges of both pieces, you’re ready to move on.

Rout the Slides
Set the height of the dovetail bit on your router table to 1/2-in. so the entire carbide cutter will cut the slide. No depth adjustment is required for this step, just a fence adjustment if you like, though this is easily done in a single pass.
After you’ve set your bit height and fence, run both edges of the two slide pieces. Aim to get the slide and mount to fit snugly together. Note: You could also use a table saw to complete this step.
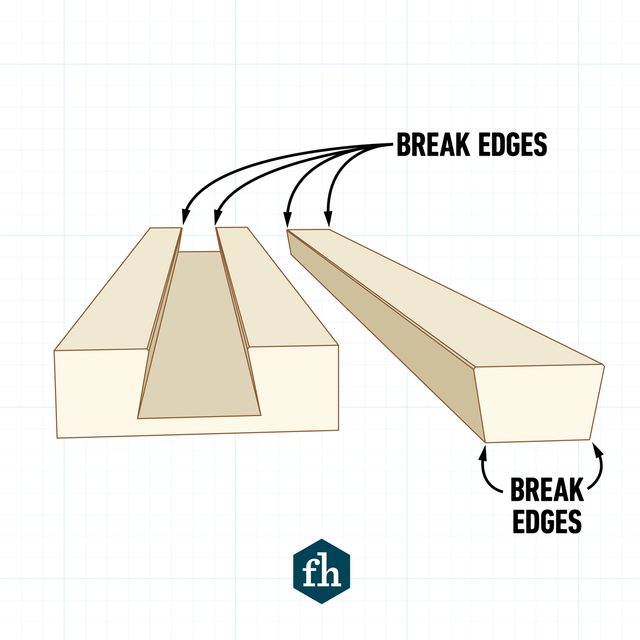
Sand and Break the Edges
To get the drawer slides to slide smoothly, break all four edges of the slide and the top two mounts. Next, sand the entire mount, including the groove on the inside. Generally, I sand these with 120-grit paper, followed by 180- or 220-grit paper. The objective is to achieve a smooth glide, not a flawless finish.
Check the slide with its matching mount often until you’ve found the optimal glide. After sanding, blow off or vacuum all four pieces thoroughly to remove the dust.
Drill and Countersink Mounting Holes
I mount these with #8 screws, which require a pilot hole 7/64-in. or 1/8-in. in diameter. Countersink the holes so the screw head lies 1/32-in. below the surface. Besides ensuring the screws don’t drag along the inside of the slide, a below-the-surface countersink will also reduce surface drag, thus ensuring smoother operation.

Finishing Touches
The slides are now complete. Their movements are smooth and free. There’s no harm in a little bit of play here. Finish them with whatever wood finish you prefer, bring careful not to apply so much that it interferes with functionality.
Before attaching the drawer slide, mark the line in the mounting location to ensure the small slide piece remained straight throughout the milling/finishing process. If it’s moved, you can adjust it as you drive the four screws. After you’ve installed the slide and mount, lubricate the slides by applying paraffin wax to their contact surfaces.
You’re done! Enjoy your newly usable drawer.
