
How to Build a Mid-Century Modern Storage Bench
 Updated: Mar. 03, 2023
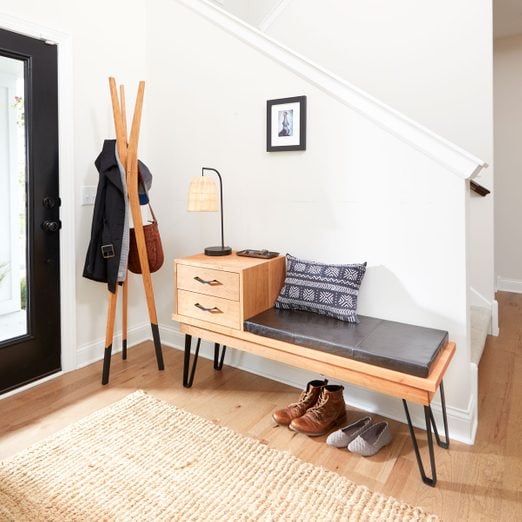
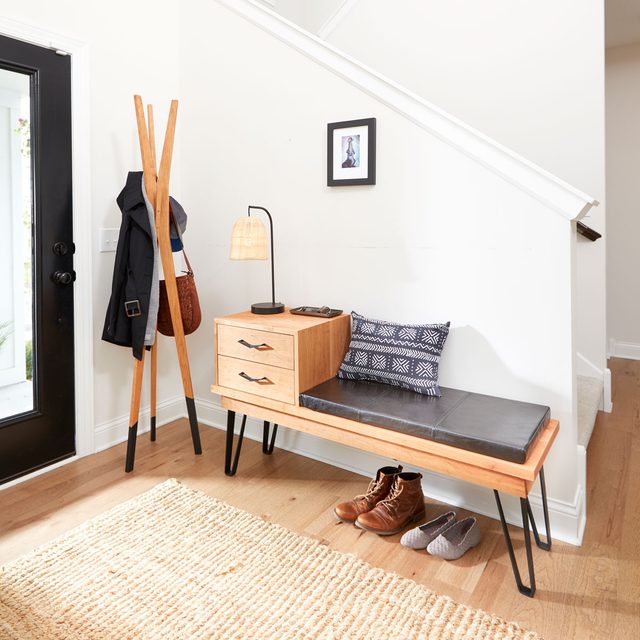
Embrace Mid-Century Modern style with this fully-functional storage bench. This project was part of a larger entryway makeover project consisting of a Mid-Century Modern coat rack and shelf.
Our editors and experts handpick every product we feature. We may earn a commission from your purchases.
Three Days
Intermediate
$251-500
Introduction
This project is a functional take on popular Mid-Century Modern furniture.Tools Required
- Basic carpentry tools
- Cordless drill
- Dowel jig
- Miter saw
- palm sander
- Pocket hole jig
- Table saw
Materials Required
- 1-1/4" pocket screws
- 1" pocket screws
- 1/4" plywood drawer bottom
- 4" drawer stock
- 4/4 cherry
- 6/4 cherry
- Bench seat
- dovetail drawer slides
- steel bench legs
The Entry Bench:
Overall dimensions: 55-in. wide x 17-in. deep x 29-1/2-in. high.
Project step-by-step (13)
Step 1
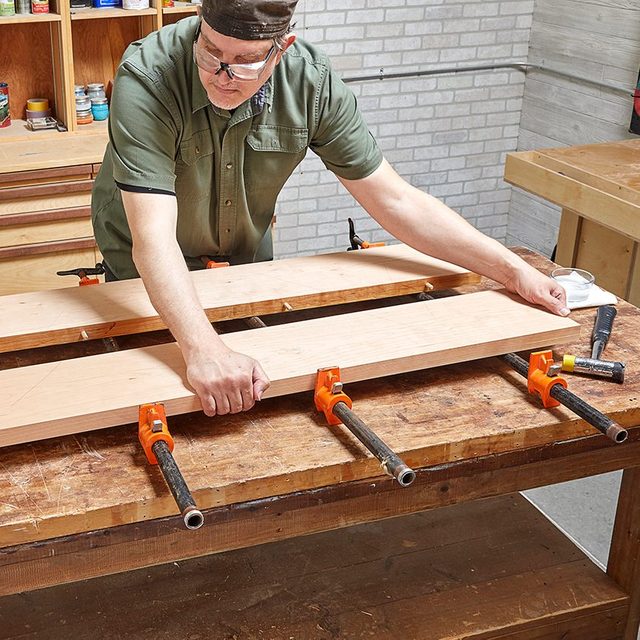
Make The Bench Top
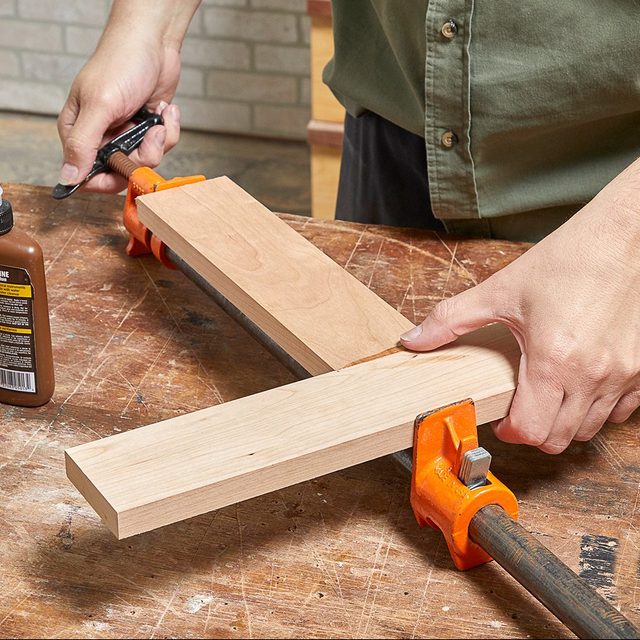
- The bench seat is made of 6/4 cherry.
- Glue the two halves of the bench seat together using hide glue. I used a few dowels to help keep the two halves aligned during glue-up.
- After the glue dries, sand the joint smooth and finish the bench seat before moving on to the next steps.
- I used General Finishes Satin Gel Topcoat. This along with the natural characteristic of cherry will create a beautiful, deep patina in a few years.
Step 2
Attach The Legs
- I found steel legs in the style I was after at tablelegs.com, so I decided to save time and buy.
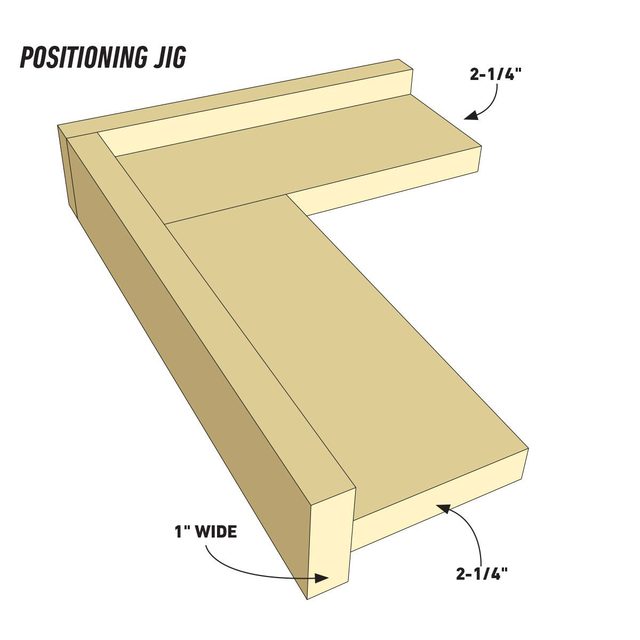
- Screw the legs to the bottom side of the bench with 1-in. washer-head screws.
- Pro tip: I made a positioning jig out of scrap 1/2-in. plywood. This easy-to-make jig will ensure precise spacing and alignment of all four legs.

Step 3
Cut Skirts To Size And Attach
- Use a bevel gauge to determine the angle of the leg, then transfer that to your table saw blade.
- Cut that bevel on one edge of a little more than two feet of the skirt material. With the legs attached, mark the two end pieces against the legs and cut them to length.
- Once those have been screwed into place, set the longer skirt pieces up against them and mark for cuts.
- Cut them on the miter saw and attach them with pocket screws.

Step 4
Make The Drawer Case
- The cabinet case will be made from solid 4/4 cherry and feature mitered corners. Make the 45-degree cuts using a table saw.
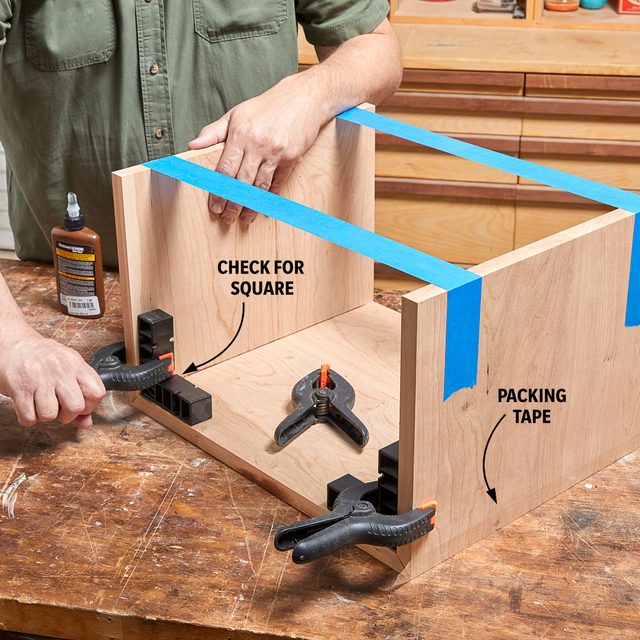
- To glue these parts together, lay them flat with the insides facing down and tape the edges together. Burnish the tape with a piece of wood.
- Flip everything over. Apply glue to the joint and tape the two sides together, keeping them square.
- Pro tip: Drill your pocket holes before glue-up. As you can see in the photo, I forgot to do this…
- Apply a coat of finish to this part now.
Step 5
Fit The Drawer Case Back
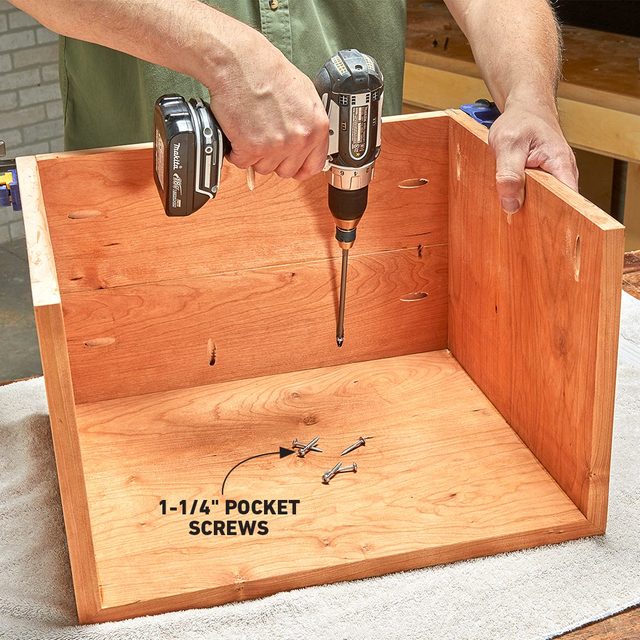
- Once the drawer case is glued together, take an exact measurement and cut the back to fit.
- Use a few clamps to hold it in place and secure it with 1-1/4-in. pocket screws.
Step 6
Attach The Case to the Bench Top
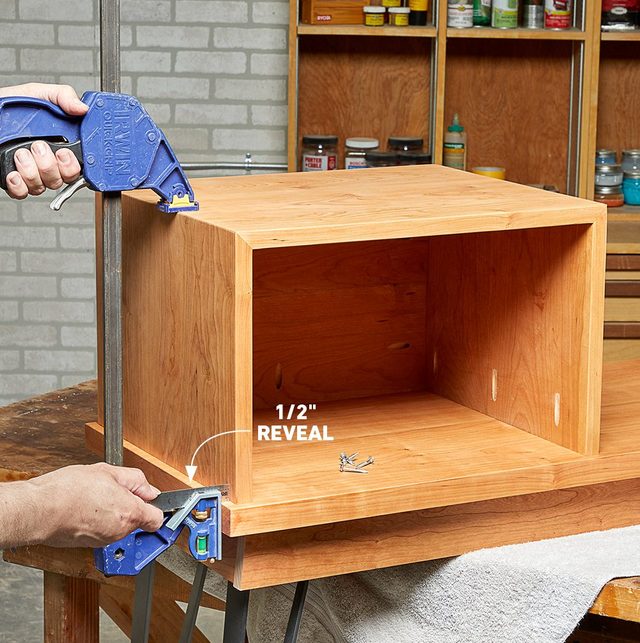
- The drawer case should be offset 1/2-in. from the side and front of the bench. Use a clamp to help keep it in place while you drive the screws in.
- Start with the outer side first, attaching it to the bench top with 1-1/4-in. pocket screws.
- Double-check for square and then repeat that process for the inner side.
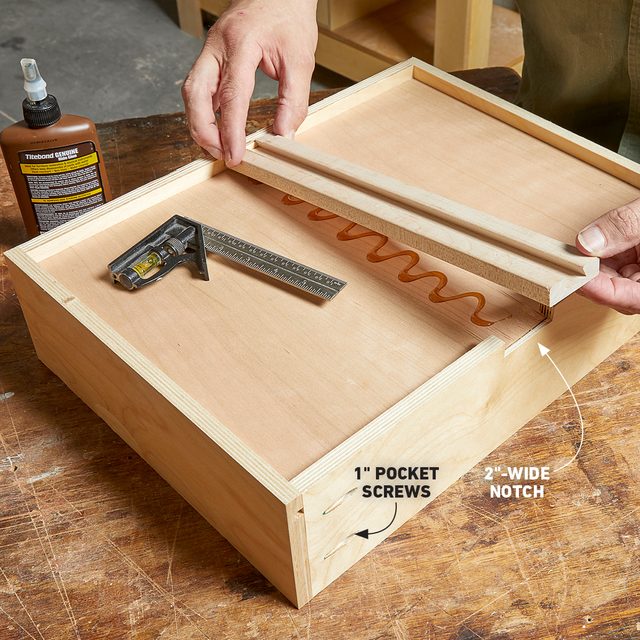
Step 7
Assemble the Cross Member
- Assemble the cross member with a little glue. Then screw the dovetail drawer slide to the top side, perfectly centered.
- Pro tip: I cut the cross member parts a little oversize, then cut them to fit once the case was assembled and installed.
Step 8
Complete The Case
- Install the lower dovetail drawer slide for the lower drawer.
- Cut the cross member to fit and attach it with 1-1/4-in. pocket screws. I used a 5-5/16-in. spacer block to help me position it perfectly.

Step 9
Make The Drawers
- Cut the drawer stock to length and cut the bottom from 1/4-in. plywood. I used cherry veneer plywood to match the bench.
- Assemble the drawers using 1-in. pocket screws.
- Notch a space in the drawer back for the center-mounted drawer slide. Using a small square, make sure the slide is square to the box, then glue it in place.
- Pro tip: Premade drawer stock saves a lot of time — it’s preslotted for the drawer bottom and comes prefinished. Woodcraft sells 60-in. lengths for $16.
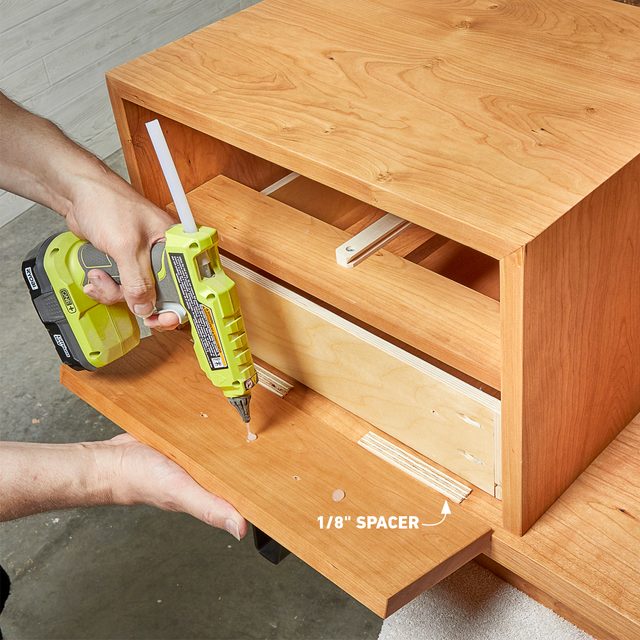
Step 10
Attach The Drawer Faces
- I used wood spacers to help me achieve a 1/8-in. reveal around the drawer faces.
- With the drawer box inserted, place a few dabs of hot melt adhesive on the back of the face, then press it against the drawer box.
- After the glue sets, secure the drawer face with 1-in. washer-head screws through the drawer box.
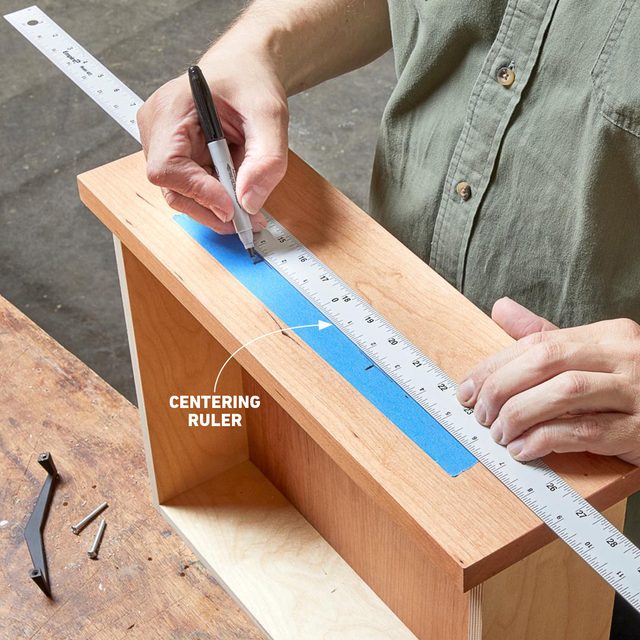
Step 11
Install the Drawer Pulls
- Center and mark the holes for the drawer-pull mounting screws on the drawer face.
- Using a 5/16-in. drill bit, drill completely through the drawer face and drawer box. Mount the drawer pulls with the supplied mounting screws.
- Pro tip: Make your marks on a piece of tape on the drawer face. Your marks will be easier to see, and you’ll protect the wood while it’s being drilled.
Step 12
Shopping For Materials
- The table legs shown are available at tablelegs.com (No. LC-IMTP-16-ST; $37 each). The faux leather seat cushion sells for $60 at wayfair.com. Made by Latitude Run in Espresso, it’s 34-in. x 16-in. x 2-in.
Step 13
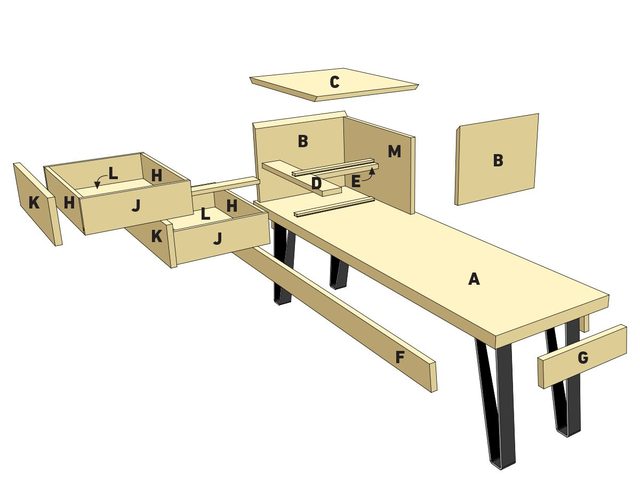
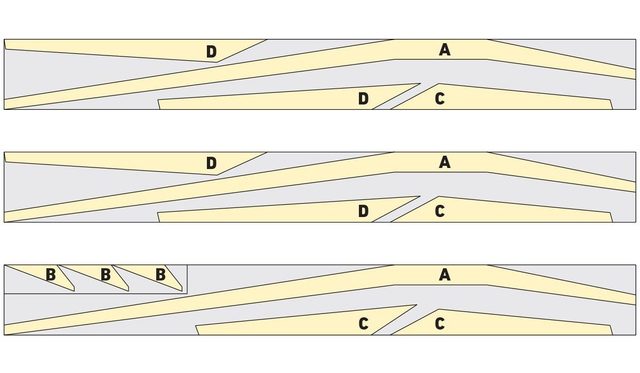
Cutting Diagrams and Templates
Overall dimensions of each board: 4/4 x 8-in. wide x 72-in. long.

Originally Published: November 10, 2021