Custom Picture Shelves
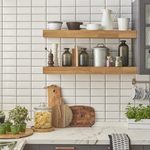
Updated: Jun. 21, 2019Picture shelves are the perfect marriage of beauty and function. They elegantly display your picture collections, large or small, and they're ultra easy to use.
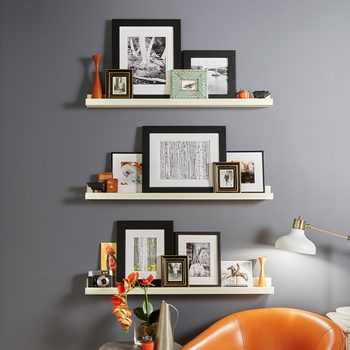
With these picture shelves, you don’t have to mess with positioning hooks. Your photos and artwork will never go crooked, and best of all, you can “redecorate” instantly just by swapping things around. There’s no need to patch holes every time you move your shelf pictures.
Just three parts, so they’re fast and easy to build
- Even a beginner can build these picture shelves—no experience needed.
- You can do it with basic tools. If you don’t have a brad nailer or miter saw, you can assemble the shelves using a hammer and nails, then cut them with a handsaw.
- Each shelf is made from just three parts. All you have to do is glue and tack them together.
Planning your shelves
Even though you’ll likely be swapping out and rearranging pictures down the road, it’s a good idea to lay out the initial arrangement of pictures on the floor. That way, you can sketch a plan for the length of your shelves and the spacing between them. The other advantage is that you’ll be able to assemble a materials list to take to the home center.
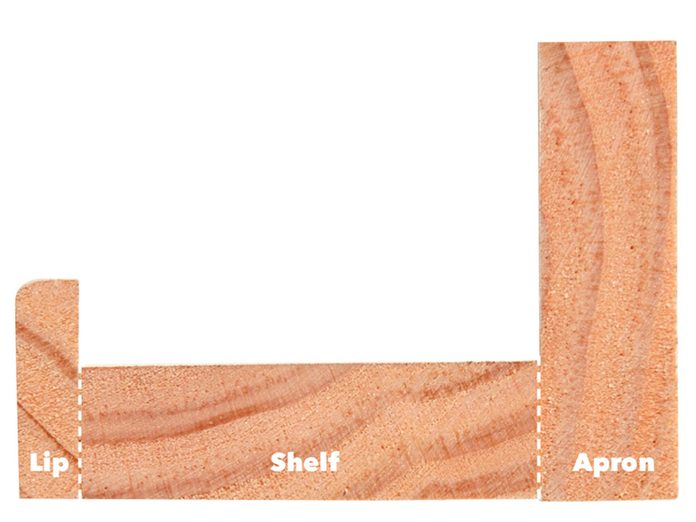
You can build your shelves any length you wish. It takes two 1x3s for every shelf, one for the apron (back) and one for the shelf. A 1-1/4 x 1/4-in. molding nailed to the front acts as a lip to hold picture frames in place.
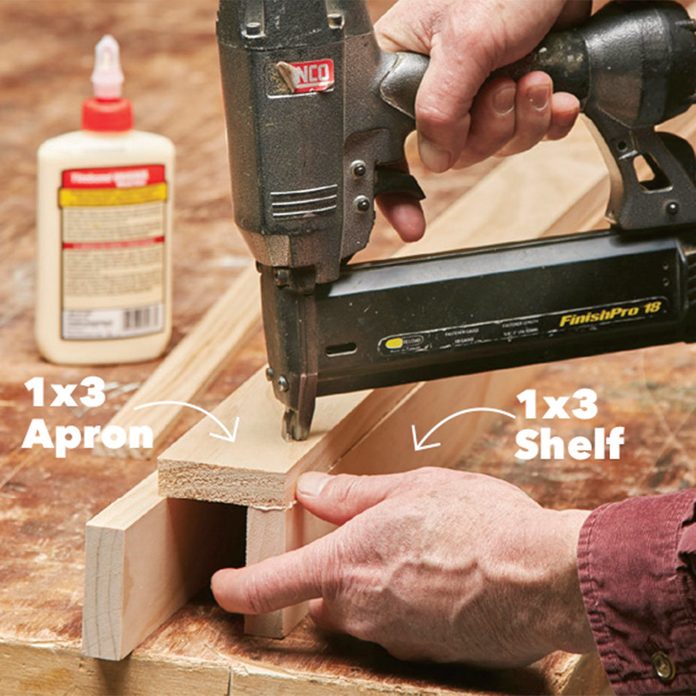
Glue and nail the 1×3 apron onto the 1×3 shelf with 2-in. brads.
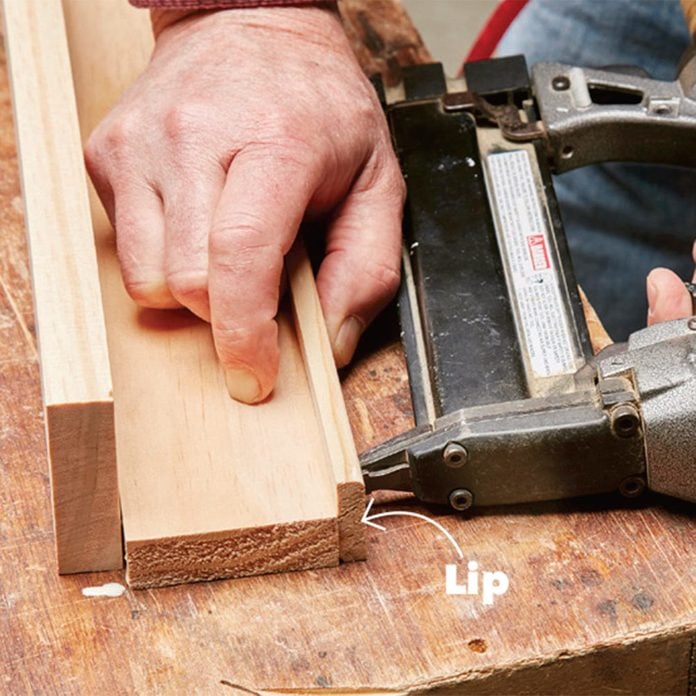
Add the lip: Use the benchtop to make the shelf and molding flush while you glue and nail them together with 1-in. brads.
We made our shelves from clear pine because we planned to paint them. If you prefer a natural wood look, oak is available at the home center along with the 1/4-in. matching molding. You can choose any wood you want if you’re capable of making your own molding.
Remember to get wood glue along with the nails. Finish washers are a simple, elegant way to dress up screw heads. They’ll largely be hidden behind the pictures, but you can paint them to help them blend in better if you wish. You’ll need 2-1/2-in. screws, about one for every 8 in. of shelf plus a package of screw-in. anchors that accept conventional threaded wood screws. (E-Z Ancor is one brand.) You can use other drywall anchors if you wish.
Assembly takes minutes
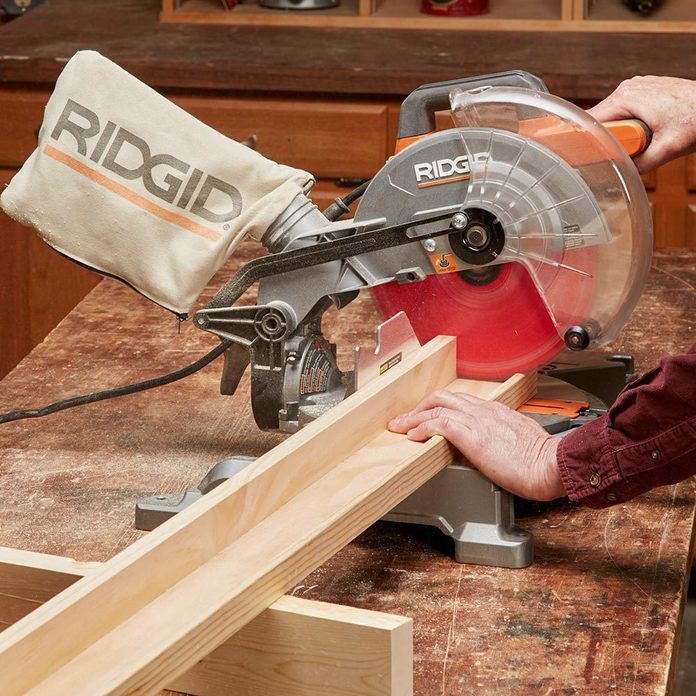
Cut to final length after the shelf has been assembled. Sand the freshly cut ends before painting.
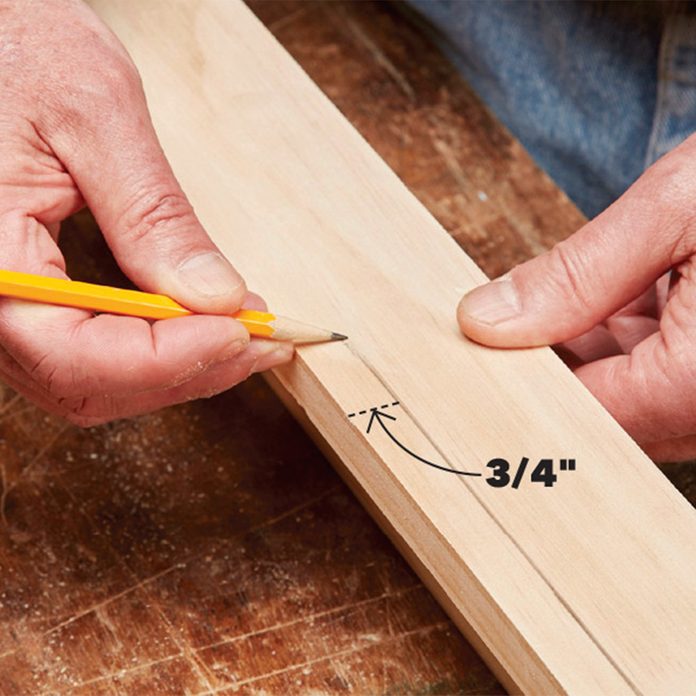
Scribe a line on the back of the apron 3/4 in. down from the top.
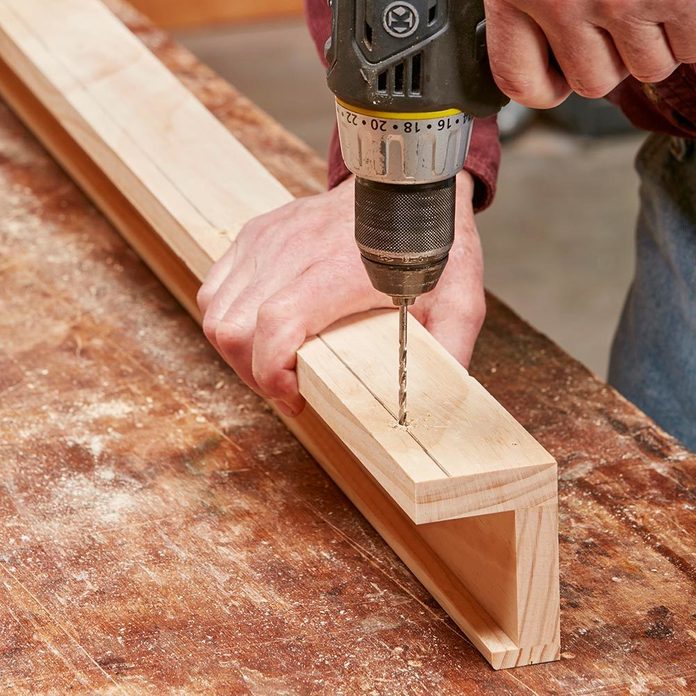
Mark for screw holes 2 to 3 in. from both ends. Then space holes evenly every 8 to 12 in. between them. Drill 1/8-in. holes.
You’ll glue the pieces together and then nail them with an 18-gauge brad nailer. Fasten the apron to the shelf with 2-in. brads, and secure the 1/4-in. molding to the front with 1-in. brads. If you don’t have an air nailer, you can certainly do it the old–fashioned way with finish nails and a hammer. It’s smart to assemble all three parts first and then cut the ends so they’re perfectly flush. If you don’t have a miter saw, make the cuts with a handsaw.
Finish after assembly
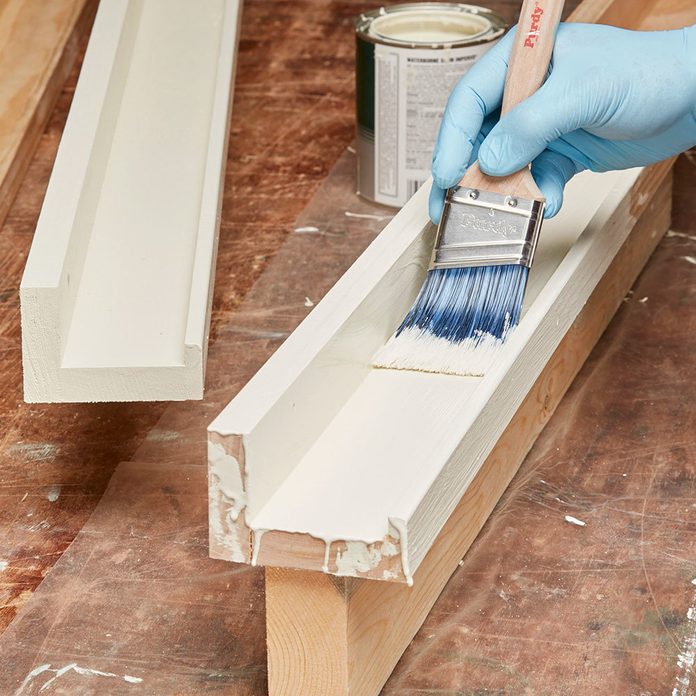
Fill the brad holes with filler, sand them flush, and prime and paint the shelves. (Or use a combination primer/paint product.)
Whether you paint or stain and varnish for a natural wood finish, do it after the shelves are built but before they get mounted on the wall. If you choose to paint, start with a coat of primer. The best topcoat to use is acrylic latex enamel. It’s easy to apply and is much tougher than ordinary latex paint, so it resists scratches and wear—and it’s easier to dust.
Hang the shelves

Stick a vertical strip of masking tape to the wall to position one end of the shelves. Mark the top of each shelf on the tape, and use those marks to draw level lines on the wall for each shelf.
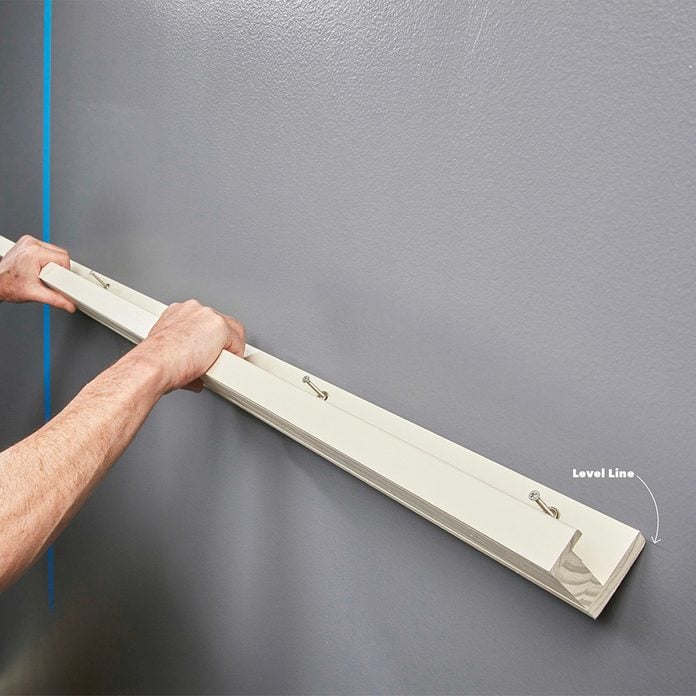
Start screws so the tips project through the back of the apron about 1/4 in. Hold the top of the apron even with the level line and push the screw tips into the drywall to mark the wall for anchors. (Have a buddy help with longer shelves.)
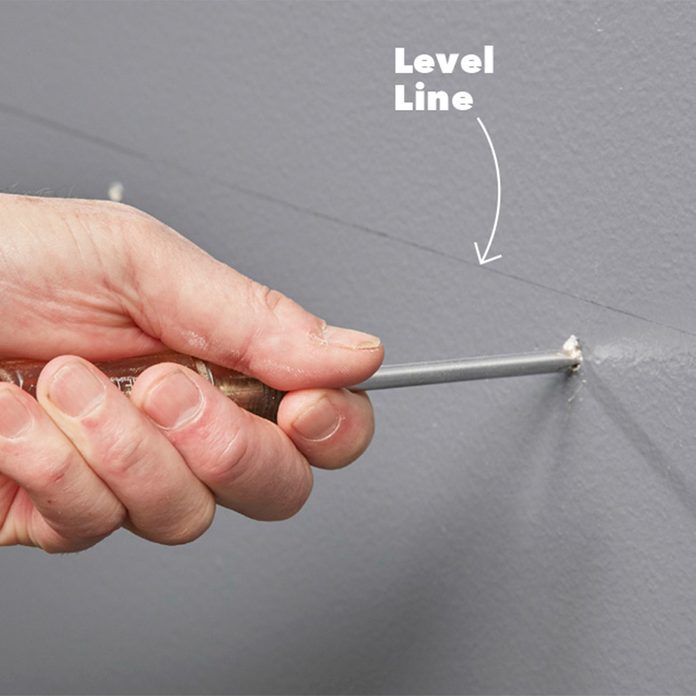
Twist and drive a Phillips screwdriver through the marks. Draw a circle around any holes that have studs behind them.

Screw a drywall anchor into each hole except the ones over studs.
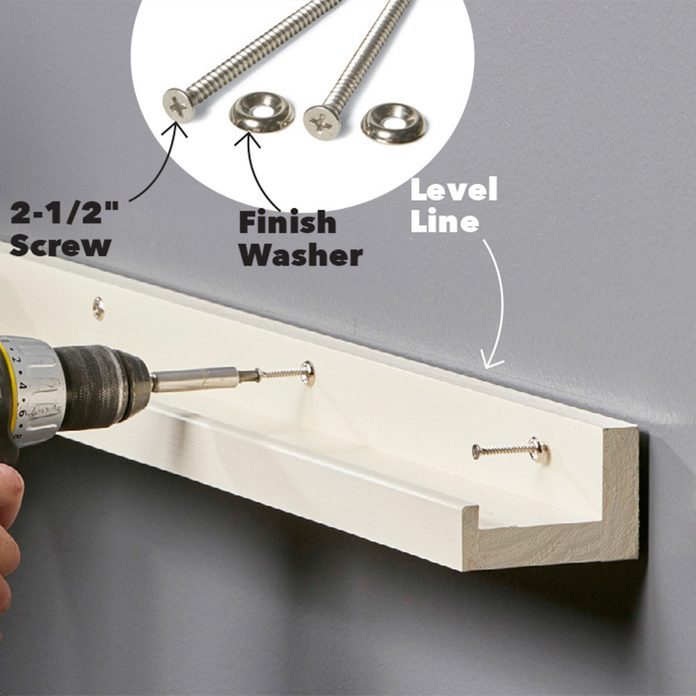
Screw each shelf to the anchors or into the studs.
Use screws with finish washers along with drywall anchors to hang the shelves—no glue. That way if you want to remove them later for repainting, you won’t have to patch the walls. The screws will be mostly hidden by pictures, but if you want, you can paint them after installation. Some screws will fall over studs. You’ll find them when you drill pilot holes with a Phillips screwdriver. You can skip the anchors and drive those screws directly into the wood. That’s it! Your only remaining step is the find perfect shelf pictures!
Here are some other shelf building projects you might like: Simple Box Shelves, Stackable Shelves, How to Make Your Own Built-In Shelves