
How to Change a Showerhead in 3 Easy Steps
 Updated: Dec. 08, 2022
Replacing your showerhead is as simple as one, two, three.
Our editors and experts handpick every product we feature. We may earn a commission from your purchases.

A few minutes
Beginner
$20-50
Introduction
If you’re looking to replace your showerhead, don’t call a plumber. It’s easy to DIY.Tools Required
- Slip joint pliers
Materials Required
- New shower head
- Teflon plumber's tape
Project step-by-step (3)
Step 1
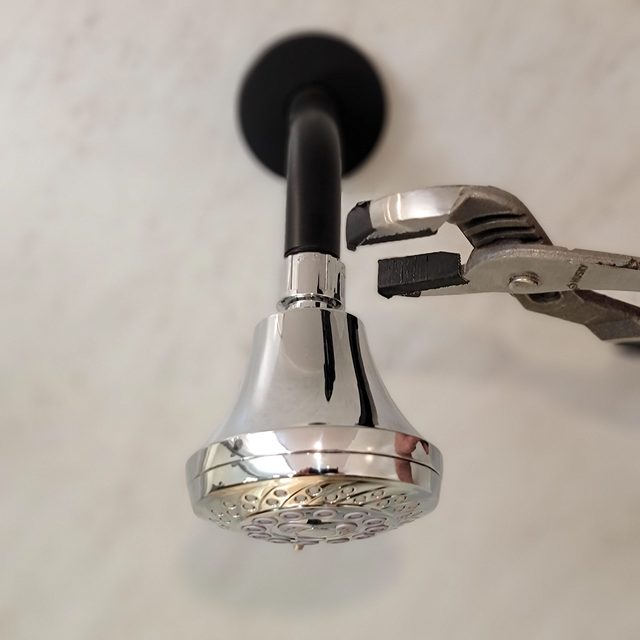
Remove the Old Showerhead
- Using a pair of plumbing pliers, remove your old showerhead by turning counterclockwise (to the left) on the coupling that connects the showerhead to the shower arm. (See photo.)
- Pro tip: Prevent scratching your new showerhead by covering the jaws of your pliers with tape.
By the way, here’s how to clean a shower head without removing it.
Step 2
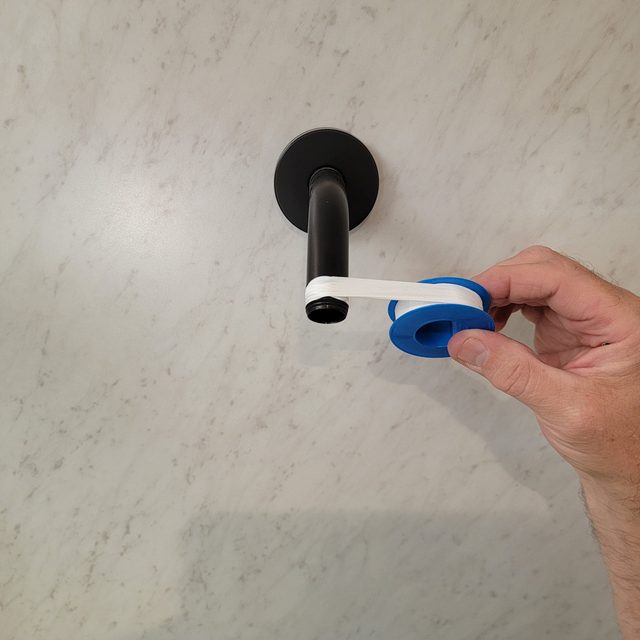
Apply Plumber’s Tape
- Wrap the threads of the shower arm with a few rotations of plumber’s tape. (See photo.)
- Note: Some showerheads don’t require plumber’s tape. Check with the manufacturer specifications.
Step 3
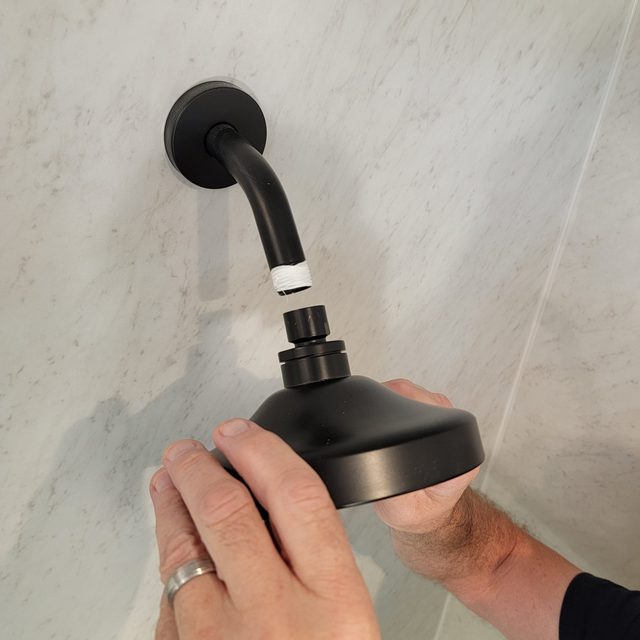
Install the New Showerhead
- Fit the female coupling of the new showerhead onto the threads of the shower arm, then hand-tighten, turning it clockwise (to the right).
- Tighten the showerhead coupling another quarter-turn using a pair of plumbing pliers. (See photo.)
- Turn on the shower and check for leaks.
Originally Published: September 29, 2021