How to Refinish Hardwood Floors
 Updated: Mar. 16, 2021
Revive a wood floor—without sanding and staining. Refinishing hardwood floors will be easy for you with this guide!
Multiple Days
Beginner
Varies
Introduction
Renew a wood floor in half the time and at half the expense of sanding and staining. The secret is to screen the old finish.Tools Required
- Bucket
- Dust mask
- Knee pads
- Paintbrush
- Putty knife
- Rags
- Roller tray
- Shop vacuum
Materials Required
- Liquid floor cleaner
- Mineral spirits
- Painter's tape
- Polyurethane floor finish
- Sanding screen (for drywall)
- Synthetic steel wool pads
When a wood floor loses its luster, the usual solution is to sand it down to raw wood and completely refinish it. But often, that’s the wrong solution. Refinishing hardwood floors is the right solution.
All wood floors are protected by a clear coating that eventually becomes scratched, scuffed and dull. Hardwood floor refinishing can help you get rid of those unsightly scratches and marks. But as long as the damage is shallow—in the coating and not in the wood itself—you can renew the hardwood floor by adding a new coat of polyurethane right over the old finish.
This how-to refinish wood floors article will show you how to do just that. As with any wood floor refinishing project, 90 percent of this job is preparation. You have to thoroughly clean the floor, touch up any deep scratches and roughen the existing finish with sanding screens so the new finish will adhere well. Expect to spend at least one full day on this prep work for refinishing hardwood floors. The recoating itself usually takes less than an hour.
Recoating takes a lot less time, skill and money than full-scale sanding and refinishing. And although roughing up the existing finish creates plenty of dust, it’s still much less messy than sanding down to bare wood. There’s another advantage you need to know when learning how to sand hardwood floors: Every time you sand a floor down to bare wood, you remove some of the wood. A solid wood floor can be sanded several times before that’s a problem. But laminated floors (glue-down or floating floors) have only a thin layer of good-looking wood veneer over a plywood-like base. The veneer can be sanded once or twice—after that, sanding will expose the plywood core beneath.
Project step-by-step (9)
Prepare Test Areas
- Pick two test areas on the floor: one in a high-traffic zone, the other along a wall or in a closet.
- Clean each area with a wood floor cleaner and roughen a 6 x 6-inch area with a sanding screen.
- Wipe away the sanding residue.
- Mask around the test area.
- Apply a coat of polyurethane in the masked area.

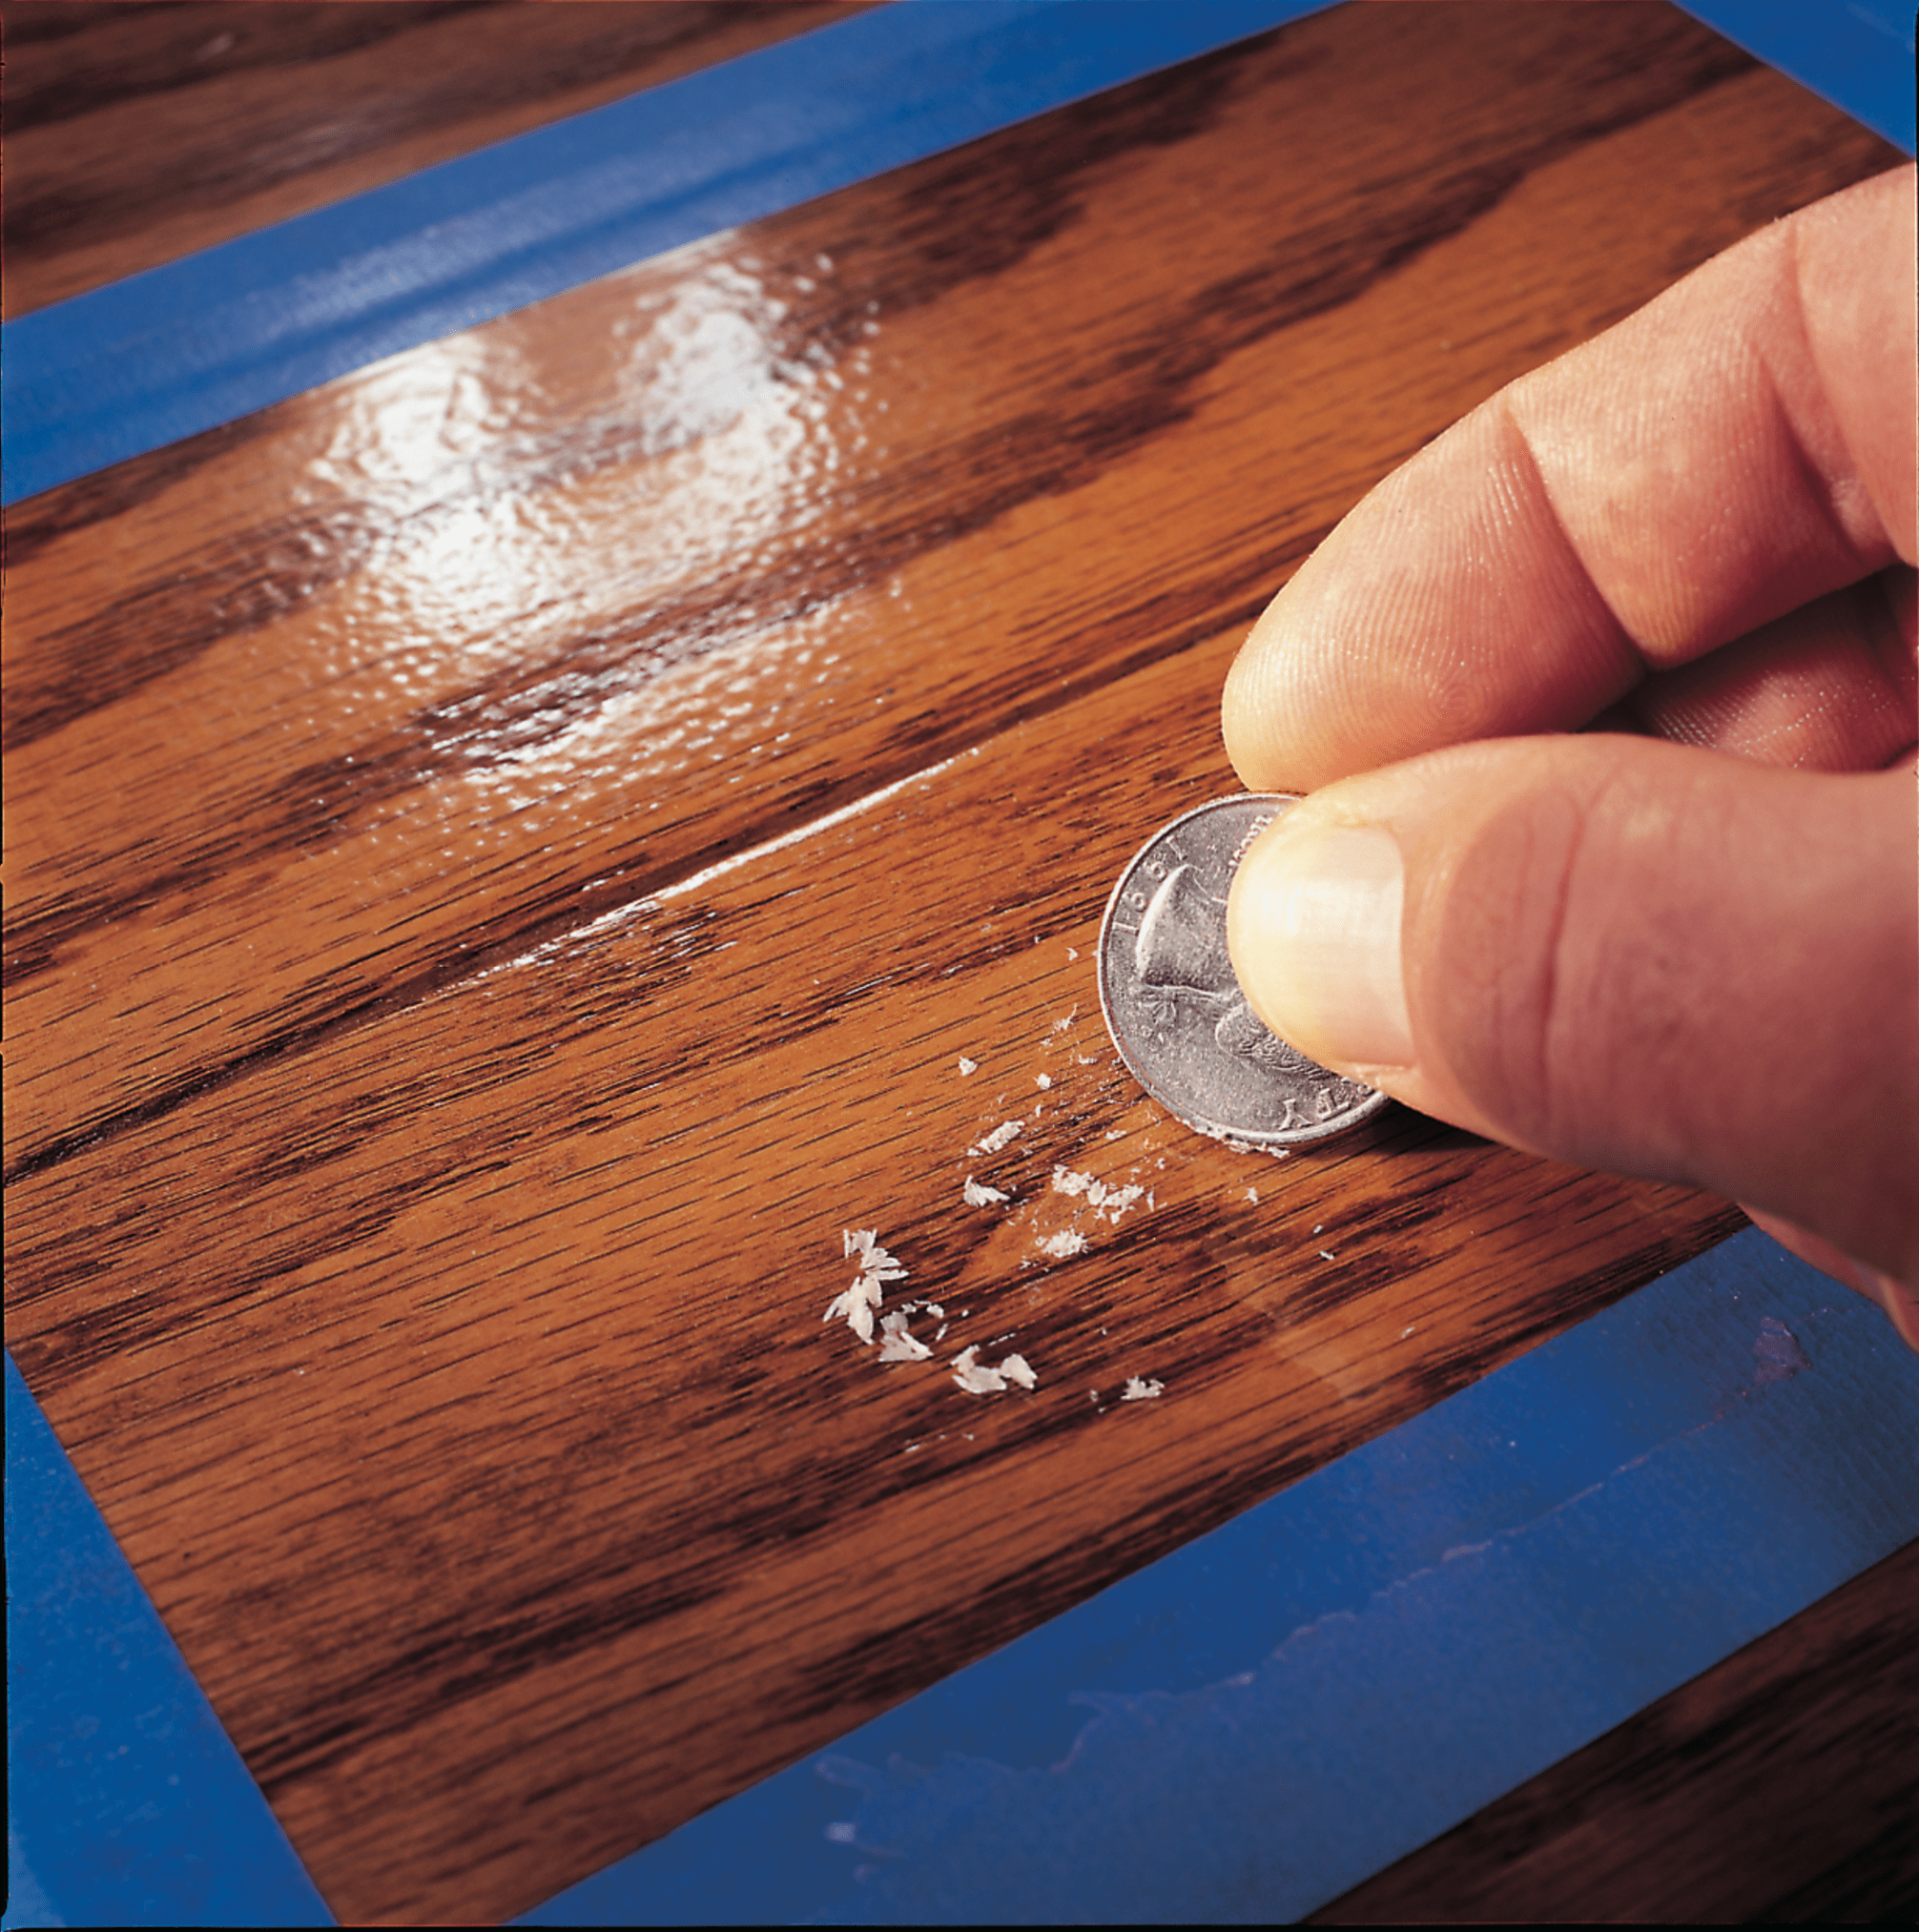
Check for Adhesion
- After the polyurethane has dried 24 hours, scrape a coin across the test areas.
- Note: If no residue scrapes up, you can refinish with screening instead of sanding. If the finish flakes easily, is cracked or has an orange-peel look, you’ll need to sand before refinishing hardwood floors.

Clean the Floor
- Scrape away any hardened-on dirt with a dull putty knife.
- Use a scouring pad dampened with mineral spirits for tough areas. If that fails, try a sanding screen.
- Pro tip: As you clean, use pieces of masking tape to mark any deep scratches, ridges or areas where the finish has worn away. You’ll have to give these trouble spots special attention (see “Problems Areas” below).
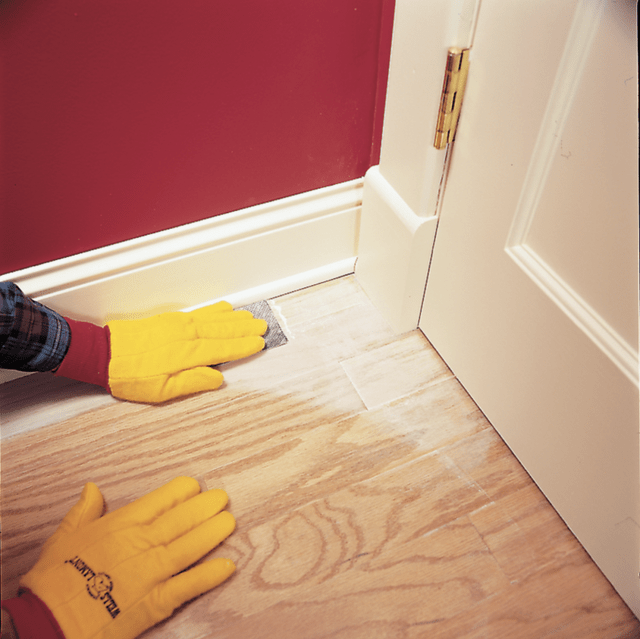
Roughen Corners by Hand
- Roughen the existing finish along walls and in corners where the buffer won’t reach.
- Note: The purpose is only to scratch up the finish, not to wear it down—or worse, sand right through it. Three or four passes with the sanding screen are usually enough. Wear gloves to protect your hands from the abrasive screen.
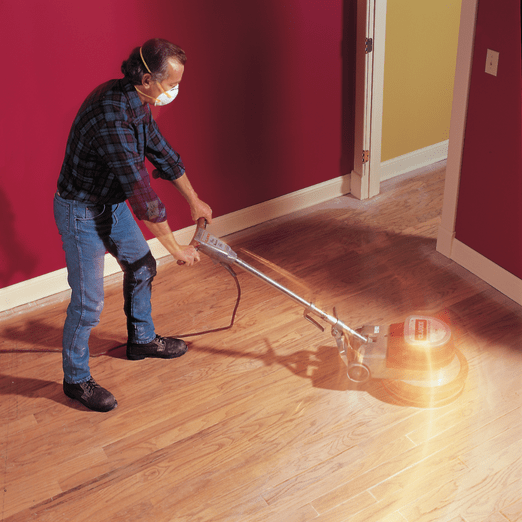
Set Up the Buffer
- Set the buffer over the sanding screen.
- Note: The screen isn’t attached to the buffer at all, but stays put under the weight of the machine.
- Lock the buffer’s adjustable handle in place before you begin buffing.
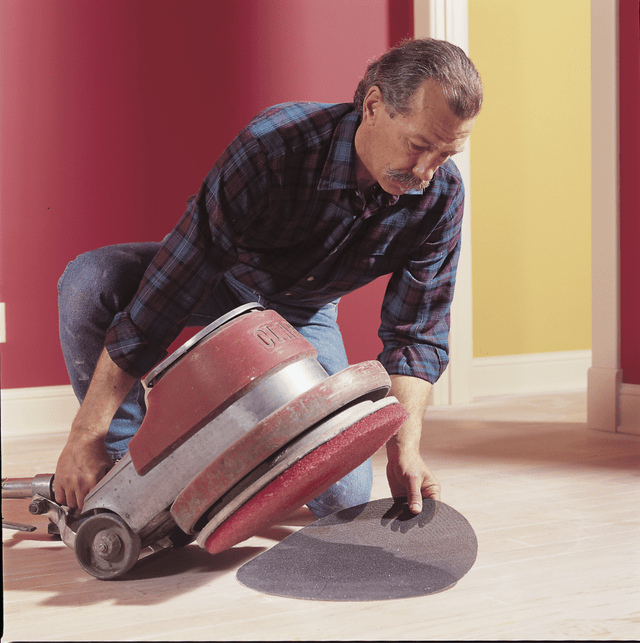
Buff the Floor
- Buff the floor starting at one wall and moving backward across the room.
- Pro tip: Slowly swing the buffer left and right as you go. Pass over each area only once or twice so you don’t cut through the finish. To make the buffer swing to your right, gently lift the handle. Make it swing left, by lowering the handle.
- To control dust, place fans in open windows, close ducts, seal off the work area and wear a dust mask.
- Check the screen for grit every few minutes and wipe away any large particles that might scratch the floor.
- Pro tip: The screen will wear out after 10 to 15 minutes of use. When it does, flip it over or start with a new screen.
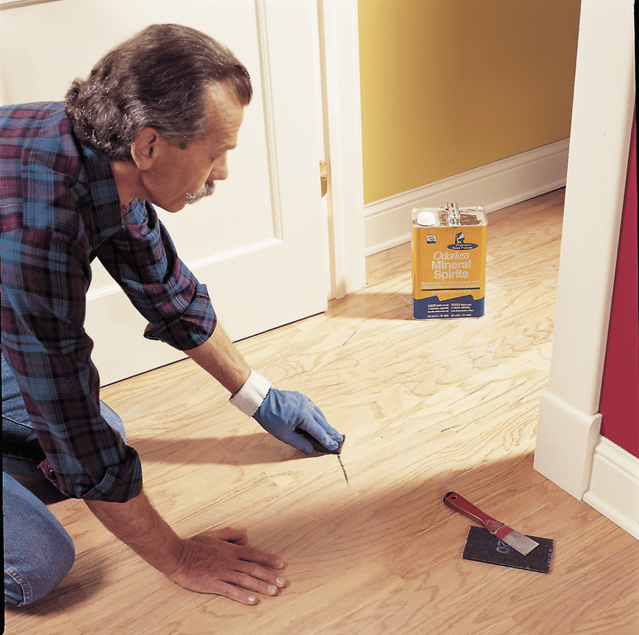
Tips for Problem Areas
As you clean and buff the floor, you may find deep scratches that go through the finish and into the wood. You usually can’t make these scratches disappear completely, but you can make them a lot less noticeable. If your floor is as light or lighter than the floor shown here, first wet the scratch with mineral spirits. A wet coat of mineral spirits produces approximately the same look as a coat of polyurethane. And on a light-colored floor, it might darken the scratch just enough to
hide it.
If that doesn’t work, apply some wood stain to the scratch using a cotton swab. Because the scratch is rough and porous, it will absorb a lot of stain. So begin experimenting with a stain that’s much lighter than the tone of your floor and wipe away the excess stain right after you apply it. For best results, use two stain colors to match the light and dark patterns in the wood grain (Photo 7).

If your floor has a high-traffic area where the clear finish is completely worn away, wet the area with mineral spirits to see what it will look like with a coat of polyurethane. If it looks good, clean the area thoroughly, apply a coat of polyurethane and give it at least two days to cure. Then you can buff and recoat the new polyurethane along with the rest of the floor.
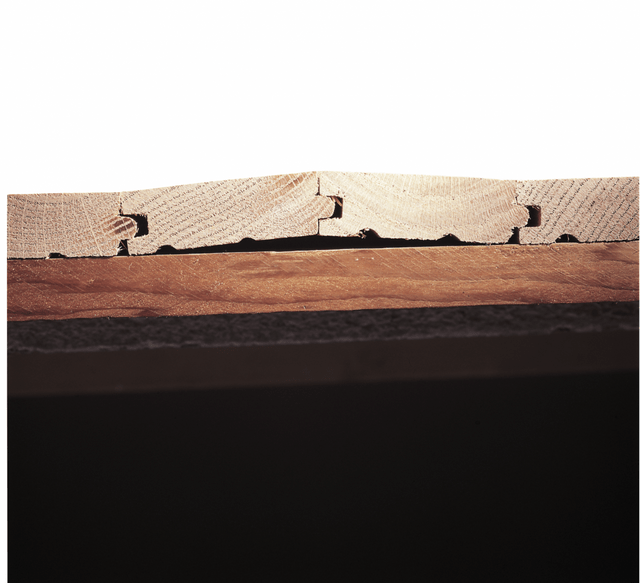
Look out for ridges. The buffer will eat right through the finish down to bare wood at high spots. And if your floor is colored with wood stain, you’ll be left with light-colored strips where the stain has been rubbed off. Photo 8 shows how a solid-wood floor can buckle in high humidity. But smaller ridges, where the wood strips cup slightly or one plank sits a bit higher than the next, can cause just as much trouble.
If you can flatten a ridge by standing on it, fasten it down with a finishing nail or two. If you can’t flatten the ridge, you’ll have to roughen the area by hand using a sanding screen. And remember to avoid that area with the buffer.
Stains that have penetrated through the finish as well as the wood can only be removed by sanding. But there’s no harm in recoating over them—if you can live with them
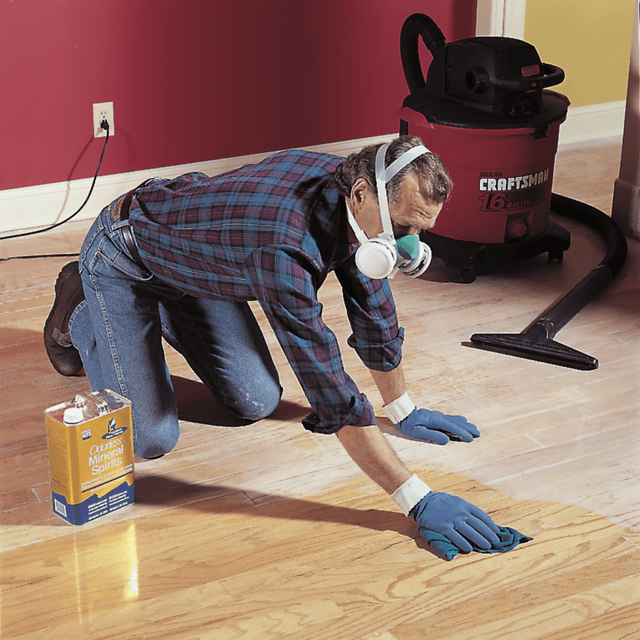
Clean Up the Sawdust
- Clean windowsills, moldings and any other surface where dust might gather.
- Vacuum the floor thoroughly.
- Wipe the floor with mineral spirits to remove all the sanding dust.
- Pro tip: Apply mineral spirits with a lint-free cloth, and wear an organic vapor respirator to protect against fumes.
Choose a Finish
The best floor finish for a do-it-yourselfer is polyurethane. Other floor finishes are either less durable or much more difficult to work with. You’ll find two types of polyurethane at home centers:
The oil-based polyurethanes (or “oil-modified urethanes”) are easier to apply because they dry slowly, giving you more time to spread and smooth the finish. They have a yellowish hue and slowly darken with time, which may be good or bad for staining hardwood floors depending on the look you want as you’re refinishing hardwood floors. The big drawback to oil-based products is the nasty vapor they give off. You must open windows and wear a respirator.
Water-based polyurethanes (or “water-borne urethanes”) are generally a bit more durable than oil-based versions. They have a milky color when wet, but they dry crystal clear and remain clear. The milky color makes them easy to see, so you’re less likely to miss spots while refinishing hardwood floors. Still, water-based products are harder to apply because they dry fast.
NOTE: With either type of polyurethane, be sure it’s recommended for refinishing wood floors before you buy.
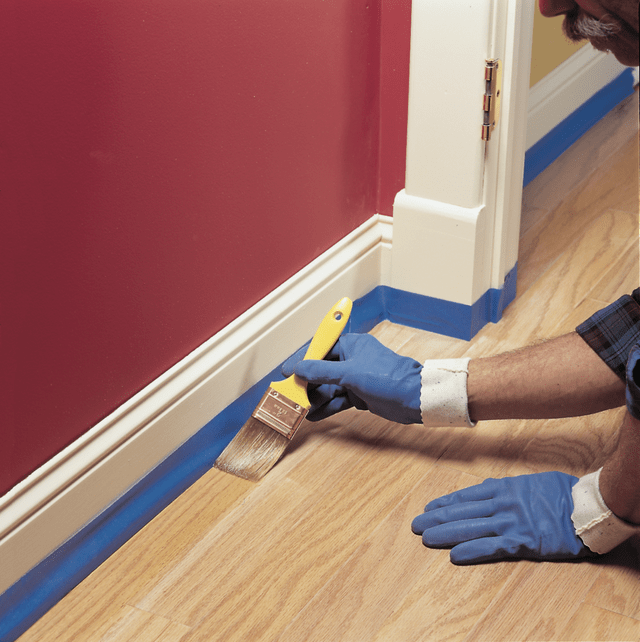
Start at the Walls
- Tape off the baseboards along the perimeter of the floor.
- With your chosen product, cut in along the first wall with a high-quality brush.
- Repeat along the entire perimeter.
- Pro tip: Use a natural bristle brush for oil-based urethane or a synthetic brush for water-based urethane.
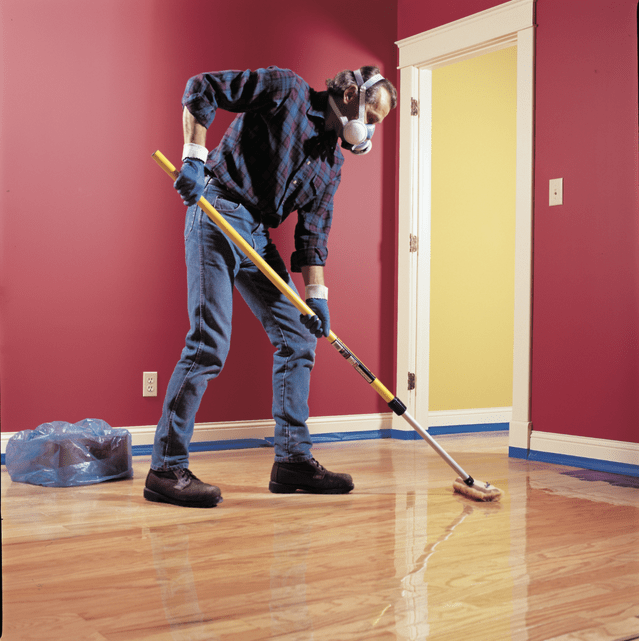
Use an Applicator Pad
- Apply polyurethane on large sections of the floor using an applicator pad attached to a long handle.
- Pro tip: When spreading the finish, you can dip the applicator into a paint tray filled with polyurethane, but a cardboard box lined with a plastic bag is less likely to tip over.
- To smooth the finish, “unload” the pad by pressing it hard against a dry part of the floor.
- Drag the applicator lightly across the floor from one end of the room to the other.