How to Make a DIY Napkin Holder
 Updated: Nov. 08, 2022
A half day
Beginner
$20
Introduction
Woodworkers quickly learn that the wood left over from other projects can become a spark of inspiration for a new creation. Here's how to craft napkin holders out of hardwood off-cuts.Tools Required
- Miter saw
- Table saw
Materials Required
- Hardwood off-cuts
- Painter's tape
- Wood glue
Are you a scrap saver? This napkin holder is the perfect project for all those small, beautiful hardwood off-cuts you haven’t had the heart to throw away.
This one is sized for 6-1/2-in. square napkins. You can easily scale it down for cocktail napkins if you like. It’ll take just a few hours to make one. Or you can spend a little more time and crank out a bunch of them for gifts.
Cutting List
Overall Dimensions: 6-in. H x 11-3/4-in. W x 2-1/2-in. D
| KEY | QTY. | DIMENSIONS | PART |
| A | 2 | 1/4″ x 2″ x 6-1/2″ | Bottom |
| B | 4 | 1/4″ x 1/2″ x 8-1/4″ | Legs |
| C | 2 | 1/4″ x 2-9/16″ x 5-1/8″ | Sides |
Project step-by-step (6)
Cut The Bottom Panels
Rip a piece long enough to cut both bottom panels. Cut the panels to length with opposing 45-degree angles on each end.

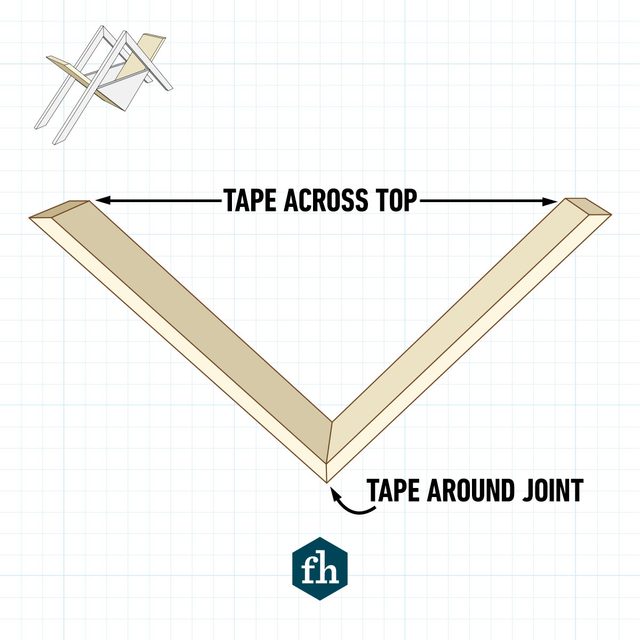
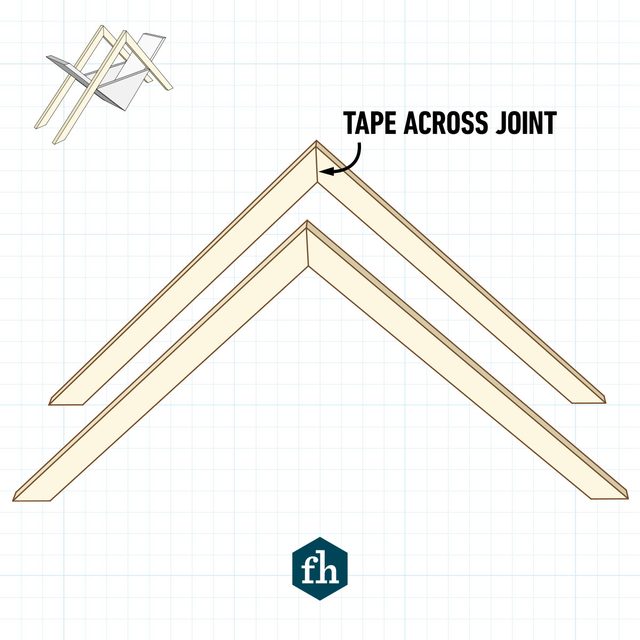
Assemble the Bottom
Lay the panels on a piece of painter’s tape with the long points touching. Apply wood glue to the mating ends, then fold them up. Stretch a piece of tape across the top to secure the joint as the glue dries.
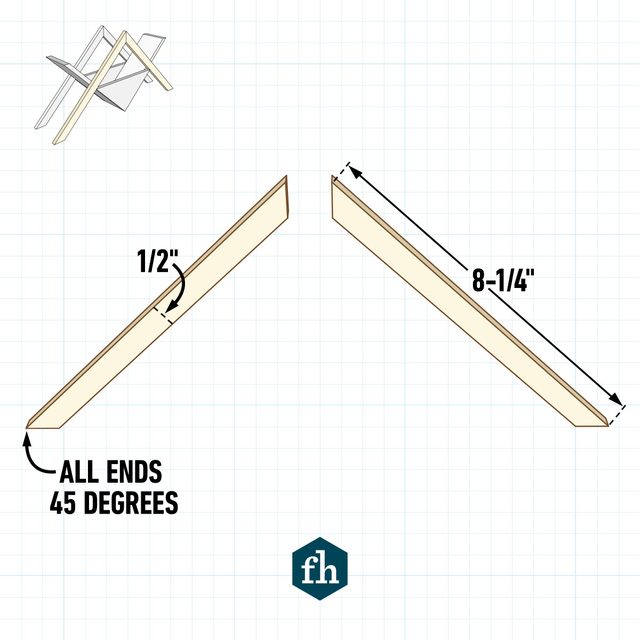
Cut the Legs
Cut four identical legs with opposing 45-degree angles on each end.
Assemble the Legs
Using the same tape technique used for the bottom, glue the legs together.
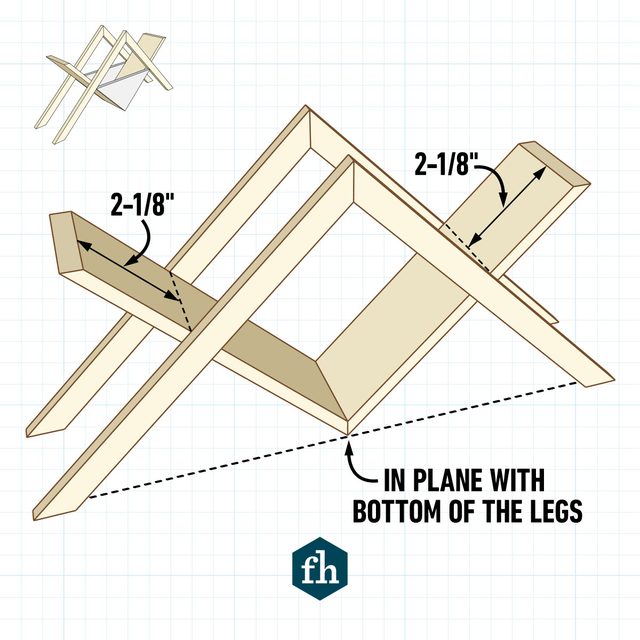
Attach the Legs
Position the legs on the bottom and mark their locations. Apply glue to the marked locations, and then clamp the assembly together.
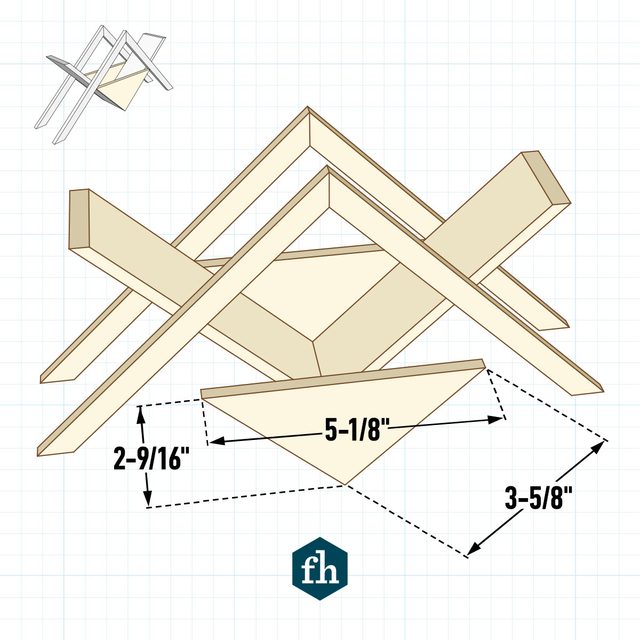
Attach the Sides
Cut out the triangular sides. The given dimensions are just a guide; make the sides to fit your napkin holder. Apply glue to the edges of the bottom below the leg intersection, and then clamp the sides in place. When the glue dries, sand and apply a finish of your choice.