
How to Make DIY Wood Chess Pieces
 Updated: Feb. 02, 2023
Put your own spin on a classic game.
A half day
Intermediate
$10-$20
Introduction
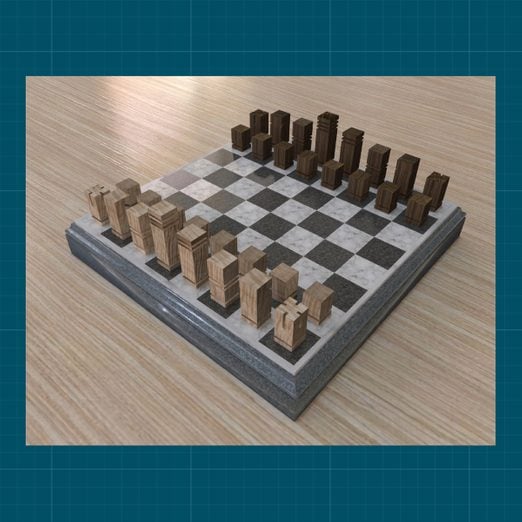
Sure, you can go buy a set of chess game pieces. But they’re probably made overseas, and you can be sure they look exactly the same as every other set out there. Here’s an alternative – make your own. It’s easy to do and your chess set will be absolutely unique!Tools Required
- Miter saw
- Table saw
Materials Required
- 5/4 x 36" Maple
- 5/4 x 36" Walnut
Cutting List
| KEY | QTY. | PART NAME | DIMENSIONS |
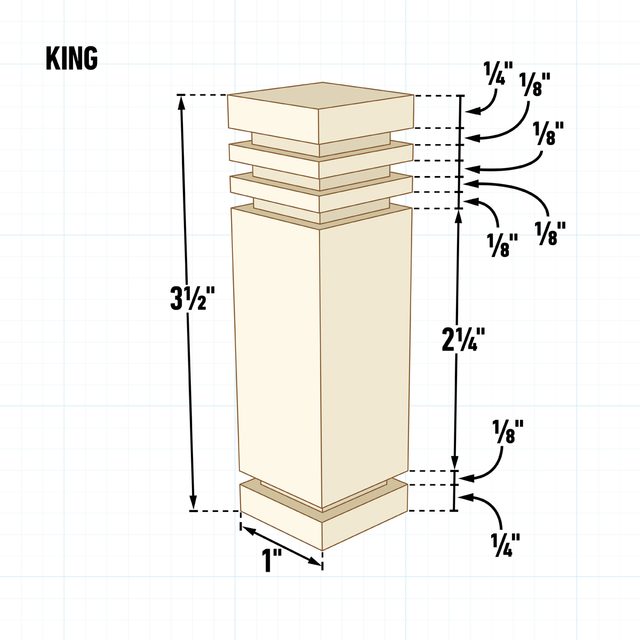
| A | 2 | King | 1″ x 1″ x 3-1/2″ |
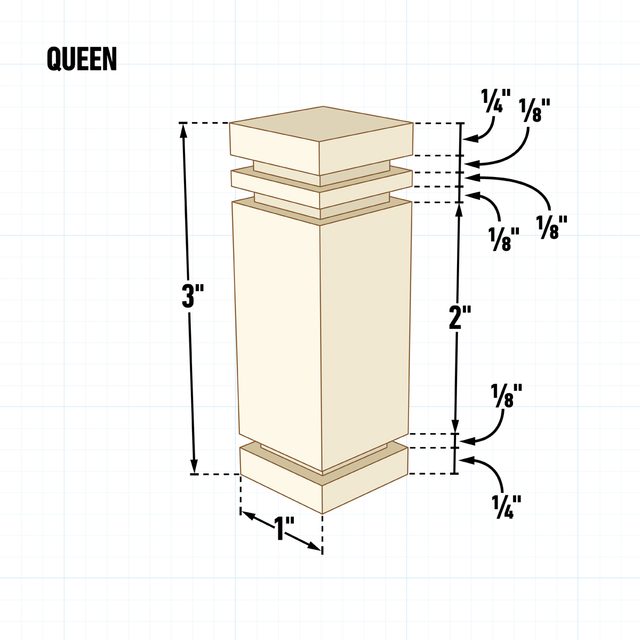
| B | 2 | Queen | 1″ x 1″ x 3″ |
| C | 4 | Bishop | 1″ x 1″ x 2-1/2″ |
| D | 4 | Knight | 1″ x 1″ x 2-1/2″ |
| E | 4 | Rook | 1″ x 1″ x 2″ |
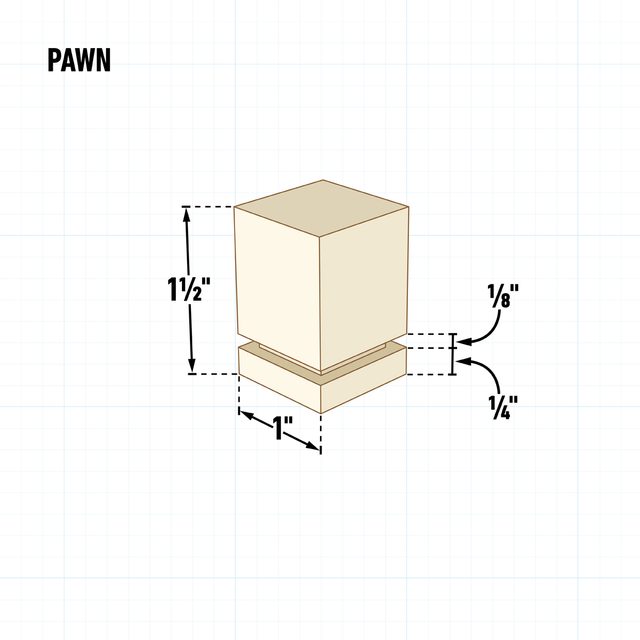
| F | 16 | Pawn | 1″ x 1″ x 1-1/2″ |
Project step-by-step (9)
Make a Sled for Safe Cutting
All the detail cuts will be made on the table saw. Adding a sacrificial board to the miter slider or making a crosscut sled will make these much safer and more accurate.
Prepare the Blanks
This design calls for the stock to be milled to one-inch square. In total, you will need 36 inches of both maple and walnut stock. Follow the cut list above and cut all the pieces to length.
Cut the Lower Ring
Once the pieces are cut to length, it’s time to make the detail cuts. Start with the lower ring and make a 1/8-inch deep cut on all the pieces. For the pawns, this is the only cut.
Make the Crown Cuts
For the King and Queen, flip the part around and make the first of the “crown” cuts.
Finish the Details
Move the stop block on the sled a 1/4-inch further away from the blade and make another succession of cuts on the King and Queen. For the King, repeat this process one more time, giving him a crown of three rings.
Make the Bishops
As you can see, the Bishops have no crown cuts and two rings in their midriff. Set up your sled to make the first ring of cuts one inch from the top, and the second ring 1/4-inch lower than the first.

Make the Knights
The Knights have an angled cut on one face. Make this cut last; the angled cut will destroy the sled’s effectiveness.

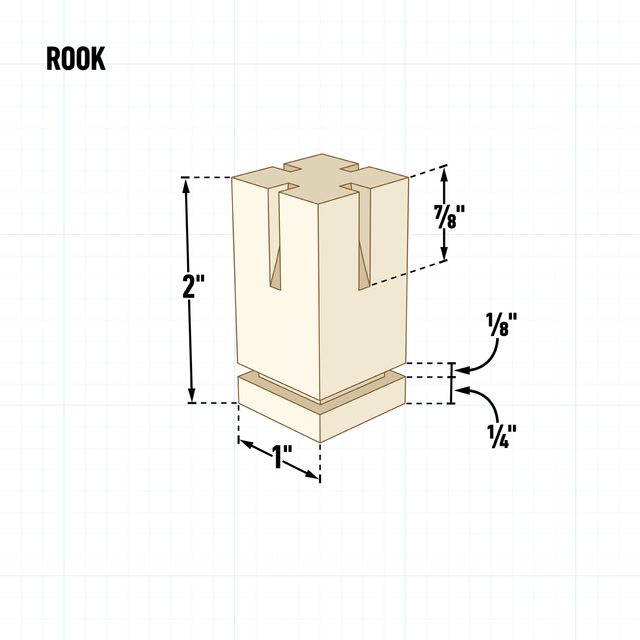
Make the Rooks
To make the castle shape, raise the table saw blade one inch above the table and set your fence to 7/16-inch. This will center the “castle” cut. Push the top of the piece into the blade about 7/8-inch.
Pro tip: Make one cut and turn the saw off, leaving the piece where it sits. After the blade stops spinning, make a pencil mark on the fence at the top of the Rook piece, then remove it. Push a piece of scrap wood through the blade, stopping at that mark, and clamp it to the fence. This makes these cuts much safer and more accurate.
Finish and Start Playing
Sand all of your chess pieces and apply the wood finish of your choice to protect them. Given the amount of handling chess pieces receive, I suggest a couple of coats of wipe-on-poly to stand up to the dirt and natural oils on our hands.
And that’s it, you’re finished. Time to grab a chess board and start playing.