How to Make Simple Mortise and Tenon Joints
 Updated: Feb. 13, 2023
A guide to mortise and tenon joinery, a core technique of woodworking.
Our editors and experts handpick every product we feature. We may earn a commission from your purchases.

Varies
Intermediate
Varies
Introduction
Counted among the strongest methods of joinery, mortise and tenon joints are as old as woodworking itself. They can be simple or complex. In all types of mortise and tenon joinery, the mortise is much the same, whereas the tenon takes many forms. These are three of the most common.Tools Required
- Bench Chisel
- Drill press
- Hand saw
- Marking gauge
- Shoulder Plane
- Square
- Table saw
Materials Required
- Solid lumber
Project step-by-step (18)
Cutting Mortises
The “mortise” is the recess where the tenon goes. It can be cut by hand with a mallet and mortising chisel, or mechanically with a mortising machine and a hollow chisel bit. If you don’t have those tools, a mortise can also be made with a drill press and bench chisel.
Mark the Cut
Make the marks on your workpiece with a pencil or marking gauge.
Pro tip: Shade the areas of waste that must be removed. This will help eliminate mistakes.
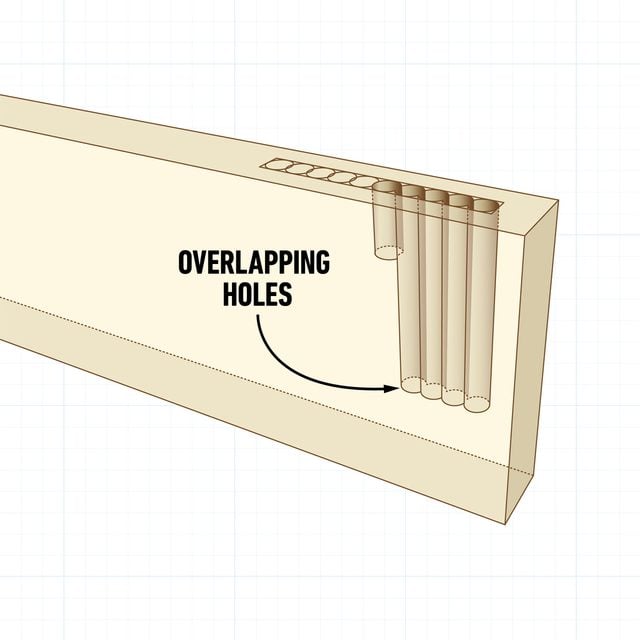
Hog Out Material
Use a forstner bit on a drill press to drill a series of holes to remove the majority of the waste.
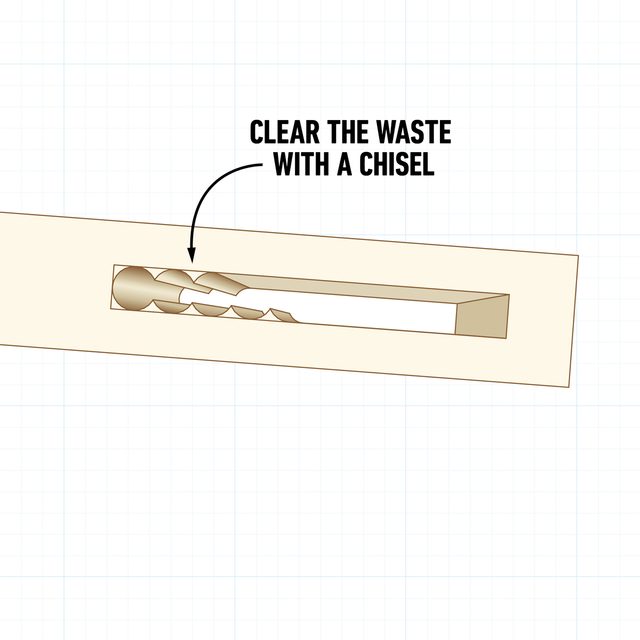
Clean the Mortise with a Chisel
With a wide bench chisel, clean up the sides of the mortise. Don’t try to remove all the waste at once. Take small cuts. Use a narrow chisel to square up the ends of the mortise.
Cutting Tenons
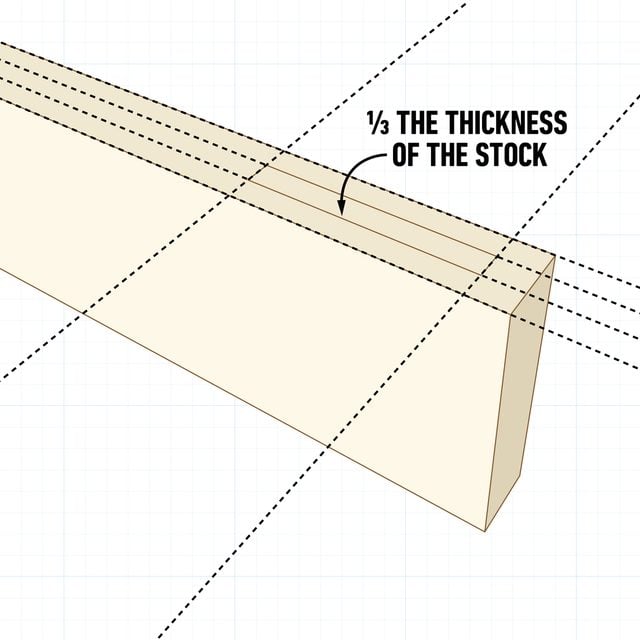
A tenon can be cut on the table saw with the right jig, or with a handsaw meant for that purpose. A western-style back saw or Japanese-style pull saw will work well. Size the tenon to be one-third the thickness of the stock.
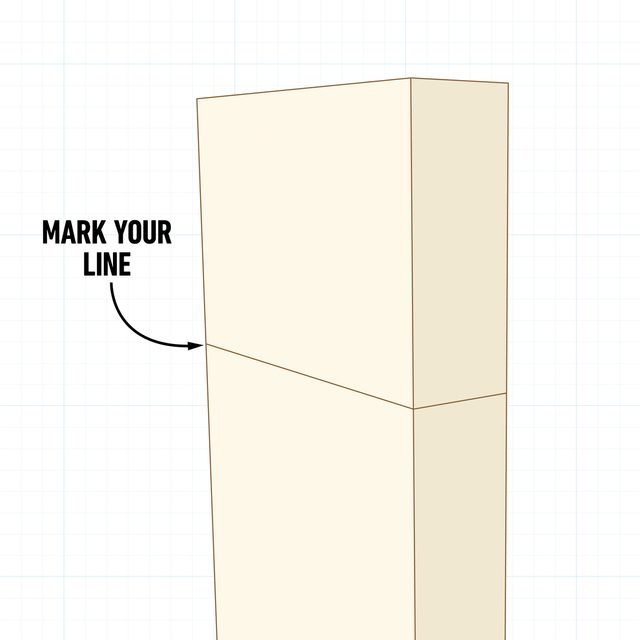
Mark the Depth
With a pencil and square or a marking gauge, mark the shoulders on the face and edge of the stock.
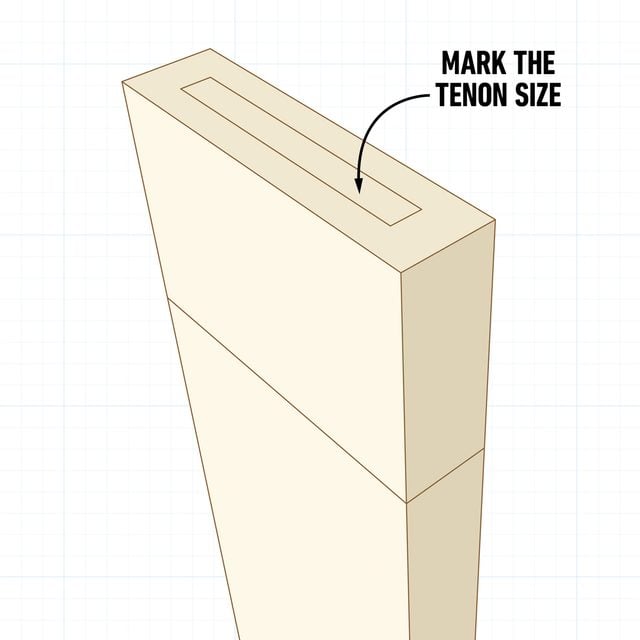
Mark the width and thickness of the tenon on the end grain.
Mark the Tenon Size
Sketch the measurements of the completed mortise onto the tenon board.
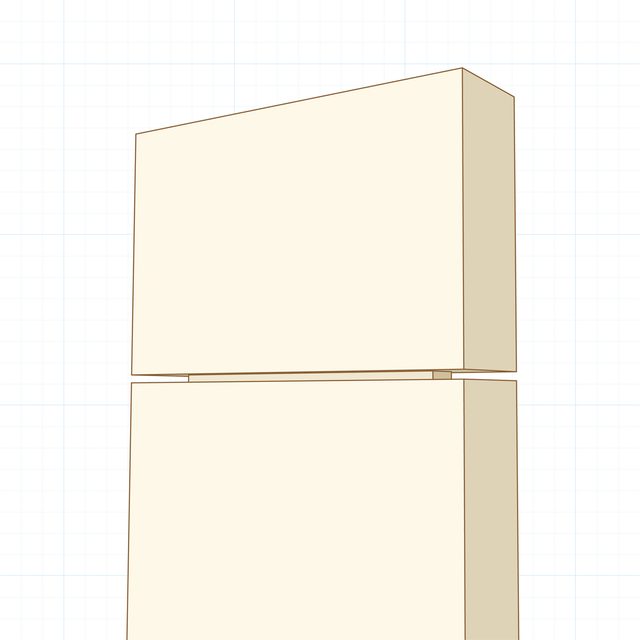
Make the Shoulder Cuts
Shoulder cuts can be made on the table saw with a crosscut sled or miter slider. With practice, they can be cut with a hand saw.
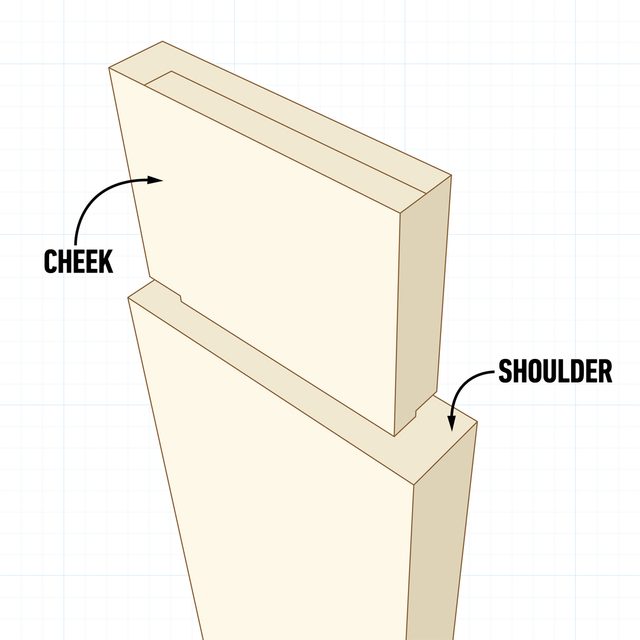
Cut the Cheeks
With a tenoning jig, cheek cuts can safely be made on the table saw. Do not make cheek cuts on the table saw freehand!
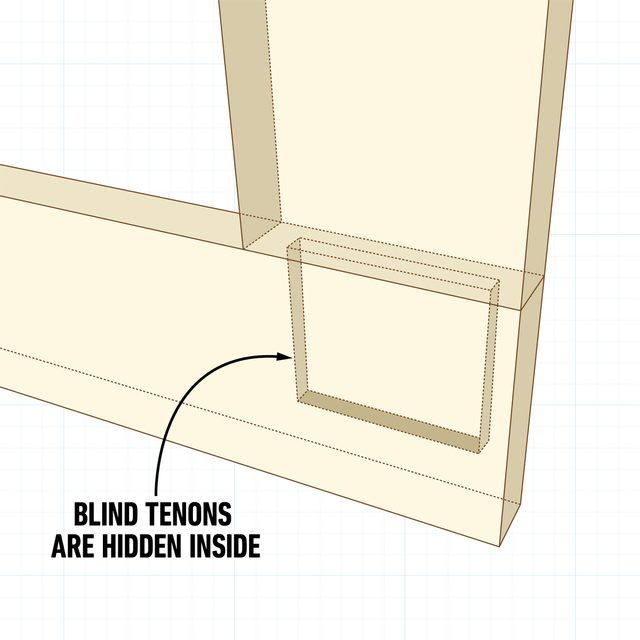
The Blind Tenon
It’s called a blind tenon because it’s completely hidden inside the mortise.
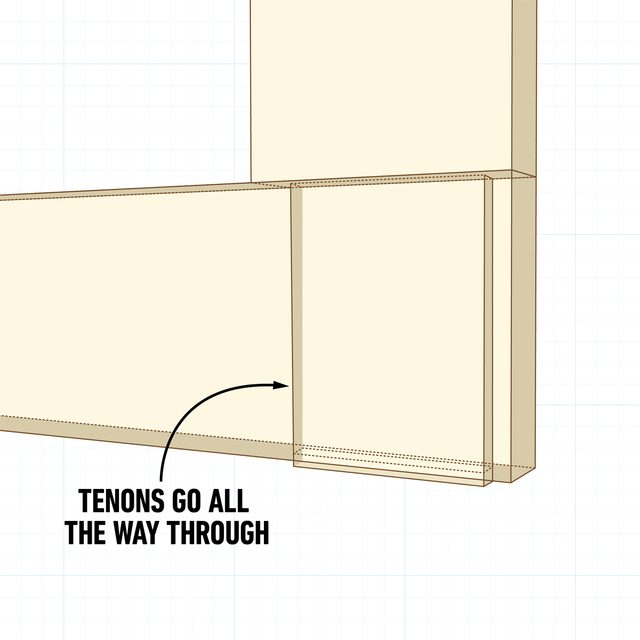
The Through Tenon
Similar to the blind tenon, the through tenon does what the name suggests – it goes completely through the joint. This creates a slightly stronger joint. It’s also a little easier to make.
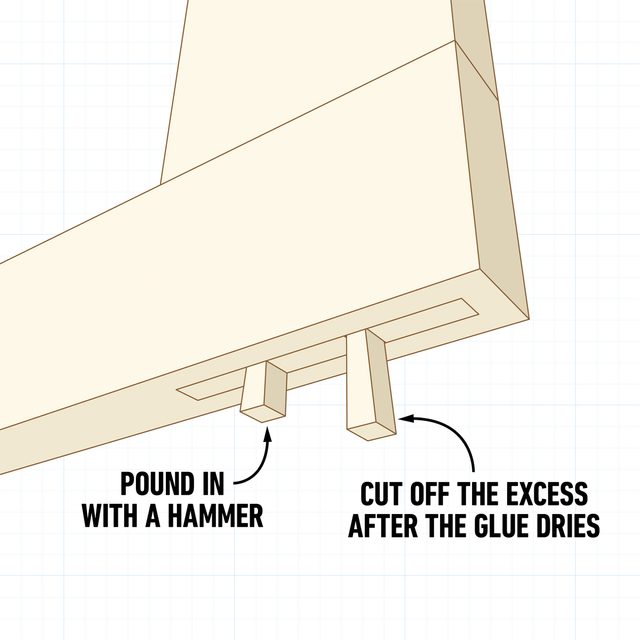
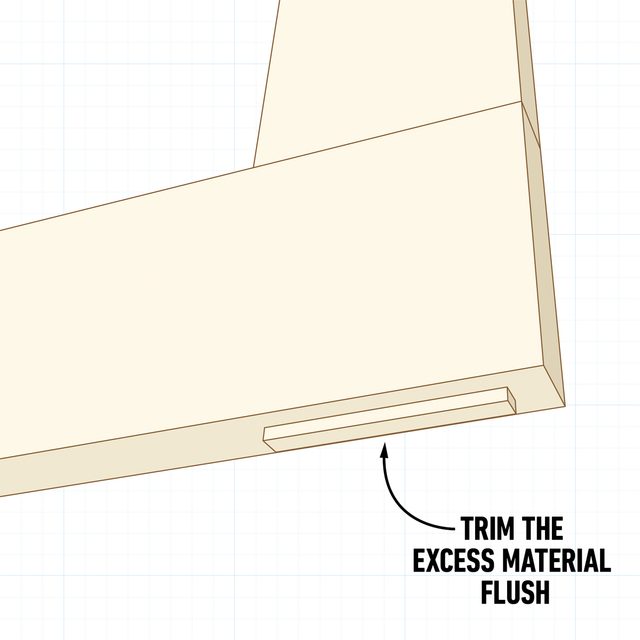
Trim the Excess
Once the glue joint dries, use a flush cut saw to trim the excess material off the tenon. A flush cut saw only has teeth set on one side of the blade. Make sure that side faces up— otherwise you might scratch your work. Some styles of joinery don’t flush-trim the protruding tenon, but rather leave it proud. This creates a distinct Craftsman style.
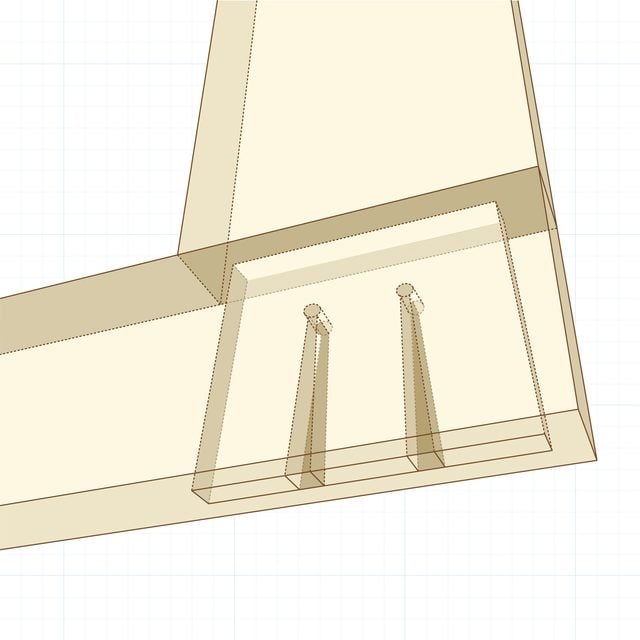
The Wedge Tenon
The wedge tenon takes the through tenon to a whole new level. Wedges are forced into the tenon, creating a slightly tapered mortise and an extremely strong joint.
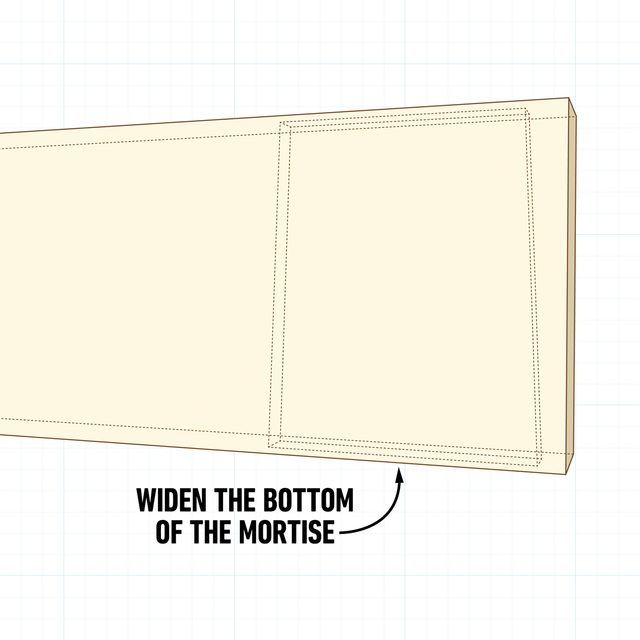
Widen the Mortise
Take a wood chisel the same width as the mortise and widen the far side of the mortise to create a trapezoidal shape. When driving the wedges into the tenon, it will dovetail into the mortise and lock itself in.
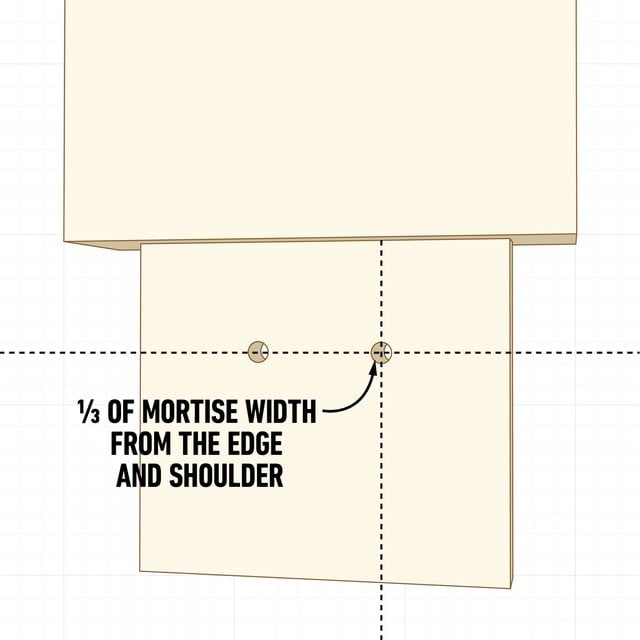
Drill relief holes
Divide the width of the tenon by three. Mark one line that distance from the shoulder and two more from both edges of the tenon. Drill two holes where the lines intersect.
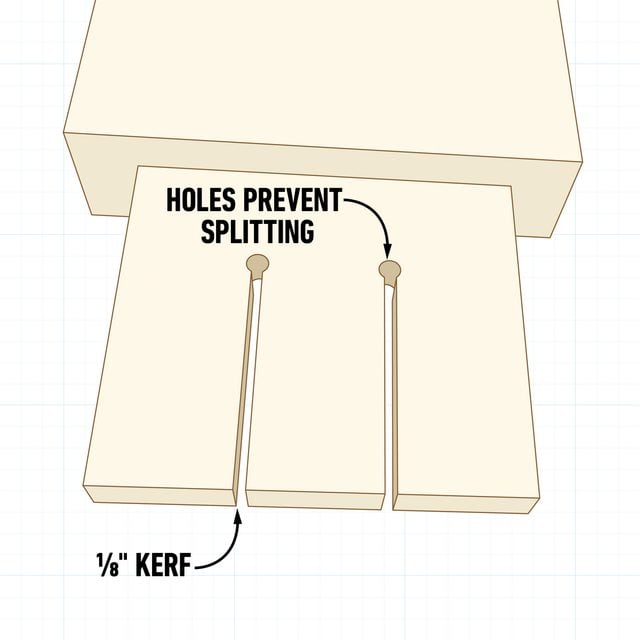
Slot the Tenon
With a hand saw, make a cut from the bottom of the tenon up to the relief holes.
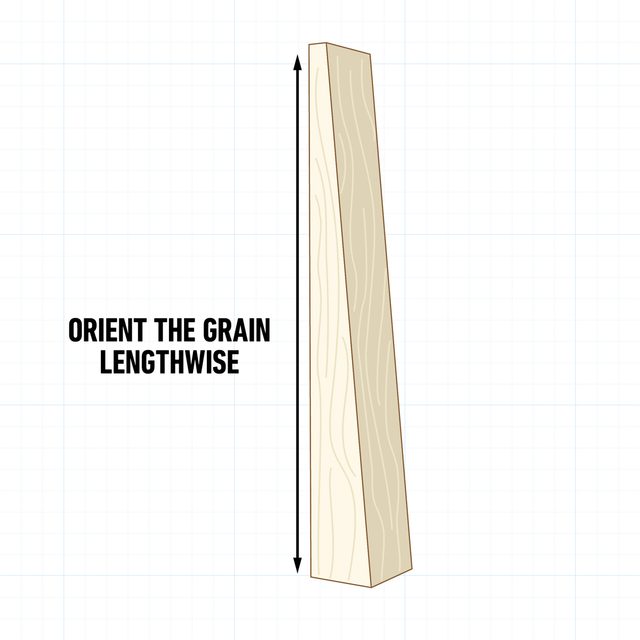
Make Wedges
Grain direction is important for the wedges. Orient the grain direction along the length of the wedge.
Insert Wedges
Coat the wedges in glue and insert them into the slots. Drive them home with a hammer or mallet.