
How to Build a Bath Bench
 Updated: May 03, 2021
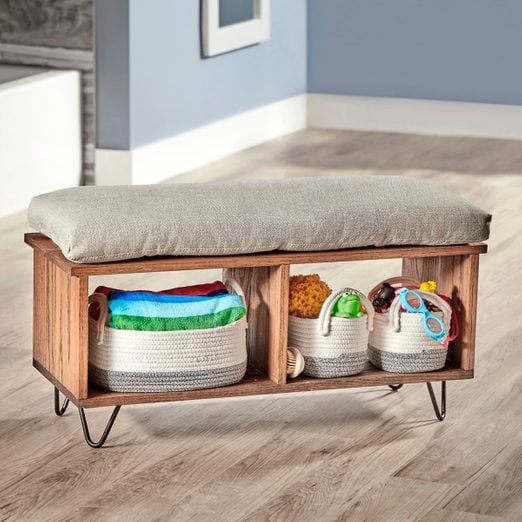
A full day
Beginner
$51–100
Introduction
This DIY bathroom bench offers a comfortable place to sit and a convenient place to store essentials. Build it in a day to last a lifetime.Tools Required
- 8-gauge brad nailer
- circular saw/miter saw
- Clamps
- Drill
- jigsaw/handsaw
Materials Required
- 3 x 3' oak board
- 4" hairpin legs
- 6 x 10' oak board
- 8 x 10' oak board
- Brad nails
- Glue

Project step-by-step (7)
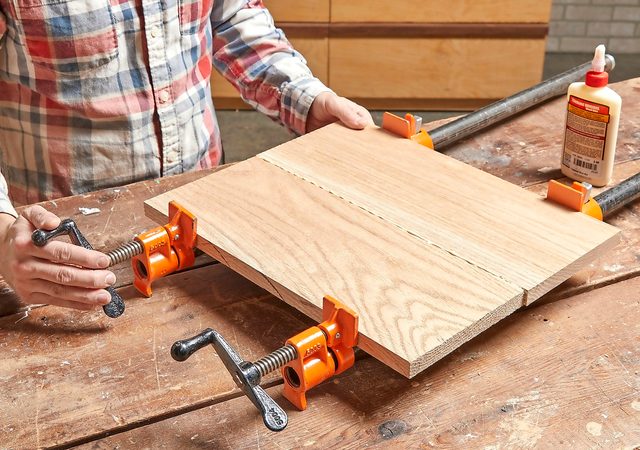
Make Wide Panels
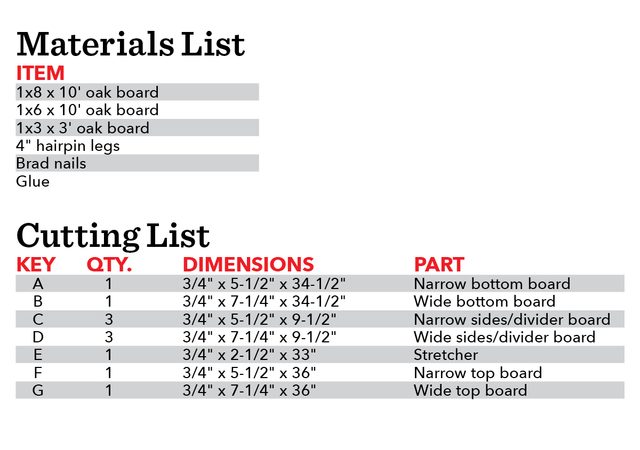
Cut all the individual boards 1/2-in. longer than their final length. Then edge-glue the boards to make the top, bottom, sides and divider panel. Wipe away any excess glue and allow the panels to dry.
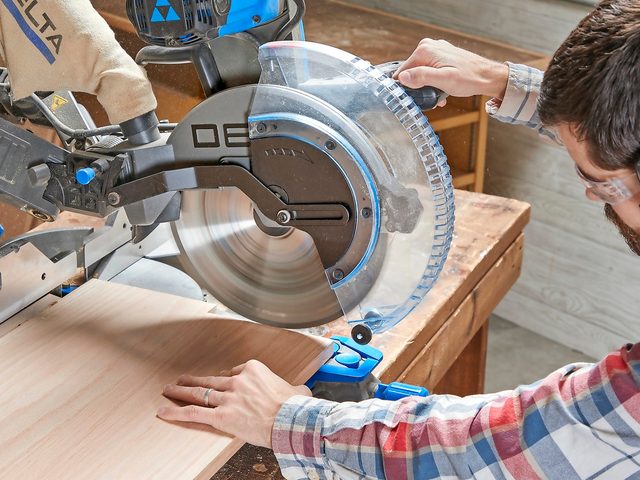
Trim Panels to Length
Trim one end of the panels, then cut the other end to final length. A 12-in. sliding miter saw like the one shown can cut the full 12-3/4-in. width. With a smaller saw, you have to flip each panel to finish the cuts. You could also make these cuts with a circular saw, using a large framing square as a guide.
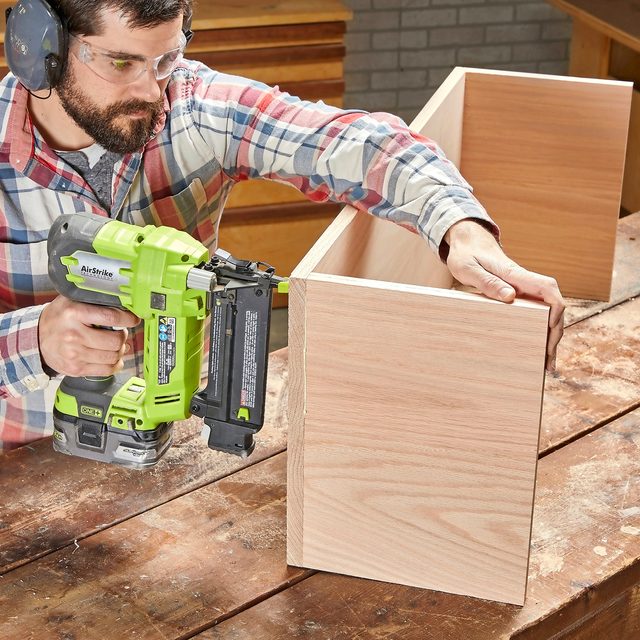
Attach the Sides
Sand the parts smooth before you assemble them. Start with 100-grit sandpaper and work up to 180. Position the sides flush to the ends of the bottom board, and fasten them with glue and brad nails. If you don’t have a brad nailer, drive trim-head screws, sinking them below the surface. Then cover them with wood putty.
Notch the Center Divider
Clamp the center divider to your work surface and cut a 3/4-in. x 2-1/2-in. notch on the top back corner. I used a jigsaw, but a hand saw works just as well. Attach the center divider with glue and brad nails.
Install the Stretcher
Spread glue on the ends of the stretcher and in the notch in the center divider. Before you nail the parts, check that they’re all in proper alignment using a Speed Square or framing square. Nail the stretcher in place through the sides and into the center divider.

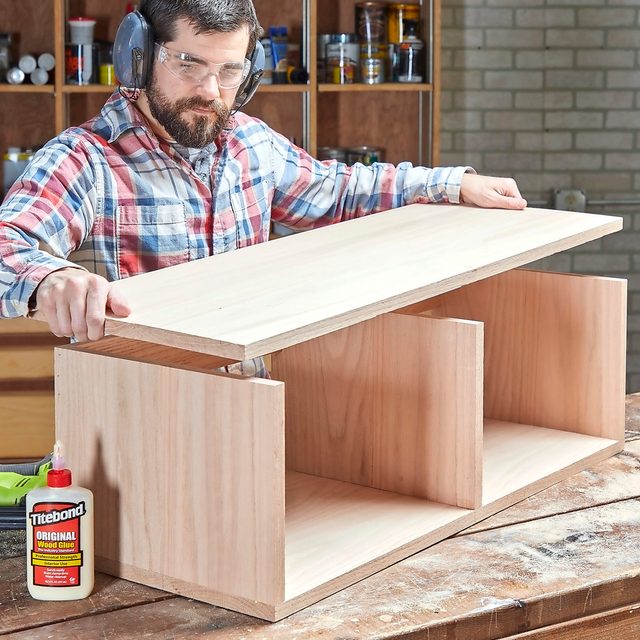
Secure the Top
Position the top so it overhangs each side by 3/4-in. and is flush with the front and the back of the bench. Fasten the top with glue and finish nails, again checking with a square before driving the nails.
Add the Legs
Flip the bench upside down and set the legs in the corners. Keep them 1/2-in. away from the edges, then drill pilot holes and screw the legs to the bottom. Apply stain and polyurethane to ensure the bench will last through years of bath time. Top off the bench with a cushion that has a nonslip bottom, or leave it as is to show off the oak grain.
