Tips for Deck Repair and Maintenance
 Updated: Nov. 28, 2022
Here are our tips to give your deck a face-lift, not a teardown.
A deck that’s not maintained can become unsafe and unsightly. If this sounds like your deck and you want to upgrade to a maintenance-free outdoor living space, consider a “re-deck.”
The job of ripping up and replacing deck boards might seem straightforward, but you could run into problems. With these tips, you’ll avoid major pitfalls and give your deck a whole new life.
On This Page
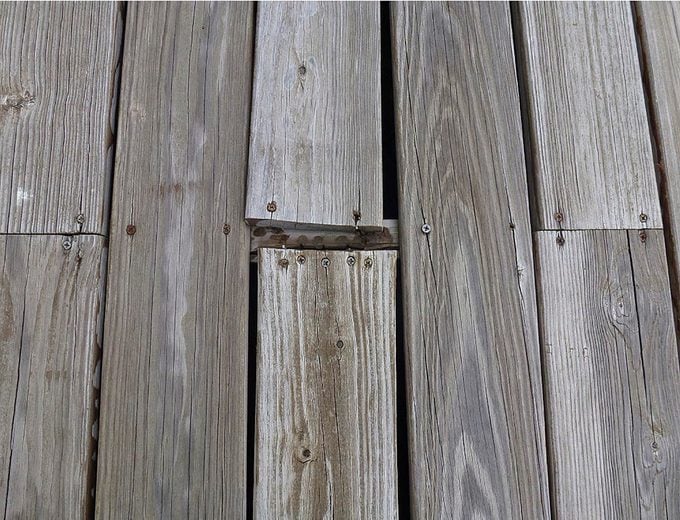
Demo the Decking
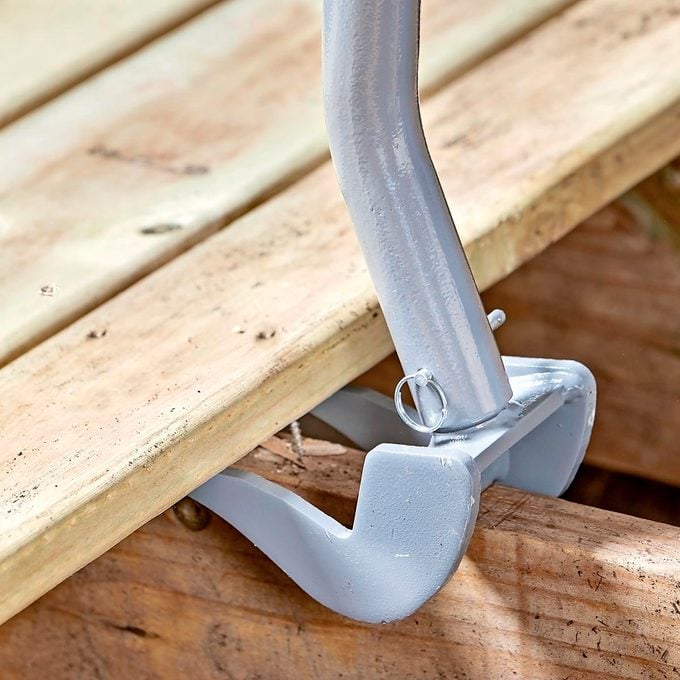
Pulling up deck boards is a chore. If your wooden decking was nailed on, demolition will be a bit easier. If it was screwed on, don’t expect to back out the screws one by one. Instead, pry up the boards, then break off any screws left in the joists by hitting them at the base with a hammer. A purpose-built pry bar like this Duckbill Deck Wrecker will ease this job.
Flash the Ledger Board
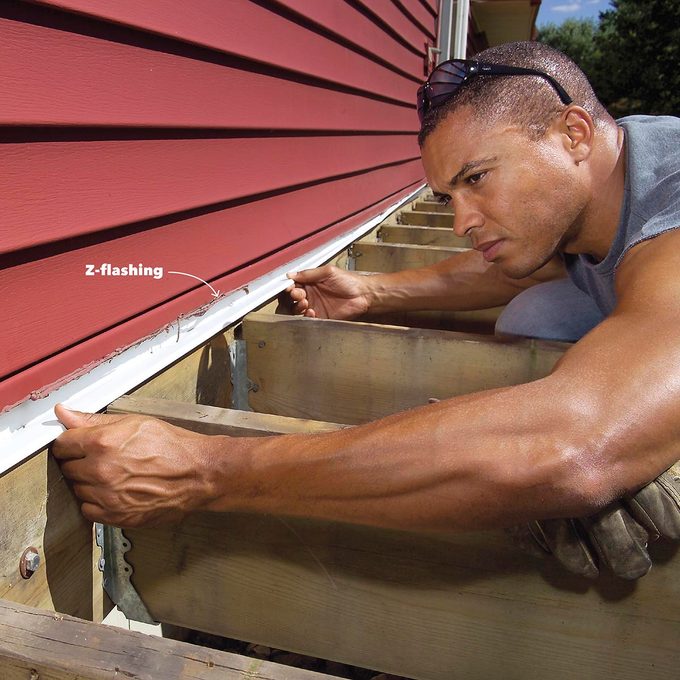
Install Z-flashing over the ledger board that holds the deck to the house. Older decks may not have flashing, but with the decking off, it’s the perfect time to add it. Tuck the Z-flashing under your home’s weather-resistant barrier. It protects the ledger board and sends water away from the house.
Replace Rotten Posts
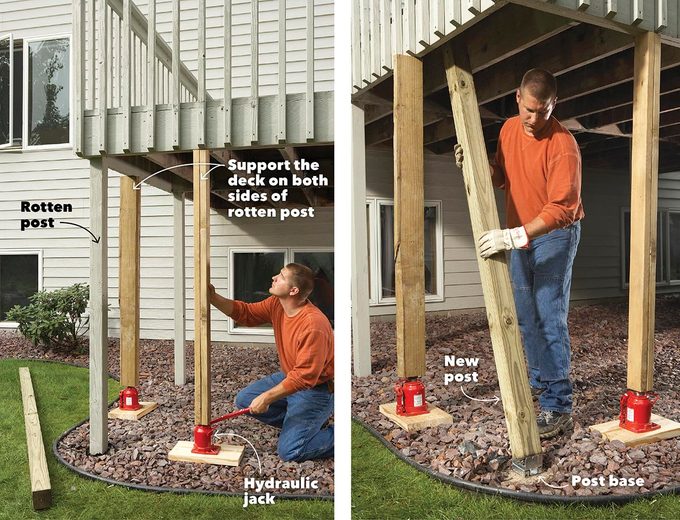
Check the bottoms of the posts that support your deck. If they’re rotting, it’s time to replace them. And it’s pretty easy.
First, using hydraulic jacks, place temporary posts on both sides of the rotten post. Make sure the jack is on firm, flat ground, then slowly jack up the deck framing enough to remove the post. Install a new deck post on a post base to keep it from rotting.
Missing Hanger Nails
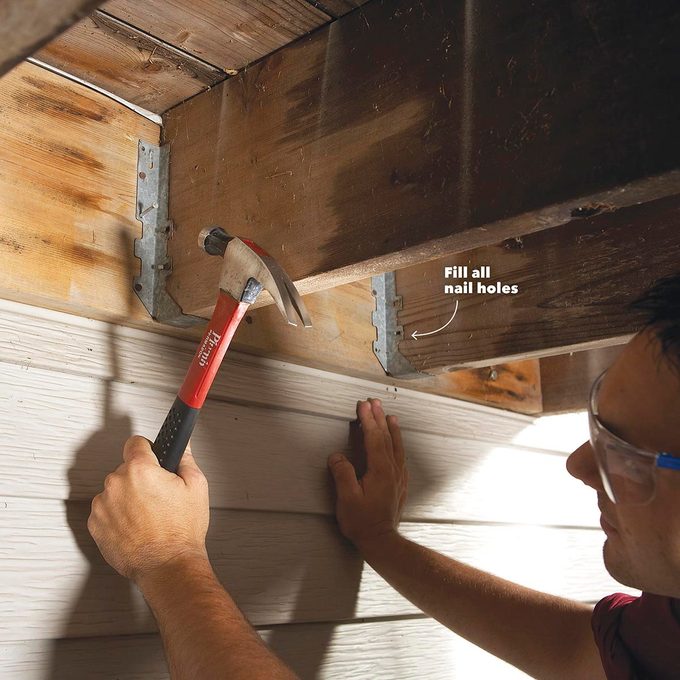
With the deck boards off, check the joist hangers. They should be rust-free and full of nails. If you see holes that are missing nails, hammer in hanger nails. Pound 1-1/2-in. nails into the ledger board and 3-in. nails at a 45-degree angle into the joists.
Protect Joists from Rot
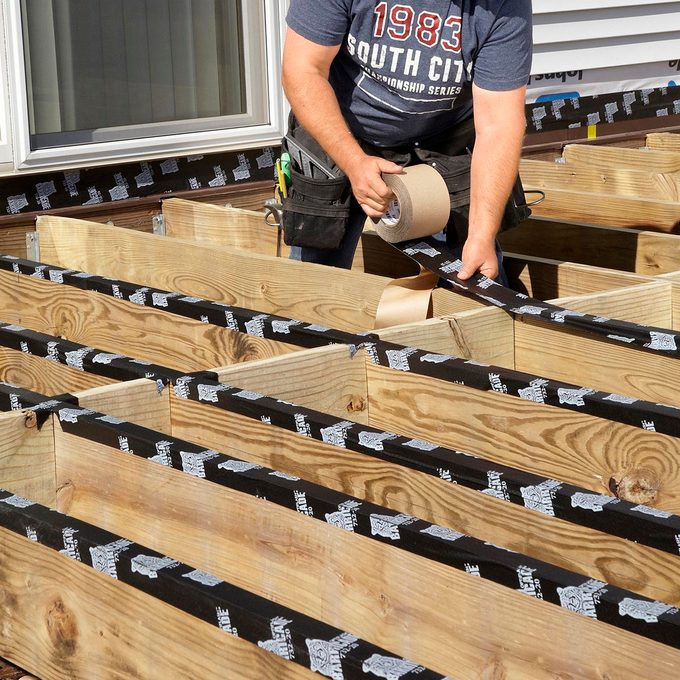
Composite decking will last a long time. To make sure the structure of your deck lasts, adhere joist tape on the tops of the joists before fastening the deck boards. The tape will seal around all the deck screws, helping to keep out water and prevent rot.
Reinforce Railings
If your deck is taller than 30 inches, it will need a railing. Whether you’re using wood, composite or aluminum railing, building code requires it to withstand a minimum of 200 lbs. of force applied anywhere. This is difficult to measure, so it’s best to beef up these rails so they don’t budge.
Corner Posts
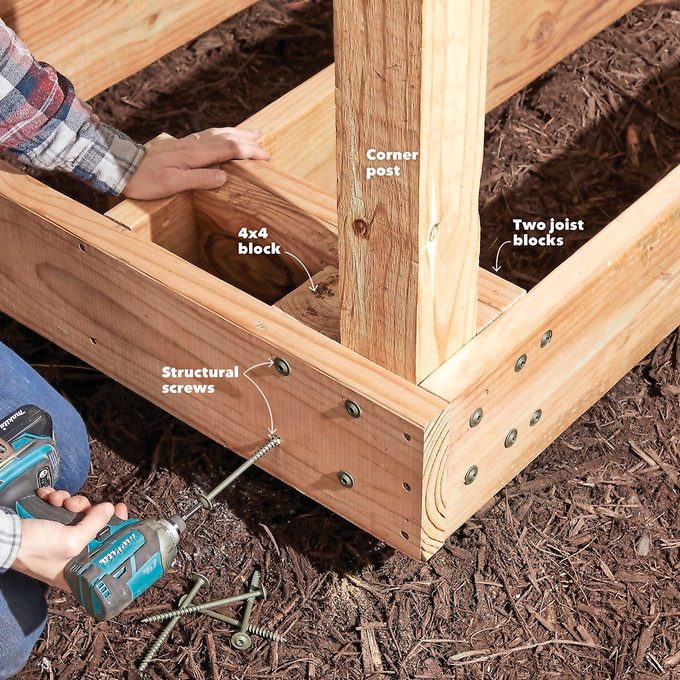
Fasten the corner posts with 5-in. structural screws. Then add two blocks between the joists against the post and a 4×4 block cut to the same height as the joist right behind the post.
Edge Posts

For posts along the edge of the deck, fasten blocks on both sides of the post. Then fasten a 4×4 block against the post and between the blocks.
Surface-Mounted Railings
For surface-mounted railings, secure a double-layer block flush to the top of the deck framing. If the joists are perpendicular to the edge, add a block across the joists, then use 8-in. structural screws to fasten them. The grain of the blocking should run perpendicular to the edge of the deck.
Stiffen Up the Joists
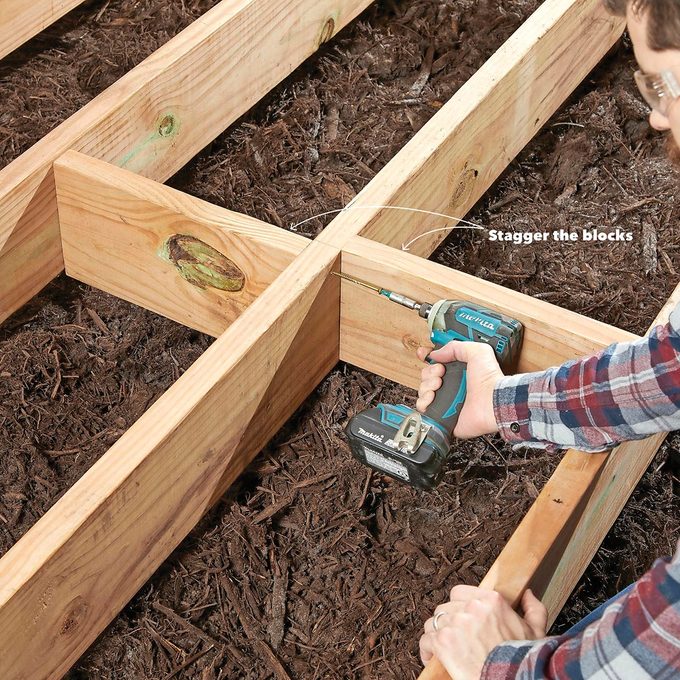
Here’s an easy fix for a bouncy deck: Snap a chalk line down the middle of the deck and add tight-fitting blocks between the joists. Stagger them so they’re easier to screw in.
Add a Picture Frame Border

A great way to hide cut ends of your deck boards is to wrap around the deck with a picture frame border. You’ll need additional blocking to support the deck boards, but the clean look is worth the extra effort.
Add an extra joist three inches away from the end joist and add blocks every 12 inches between. This supports the picture frame board and the decking that runs into it.
Work From the Outside In

The first row of decking you install should be away from the house. This will ensure that the most visible deck boards are full width, and any skinny boards are hidden against the house.
Pin the Middle

Composite decking expands and contracts with fluctuating temperatures. Decking manufacturers include an installation step, but it’s often missed: Toe-screw each deck board into the centermost joist. If a board expands 1/4-in., it will move 1/8-in. in either direction. That’s much less noticeable than 1/4-in. in one direction.
Run the Boards Long to Avoid Butt Joints
Deck boards come in lengths up to 24 feet. Cut deck boards to span your entire deck when possible to avoid butt joints. Keep the deck boards long instead of trying to cut them, and line them up individually as you lay them. See “Trim the Edges” below.
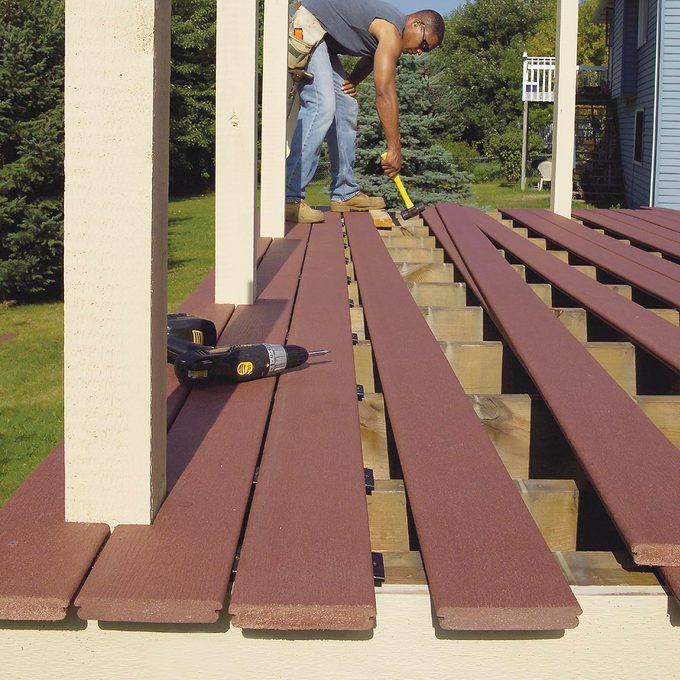
Hidden Fasteners for a Clean Surface
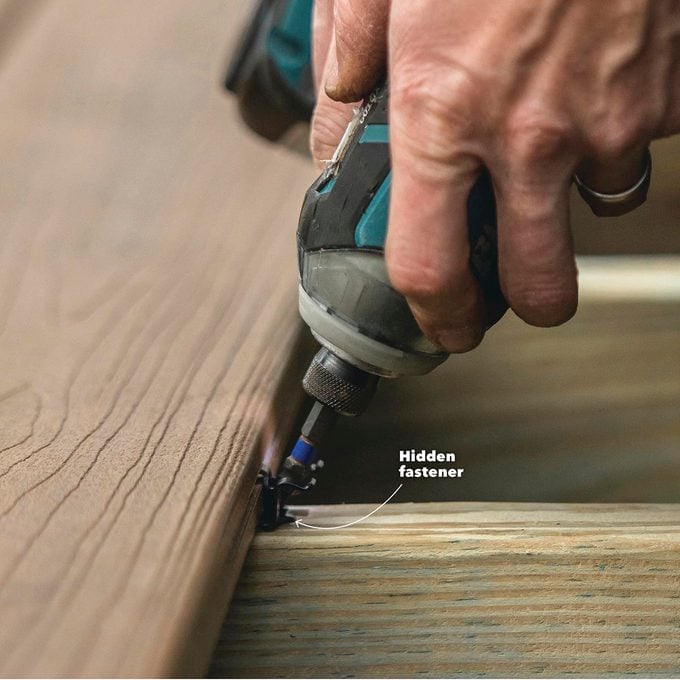
The brand of decking you choose will dictate the fasteners used. Screwing through the top is an option, but the clean surface you get by using hidden fasteners is worth the up-charge. Plus, hidden systems space the deck boards perfectly, so usually they install just as fast.
Butt Joint Seam Fix
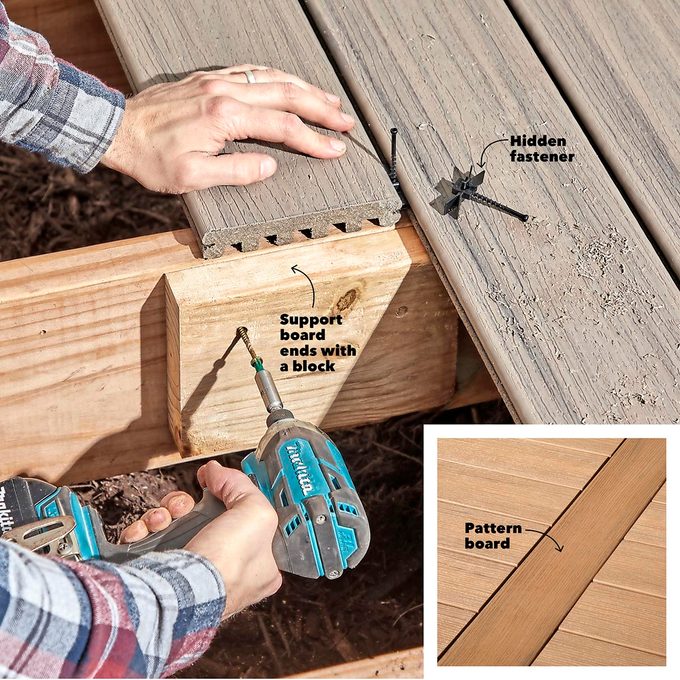
If you can’t avoid a seam in your deck boards, choose one of these options:
1. Stick with a butt seam. You’ll need to leave a gap between the boards and fasten each end down. To do this, add a block to screw the hidden fasteners for each board into.
2. Place a pattern board perpendicular to the rest of the decking. You’ll need extra blocking to support the pattern board and the ends of the deck boards on both sides.
Easy Stringer Replacement
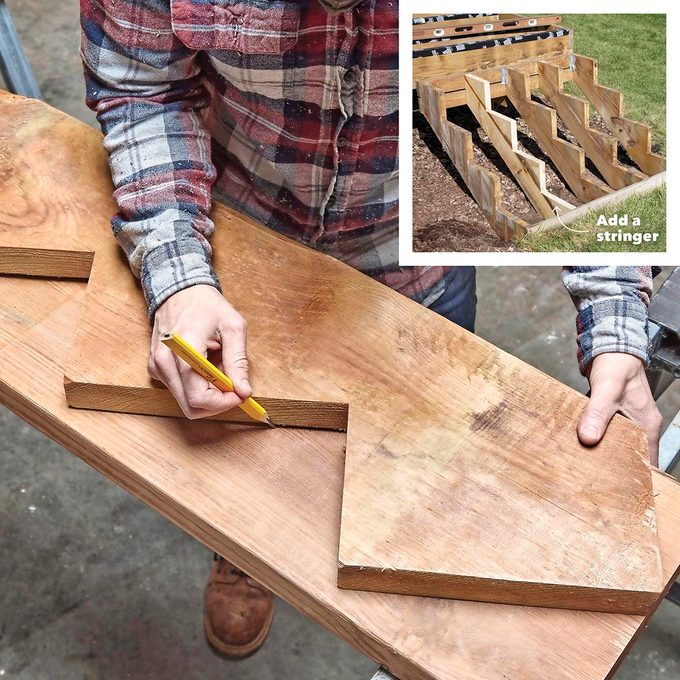
Most composite decking requires shorter spans between the framework supports, especially on deck stairs. Check with the manufacturer of the decking for the required stringer spacing; some require stringers to be as close as eight inches apart. If you need to add new stair stringers, use an existing stringer as a template. Trace its shape onto a new 2×12 and cut it out.
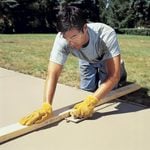
Trim the Edges
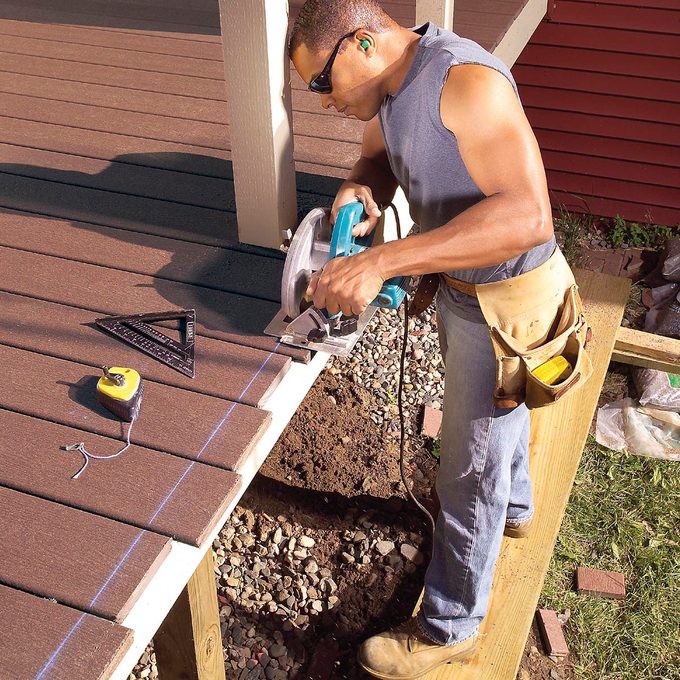
Trim the edges after you’ve installed all the decking. Snap a line and cut them all at once. This is faster than cutting each board when you’re installing it, and it will ensure the ends line up.
Update Wood Posts With a Sleeve
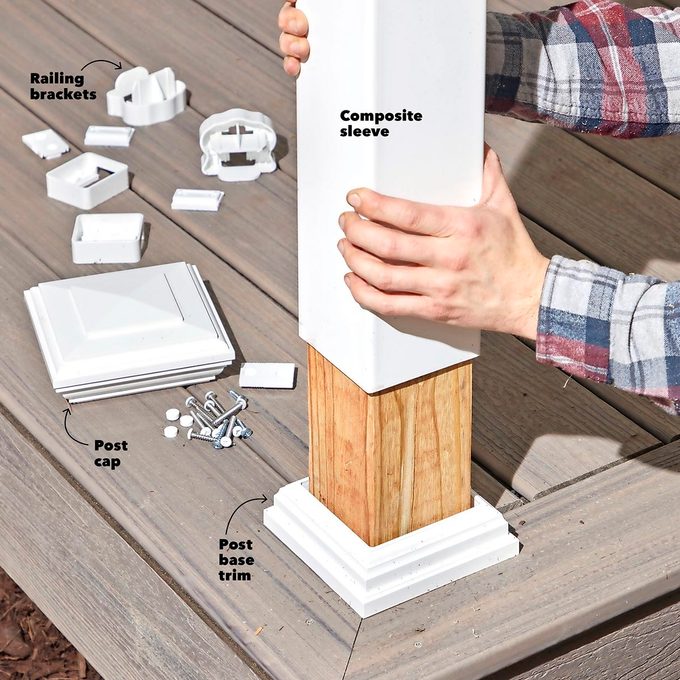
To protect your wood posts and give them a new look fast, you can just slide a sleeve over the top. Combine them with an 8-ft. railing kit and you’ll get a maintenance-free section of railing and two covered posts for just under $200. Find the sleeves and railing kits at home centers.
Modernize with Aluminum Rail
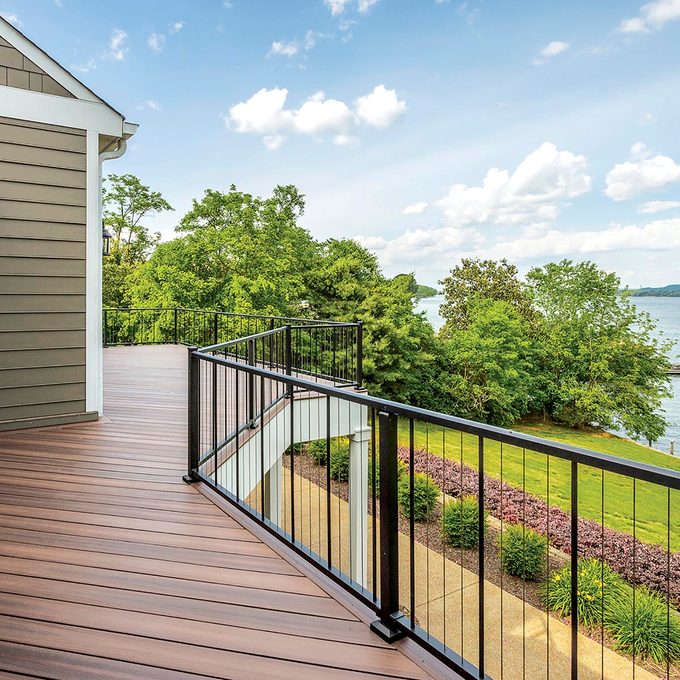
Upgrade the style of your deck with aluminum railing. Install aluminum posts on the surface of your deck and choose from various railing options, including glass and steel cable. Expect to pay at least $250 for six feet of aluminum railing and posts at home centers.