How To Build a 2-in-1 Workbench and Bar Top
 Updated: Jan. 24, 2023
Add LEDs set in epoxy for a custom, high-tech work surface.
Multiple Days
Advanced
More than $1000
Introduction
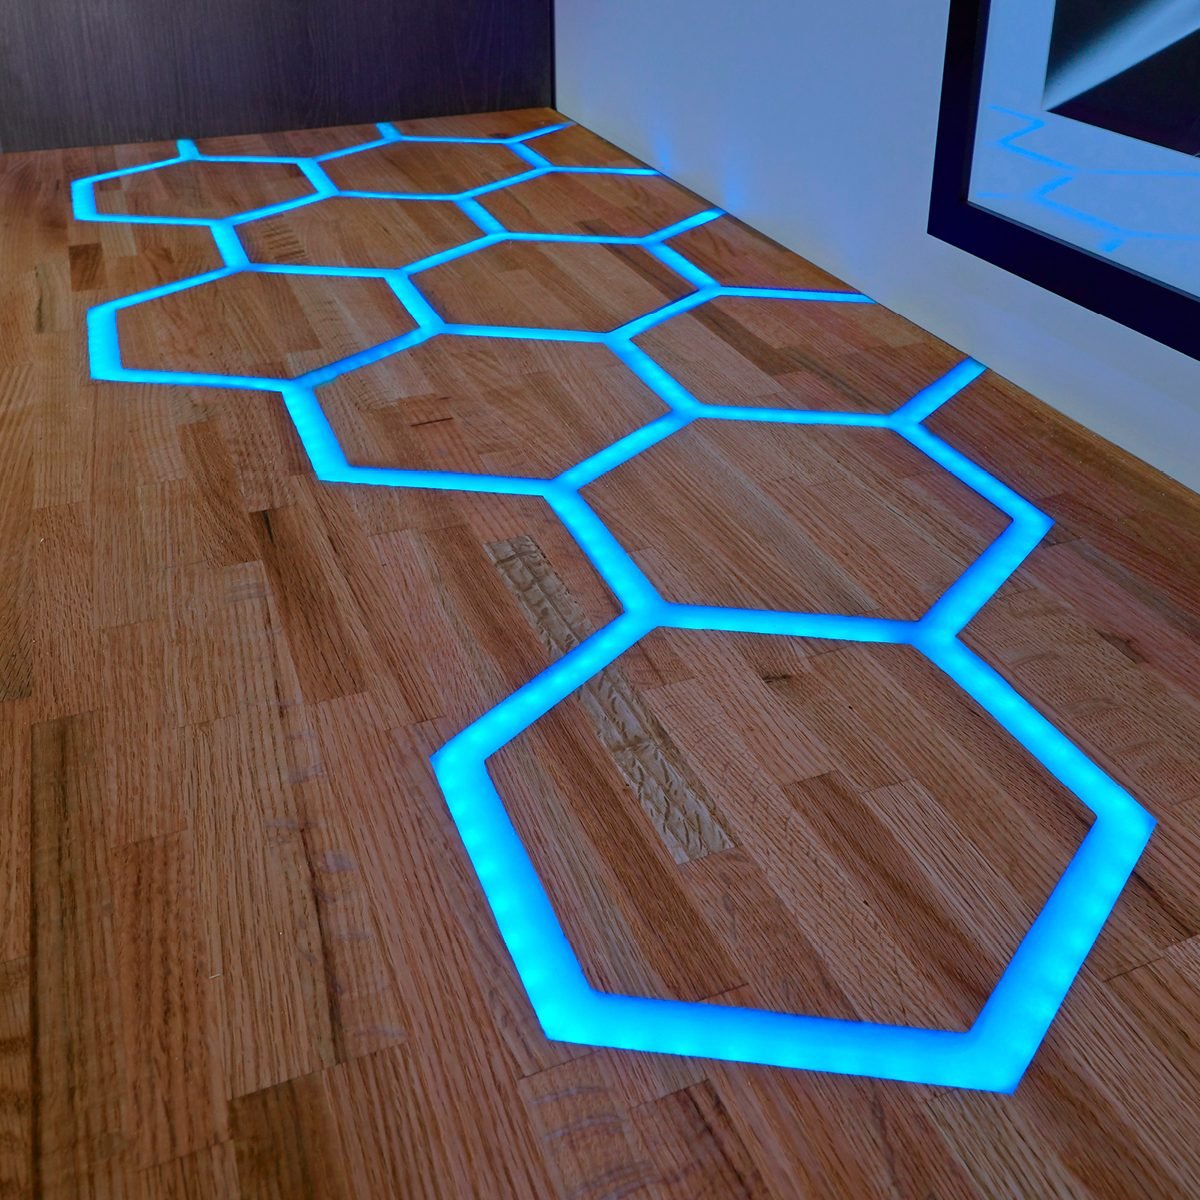
Butcher block countertops are tough as nails and the perfect choice for a garage workbench. But that doesn’t mean they have to be ordinary. I made this design by routing out a hexagon pattern, laying LED strips in between and covering them with epoxy. Flipping that light switch at the end of the day signals that it’s time to put away the tools, sip — and relax.Tools Required
- 18-gauge brad nailer
- Belt sander
- Caulk gun
- Chisel
- Drill
- Hot Glue Gun
- Orbital sander
- Router
- Table saw
Materials Required
- 1-qt. measuring container
- 1/2 x 2' x 2' plywood (melamine)
- 18-gauge brad nails
- 22-gauge five-lead cable
- 3/4” plywood
- Acrylic plexiglass
- hot glue
- LED strip connectors
- LED strip lights
- Metallic powder highlight
- Mixol concentrated tint
- Oak butcher block countertop
- Shellac
- Silicone
- toggle clamps
- Two-part deep-pour epoxy

Project step-by-step (16)
Start the Hexagon Tiles
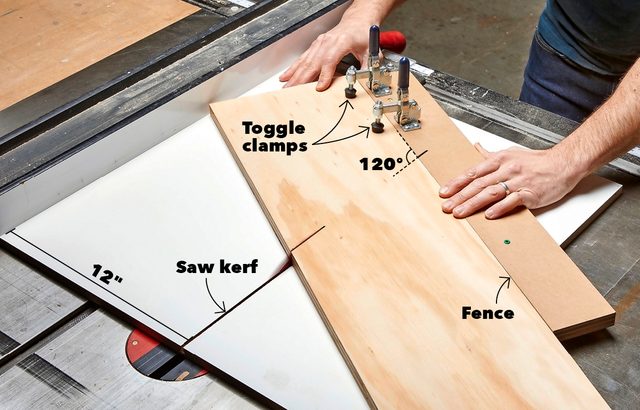
To cut the 15 hexagon tiles, you’ll need a jig. I started with a 2-ft. x 2-ft. melamine sled.
I set my table saw fence to 12 inches and made a partial cut into the sled. I attached a fence at a 120 degree angle with a few screws then fastened a pair of toggle clamps to the fence. Then, I cut 8-1/4-in.-wide strips of 3/4-in. plywood into 10-inch pieces until I had 16 parallelograms.
Finish the Hexagon Tiles
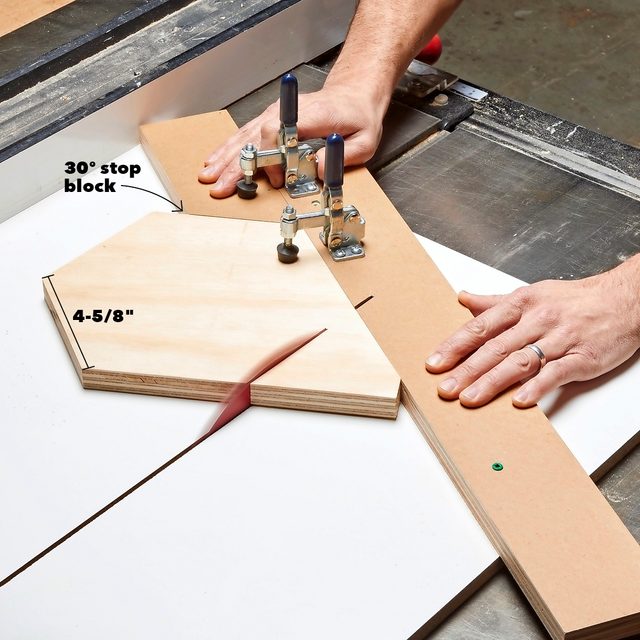
For the rest of the cuts, clamp a stop block with a 30 degree angle at one end against the fence 4-5/8-in. away from the saw kerf. Clamp the plywood parallelograms into the jig, cut one side, then rotate and repeat until you’ve got a pile of hexagon tiles.
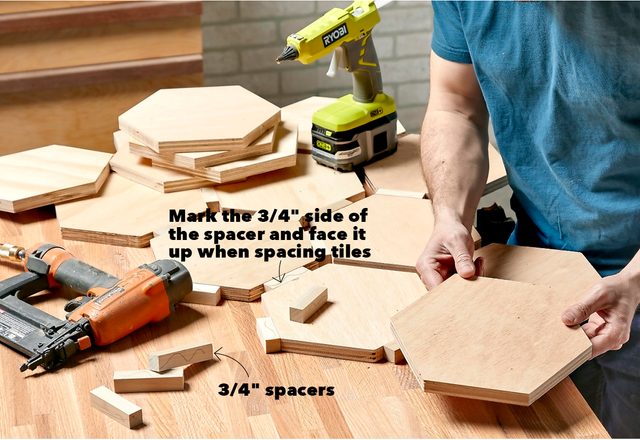
Create the Pattern
Lay out the tiles on the butcher block top, using spacers just like you would if you were tiling a floor. To make the spacers, I ripped 3/4-in.-wide hardwood strips. (The edge of nominal 1-by material is too narrow to use as a spacer for my 3/4-in. router bearing.) Then I cut the strips into three-inch lengths. I secured the tiles with dabs of hot glue and brad nails.
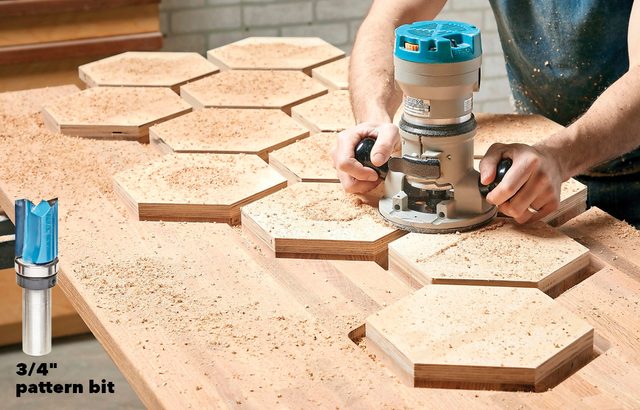
Rout the Pattern
To create the channels, I routed around the tiles counterclockwise (against the rotation of the bit). I did this in several 1/8-in.-deep passes until I reached a depth of 3/4-inch. This is the most difficult part of this project; go slow. After each pass, I stopped to vacuum out all the chips and let the bit cool.
Remove the Tiles
When you finish the routing, remove the tiles with a pry bar and pull the nails. If the nails won’t pull out, cut them off and use a nail set to drive them beneath the surface, then fill the holes with wood filler.
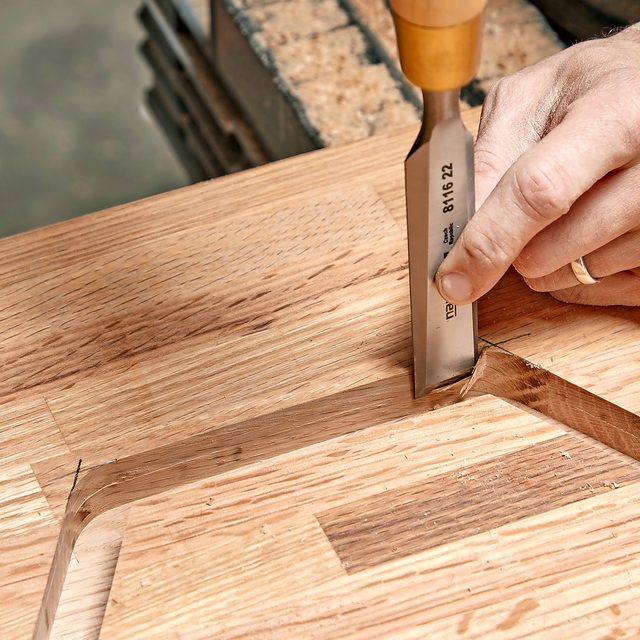
Chisel the Corners
The router leaves rounded corners at every outside turn. Using a straightedge, mark a sharp corner, then chisel to the line. You’ll fill the channel with epoxy, so don’t worry about making a perfect cut all the way to the bottom of the channel.
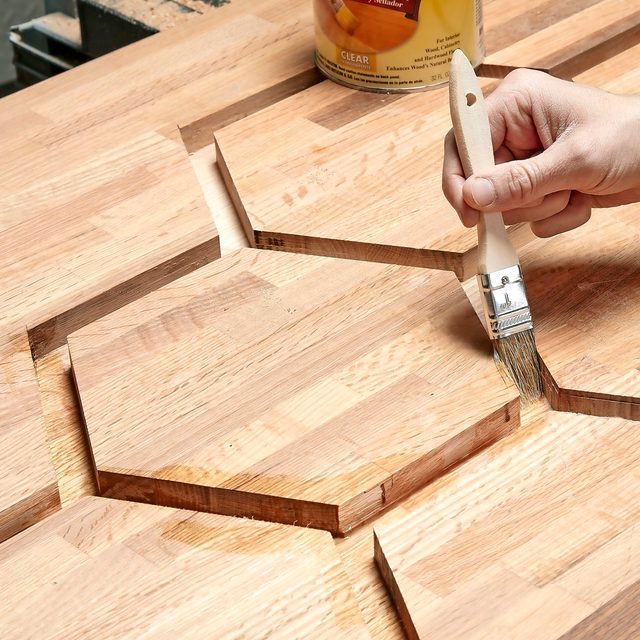
Seal the Channels
When poured right over wood, especially an open-grained species like red oak, the epoxy will seep into the pores. This wastes epoxy and produces lots of air bubbles. Prevent this by sealing the wood with shellac first. Because shellac dries quickly, you won’t have to wait long before pouring epoxy.
Set the Lights
Getting the LED light strips through the channels is a bit of a puzzle. I needed multiple runs to get lights in each channel, including a couple strips that covered just a single side of a hexagon. At the ends of the runs, connect the strips to a five-wire cable, then guide the cable into the cabinet space through a 1/4-in. hole. Here are a few things I learned:
- Draw a map of the runs before cutting any lights.
- Lay the cut strips in the channels before removing the adhesive
backing. - Use hot glue to hold corners of the strips that don’t stick very well.
- Test your lights before covering them with epoxy.
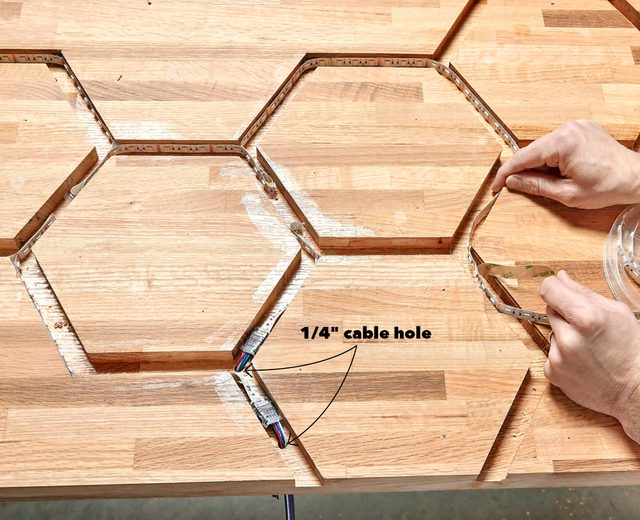
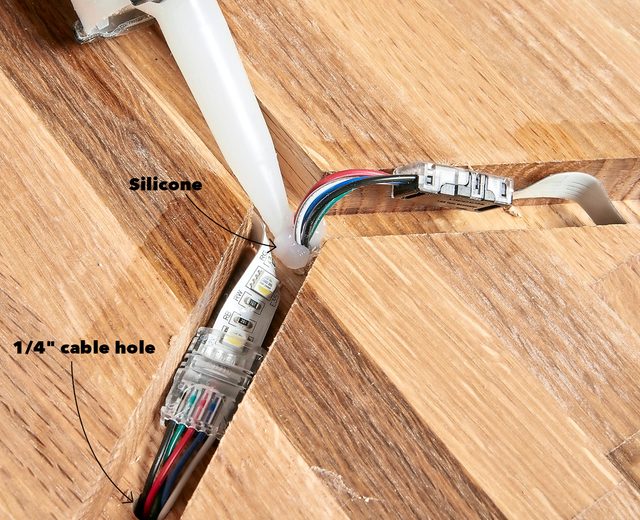
Plug Every Void
Even a tiny leak in the form could cause the epoxy to drip out and make a huge mess. Where each cable passes through the top, lift the cable a bit and fill the hole with silicone. Slowly push the cable back through, filling the hole with silicone as you push the wires down.
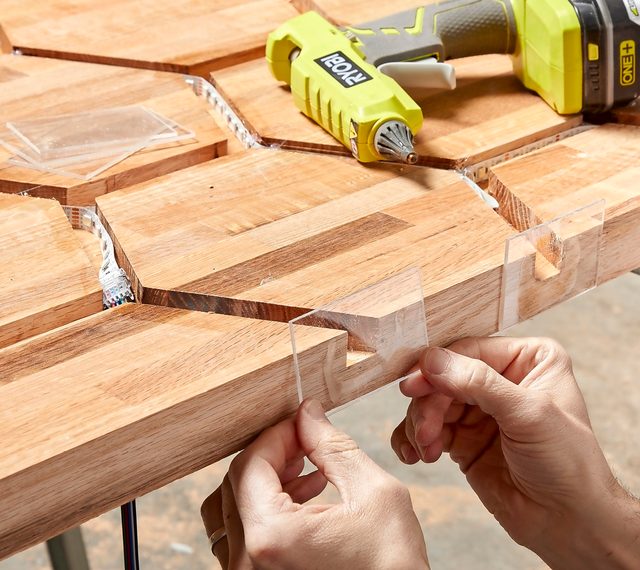
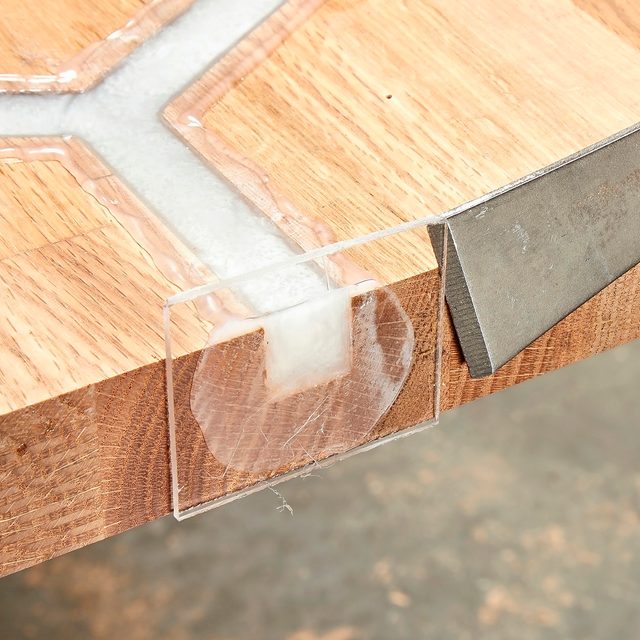
Dam the Edges
The easiest way to dam the epoxy in the channels is with 1/8-in. acrylic and hot glue. I cut two-inch-wide acrylic strips into three-inch-long pieces. Then I laid a thick U-shape bead of hot glue around each channel’s opening; I extended this glue to the top of the countertop on both sides of the channel to keep the epoxy in. Apply silicone around the outside of each dam for extra leak protection.
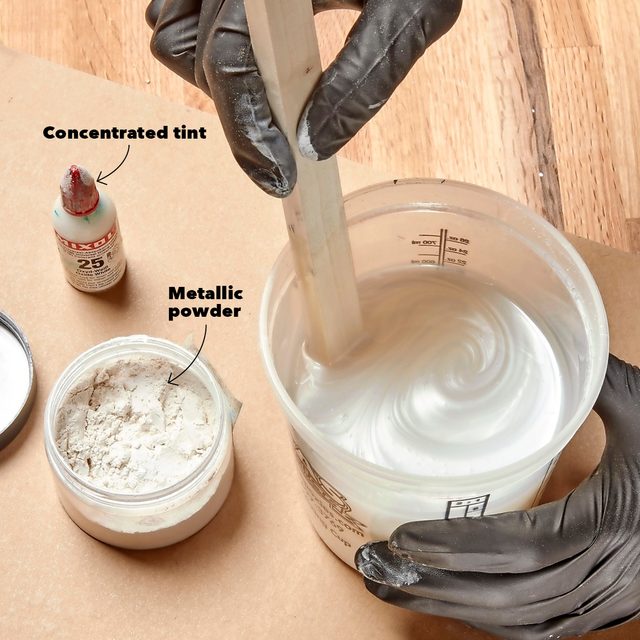
Mix and Tint the Epoxy
I used MAS Epoxies Deep Pour Epoxy Resin System to fill the channels. Each epoxy is different; follow the mixing guidelines on the kit and mix only what you can pour right away. I stirred in a few drops of white concentrated tint, plus white metallic powder to add a cool shimmer effect.
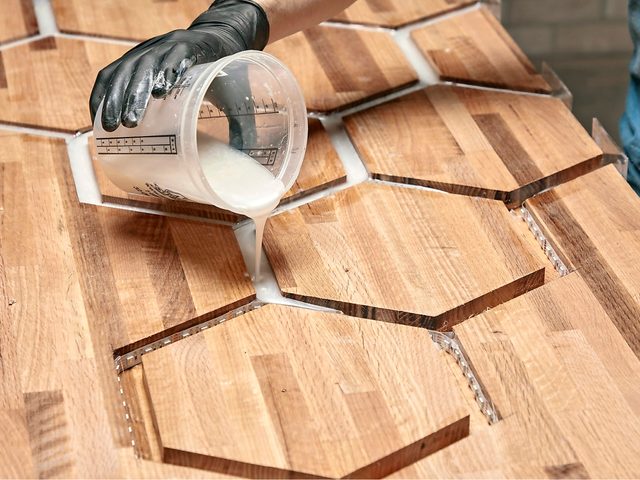
Pour the Epoxy
When you’re ready to pour, work your way around all the channels. Don’t worry about dripping or slightly over-pouring; you’ll sand everything afterward. I used three batches of epoxy, overfilling the channels slightly. Look for leaks as you go, using duct tape to seal them. This deep-pour epoxy has a low viscosity and takes about two days to fully cure.
Remove the Forms
After the epoxy has fully cured, carefully pull off the acrylic dams. They should pry right off with a flat bar or chisel. Then scrape off the dried glue.
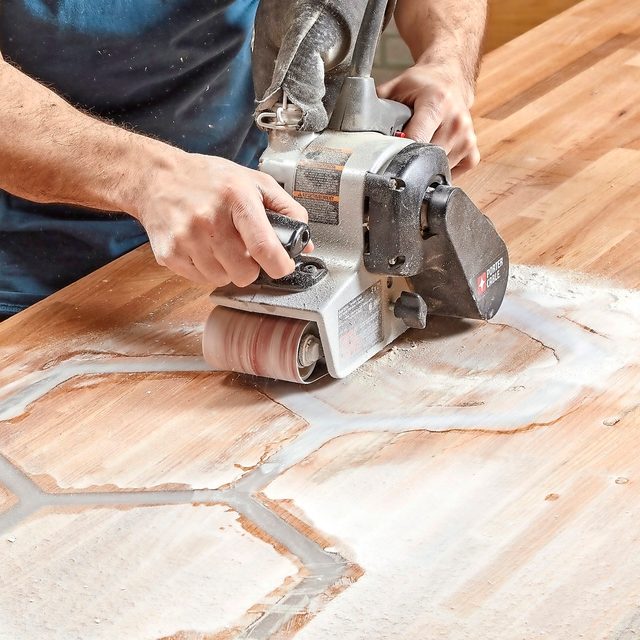
Sand the Top
With a belt sander and 40-grit sandpaper, I attacked the cured epoxy that pooled above the surface. Once the counter was flat, I switched to an orbital sander with 80-grit sandpaper, working my way up to 220-grit and sanding the whole top.
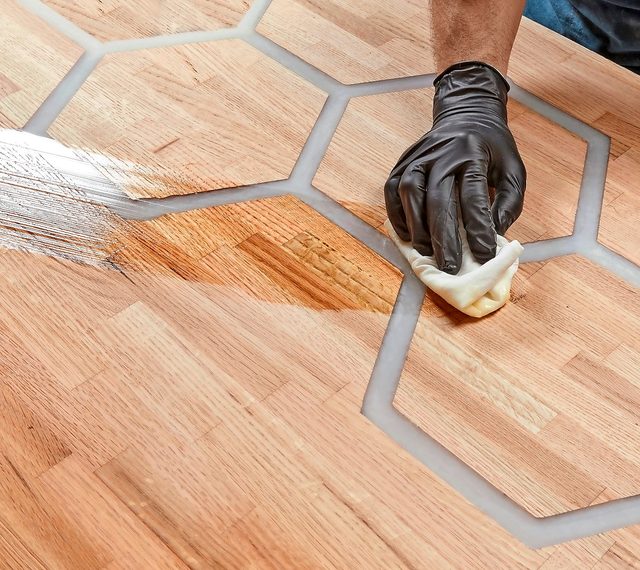
Wipe on the Finish
At this point, the epoxy looks dull, but that’s temporary. Vacuum the dust and clean the top with denatured alcohol. Then using a clean rag, wipe on a coat of polyurethane to protect the top and reveal the epoxy’s swirl and shimmer.
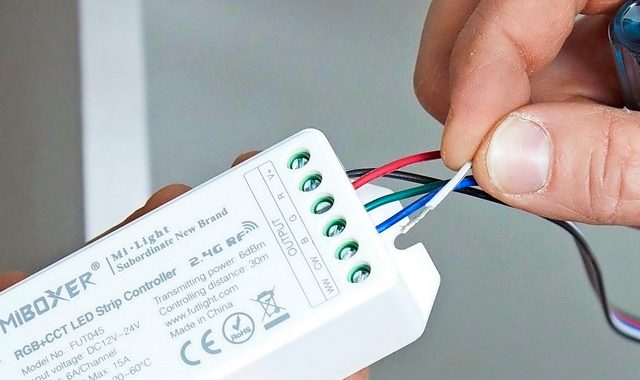
Wire the Lights
After you place the counter on the cabinets, all that’s left is connecting the lights to a power source. Match the color-coded wires to the correct terminals of your power supply and turn it on.