
How To Install an Electric Fireplace
 Updated: Dec. 09, 2022
With a heater and color changing flames, enhance any chilly space with an electric fireplace insert.
Multiple Days
Intermediate
Varies
Introduction
Stepping out of a warm tub or shower into a cold space is not one of life's joys. The usual remedy — other than tolerating the chill — would be installing a heat lamp. But their red glow and noisy timers can make you feel like a newborn chick, or maybe a hot dog at a gas station waiting for a hungry customer.
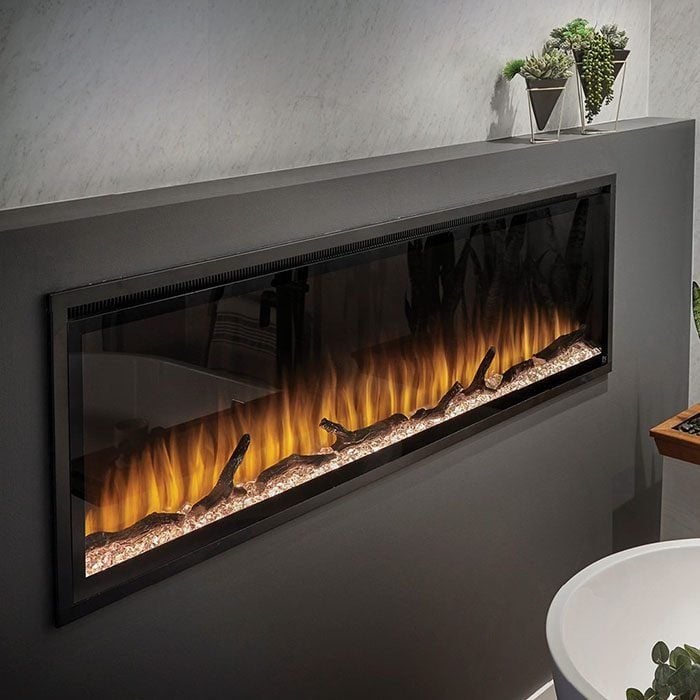
I wanted a different vibe for our complete bathroom remodel — no surprise, right? With this electric fireplace, I can change the color of the flames and embers and I control the heat output, all using WiFi.
Tools Required
- Circular saw
- basic carpentry tools
- drywall tools
- wire stripper
Materials Required
- 2x4
- 3-in construction screws
- sheetrock
- sheetrock screws
- Paper joint tape
- Joint compound
- The Touchstone Elite Sideline fireplace insert costs $1200 at Lowe’s
Easy Installation, Anywhere
To ease this installation, I built out an existing wall. Doing this makes it possible to put an electric fireplace anywhere in your home without worrying about compromising a load-bearing wall or the insulation on an exterior wall. It simplifies pulling wires too, but you’ll still have to apply drywall, tape and mud.
We installed the Sideline 60 Elite Fireplace from Lowe’s.
Project step-by-step (10)
Map it Out
To position the fireplace with the required clearance, I started with a cardboard cutout of the fireplace. For this bathroom remodel, we’re adding a raised deck for a tub. So I marked the finished height of the tub deck, the height of the tub, and six inches of clearance above the tub to the bottom edge of the fireplace. I centered and leveled the cutout, then taped it to the wall.

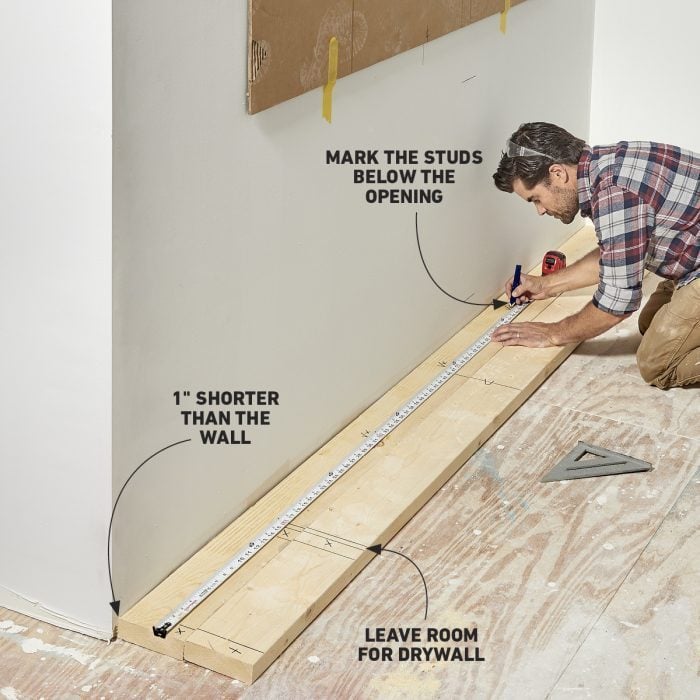
Mark the Plates
For the top and bottom plates of your fireplace wall, cut two 2x6s one inch shorter than the finished wall. Flush their ends and use a speed square to mark across both plates, marking the center, the fireplace rough opening and the studs every 16 inches on-center.
The rough opening should be 1-1/2-in. taller and wider than the fireplace. This will give you enough space to drywall the opening, as well as some wiggle room.
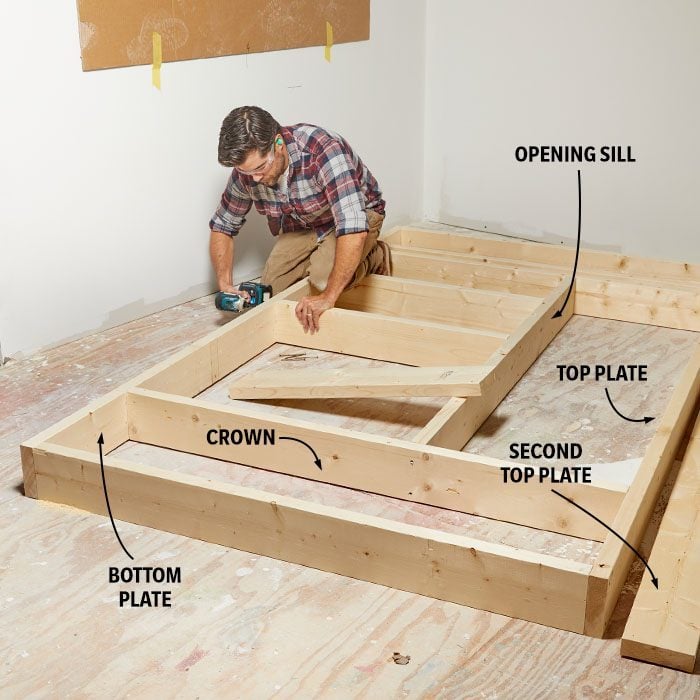
Build the Wall
After you cut the studs, separate the top and bottom plates and lay the studs in between. While you line up the studs on your layout marks, check them for a crown. If there is one, face it up.
For this small wall, I fastened the studs with screws through the plates, positioned the sill to the rough opening size, then capped the wall with a second top plate.
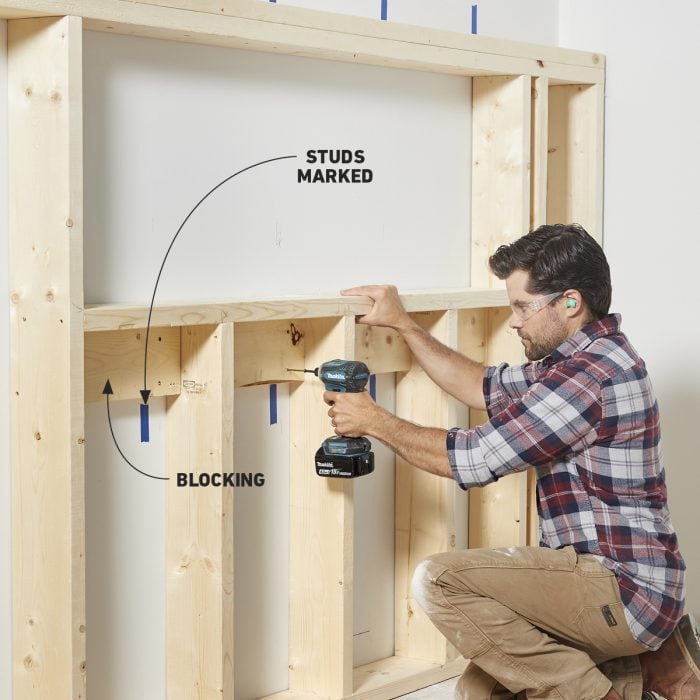
Secure to Studs with Blocks
To fasten the new wall in place, attach blocks between the studs, flush with the back of the wall. Then locate studs in the existing wall and drive screws through the blocks into the studs. If the existing studs line up with the new wall’s stud layout, toe-screw the top of the wall into the existing studs.
Fish the Cable
Building out a wall makes running the cable as easy as drilling a hole and pulling the cable through. Read the owner’s manual for your electric fireplace. Ours says, “Never overload the circuit” and “Avoid plugging other appliances into the same circuit as this fireplace.” This told me it should probably be on its own circuit for safety.
If there isn’t a dedicated circuit already in place, hire an electrician to install one.

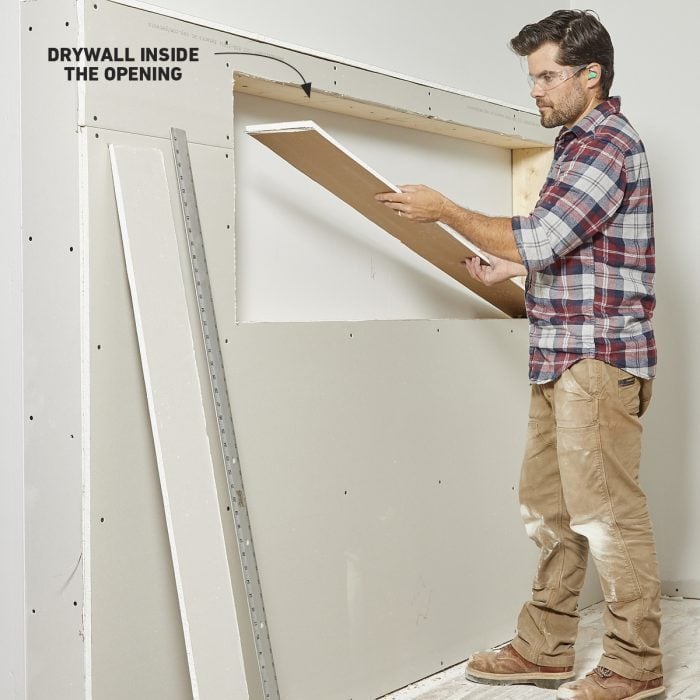
Finish the Wall
With the electrical cable run through the opening, I covered the wall with drywall, taped and mudded. The inside of the opening where the wood framing is exposed should also be covered with drywall to maintain the recommended clearance to combustibles.
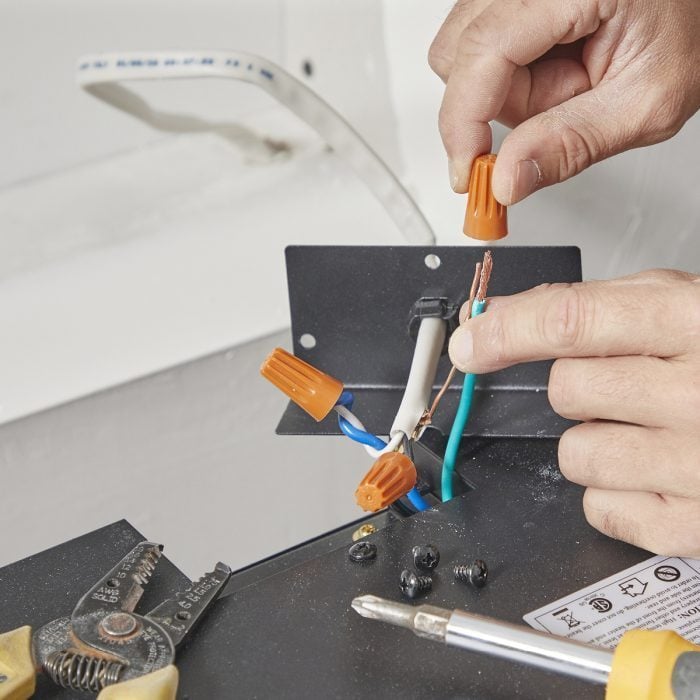
Options for Power
This fireplace has two options for power: Plug it into an outlet with the cord that’s attached, or remove the cord and hardwire it to a dedicated circuit. To plug it in, I would have needed to add an outlet, so I opted to hardwire it. I simply opened the cover and swapped the cord with the cable I fished through the opening.
Pro tip: Pull cable through an opening close to the wall and near the fireplace power cord.
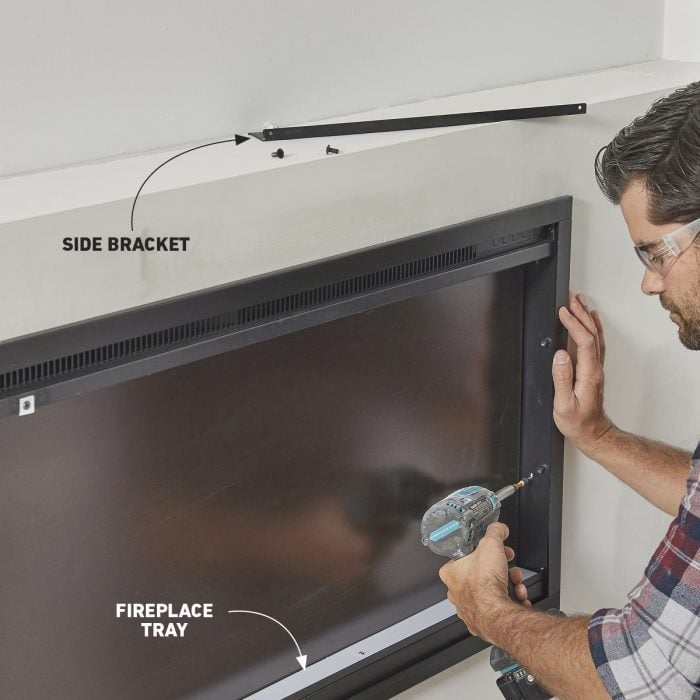
Fit and Fasten the Fireplace
Remove the glass panel and the side brackets inside to expose the holes for fastening the fireplace. I used the matching black 1-1/2-in. wood screws that came with the kit and drove them while pressing the fireplace tight to the wall. Once both sides were fastened, I replaced the side brackets.
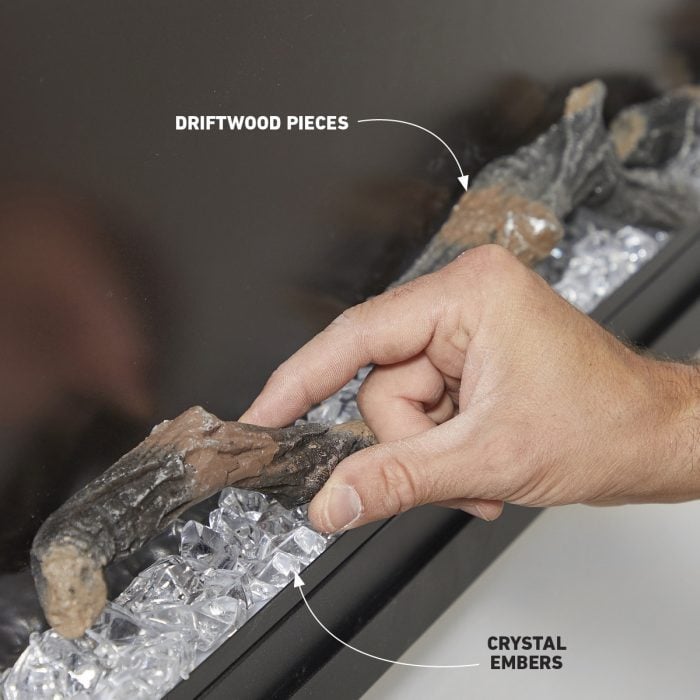
Add the Embers and Logs
I added the crystal embers to the fireplace tray and set the driftwood log pieces on top. The LED strip below the embers makes the crystals glow in different colors.
Replace the Glass Panel
After cleaning the fireplace screen and the back of the glass, I carefully set the glass panel in place and fastened it into position with two setscrews. Once we flip on the circuit breaker and paint our wall, this bathroom will be a warm and cozy retreat.
