How To Make DIY Wood Wall Art with Power Carving
 Updated: Feb. 23, 2022
Carve unique wall art with these awesome angle grinder attachments.
A full day
Beginner
$50-100
Introduction
An angle grinder is a simple, affordable and endlessly versatile tool. With the right attachment, you can grind, cut or polish metal, masonry and stone. You can also quickly sand wood, cut tile and clean away rust from metal.
I recently discovered a new attachment for my grinder: power-carving wheels. With these, I can shape wood and create reliefs and contours with ease.
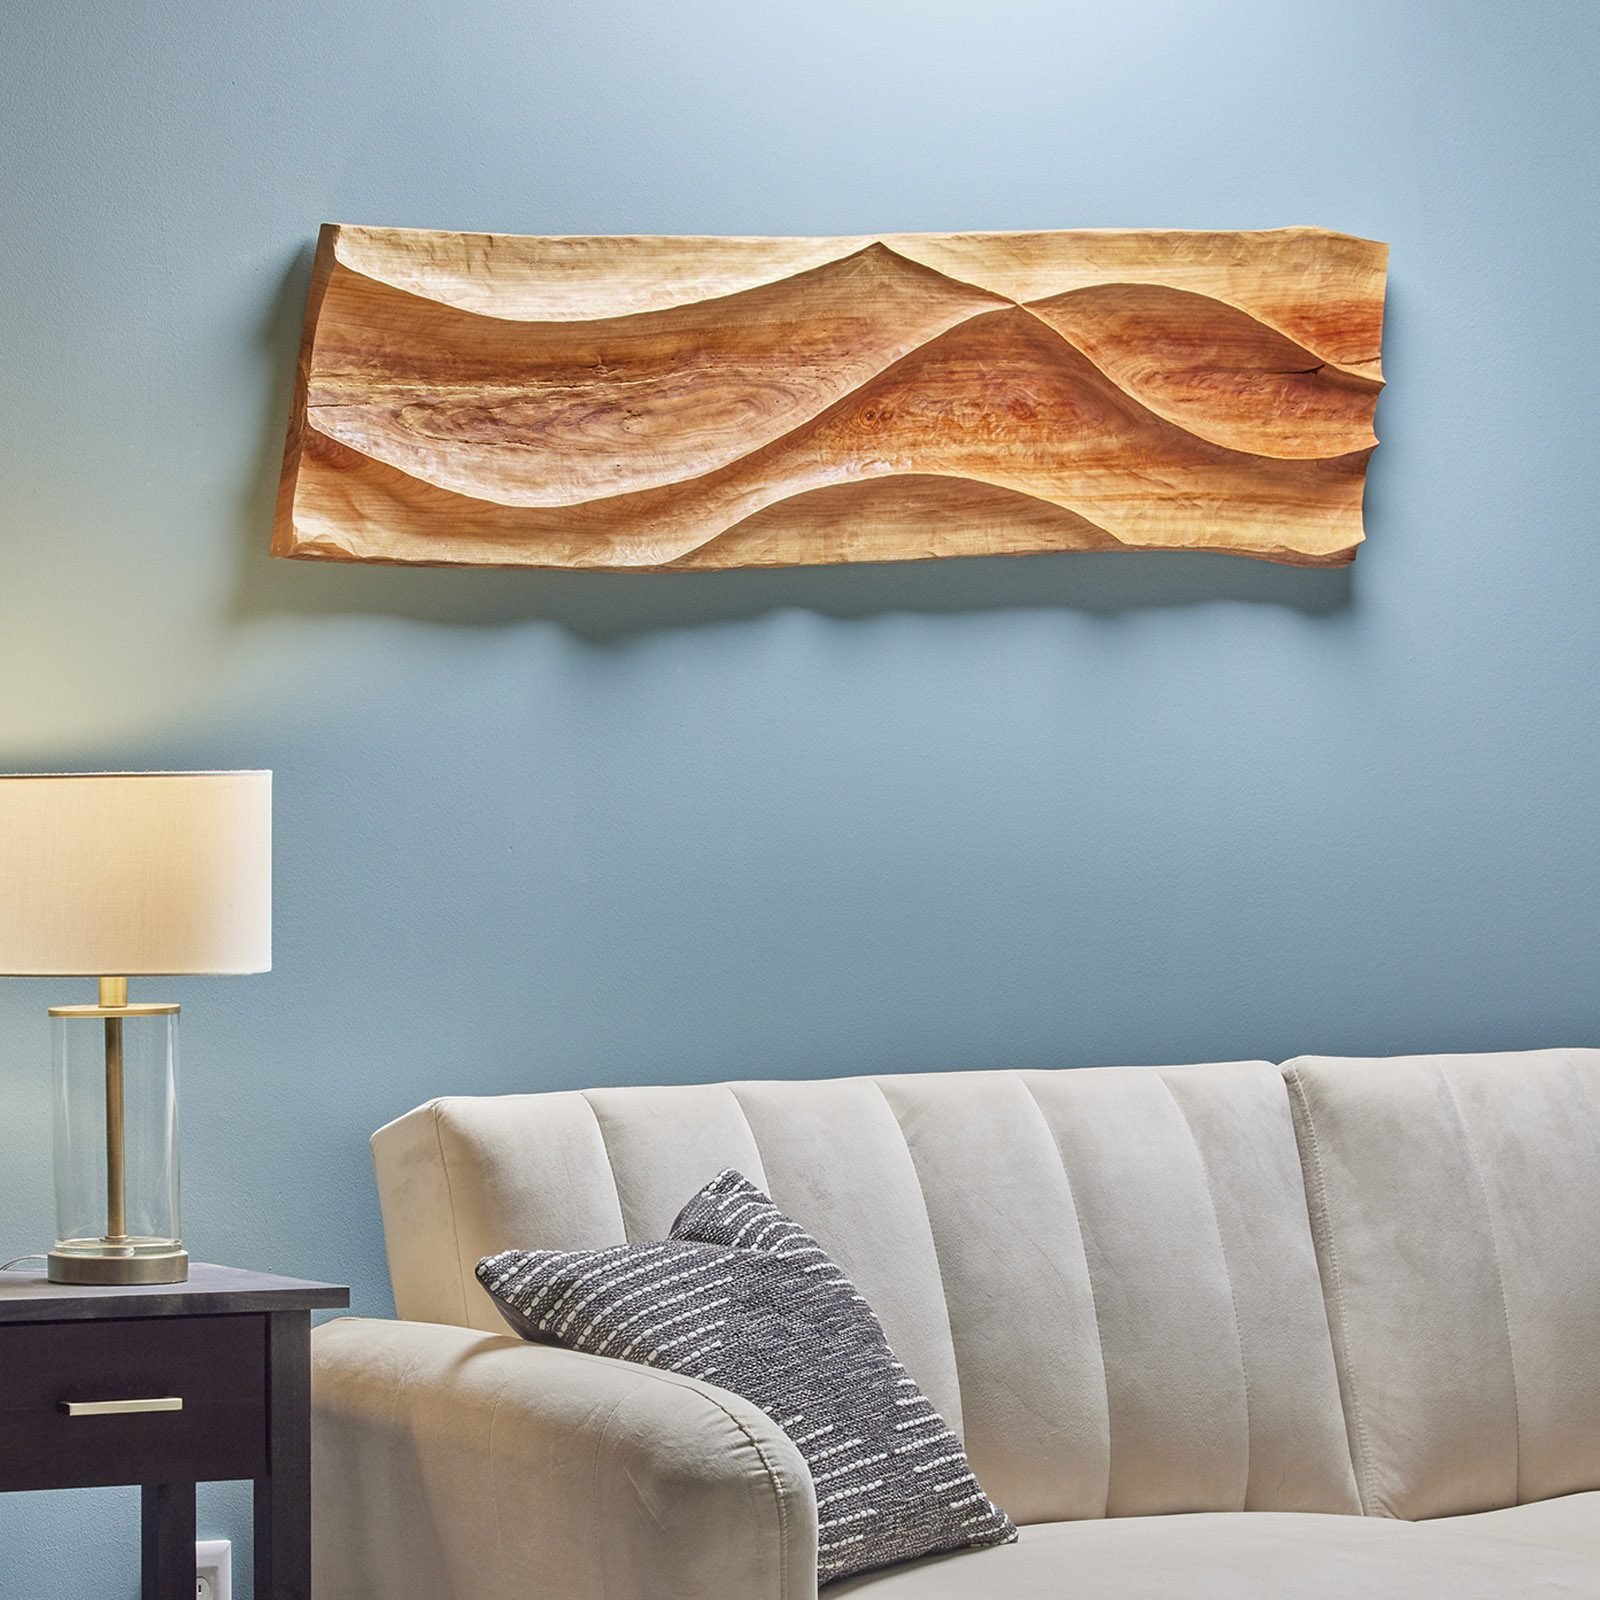
I had a rough slab of cherry that seemed unusable and was headed for a campfire. It was perfect for a power-carving test run. After a dusty day of carving, I ended up with a distinctive piece of DIY wood wall art.
Tools Required
- 4-1/2-in. angle grinder
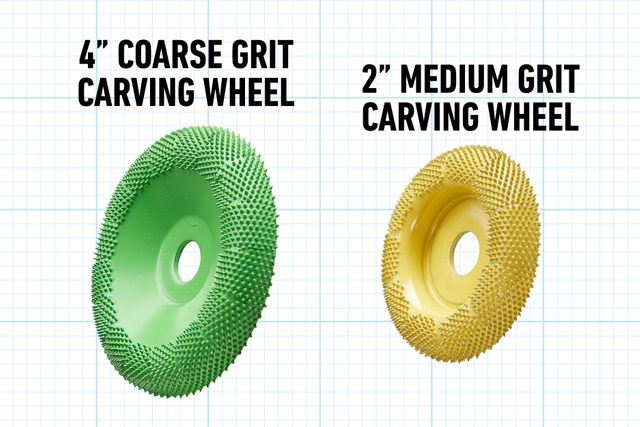
- 4-in. and 2-in. donut carving wheels from saburrtooth.com
- assortment of 1/8-in.-shank burrs
- Clamps
- Drill
- longneck 2-in. angle grinder
- Orbital sander
- Rotary tool
Materials Required
- finishing supplies
- Live Edge Slab

Take safety seriously
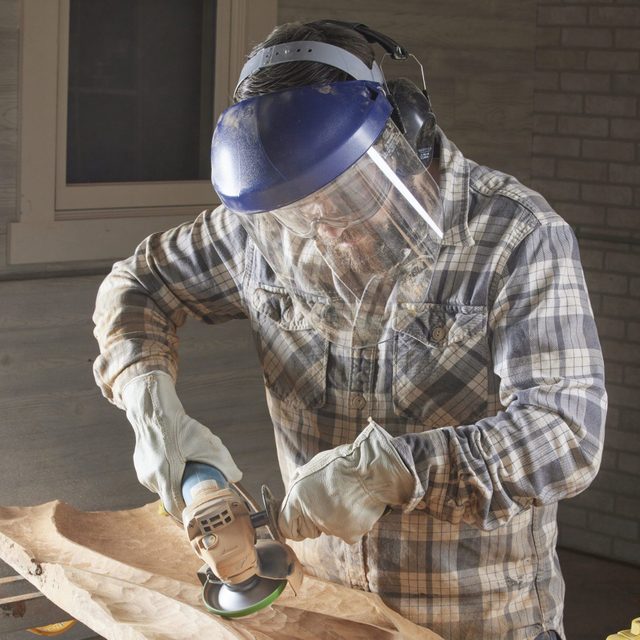
This DIY wood wall art piece was made with an angle grinder, a handheld tool that spins at 10,000 revolutions per minute (rpm) or more.
When a spinning carving wheel hits the wood, the dust and wood chips fly everywhere. A face shield is a must; I go with safety goggles and a long-sleeved shirt, too. Because my hands are so close to the wheel, I always wear gloves and keep the side handle in place. Clamp down your workpiece and make sure the chips are flying away from anything they can harm.
Project step-by-step (7)
Draw the Contours for the DIY Wood Wall Art
To make my DIY wood wall art design (see Step 7), I began by drawing lines to indicate the highest contour — the peaks. I followed the grain but also deviated from it to create interesting crossing patterns. Sketch your lines with a pencil. Once you like the shapes, go over them with a white china pencil.

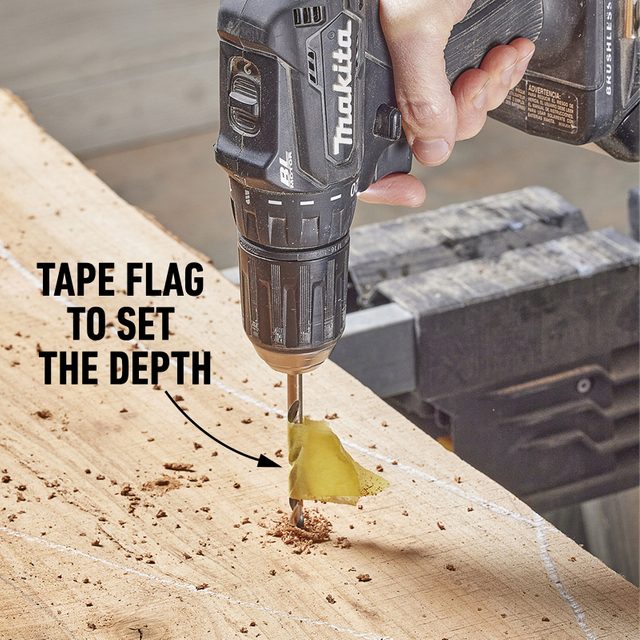
Define the Depth
To establish a consistent depth for the valleys, I drilled holes every few inches between my lines. I marked the depth with a tape flag on a 1/4-in. drill bit before drilling. You can skip this step if a consistent depth isn’t important.
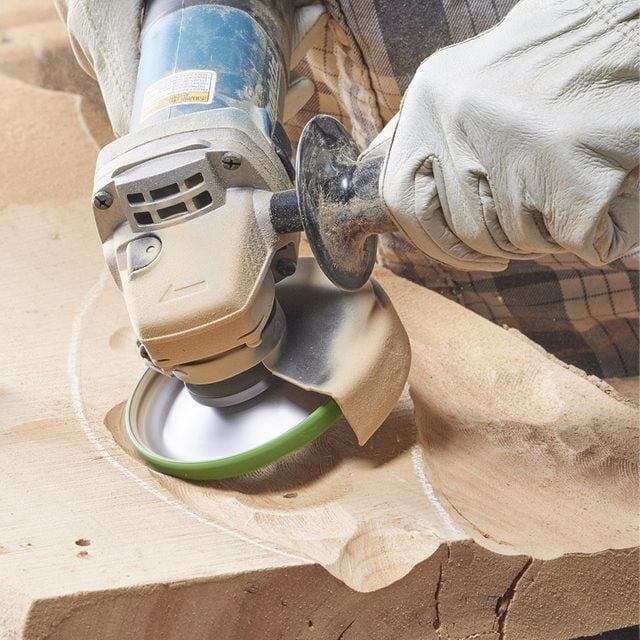
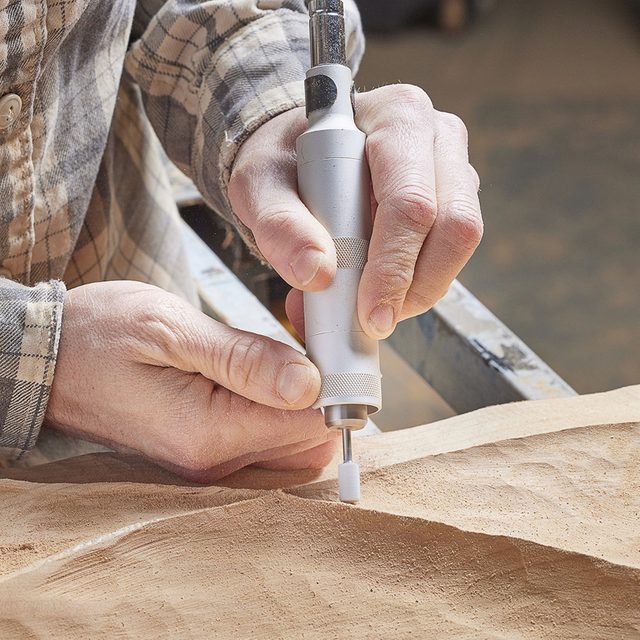
Shape the Contours
With a coarse-grit carving wheel, I removed material between the lines, carving until the 1/4-in. holes disappeared. I started in the middle of the valleys and carved slopes toward the peak lines. Once I removed most of the material, I switched to a medium grit, then finished with a fine-grit carving wheel.
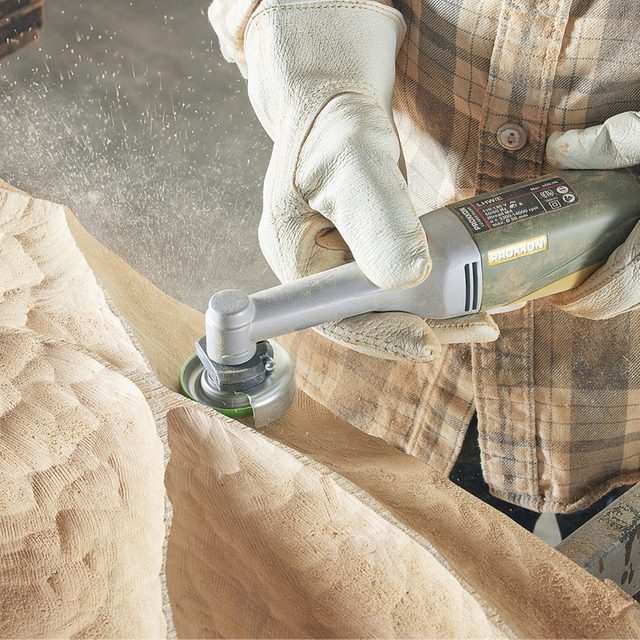
Two-Inch Wheel for Precision
To carve with more precision and reach areas the four-inch wheels couldn’t, I used two-inch carving wheels with this special longneck two-inch angle grinder by Proxxon.
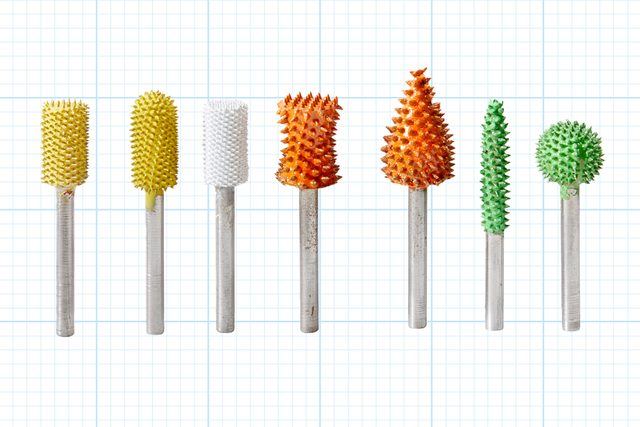
Refine the Shape with Burrs
Available in similar grits and many shapes, these 1/8-in.-shank burrs allow you to shape details in smaller crevices. The burrs fit into many rotary tools and are especially easy to use in rotary tools with a flexible shaft.
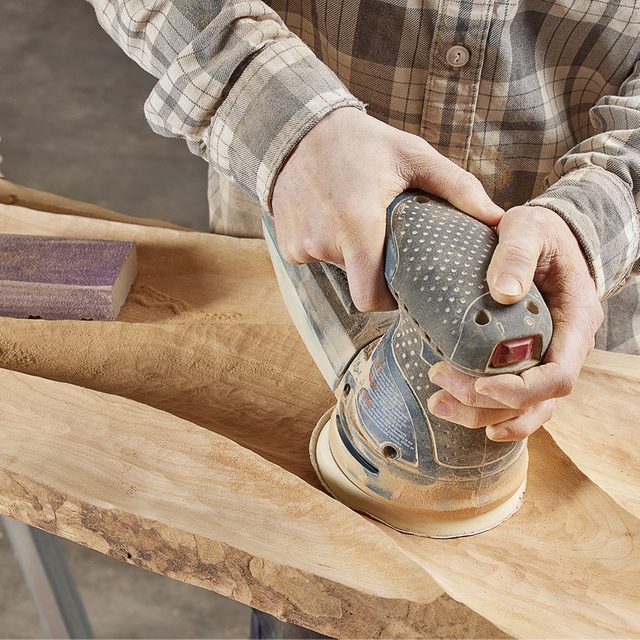
Sand it Smooth
I sanded this piece with 80-grit through 180-grit sandpaper. I used an orbital sander where it would fit, then switched to sanding sponges to follow the contours. Depending on the look you’re after, sanding could be the slowest, most labor-intensive part of the project.
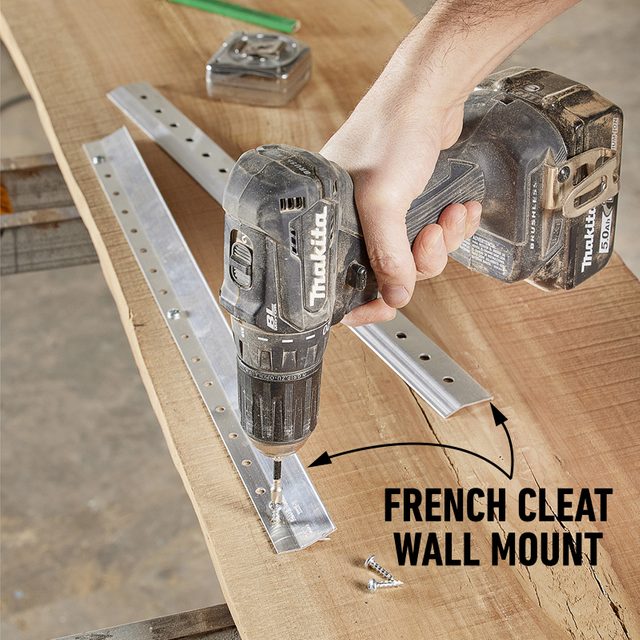
Fasten the Cleats and Hang the DIY Wood Wall Art
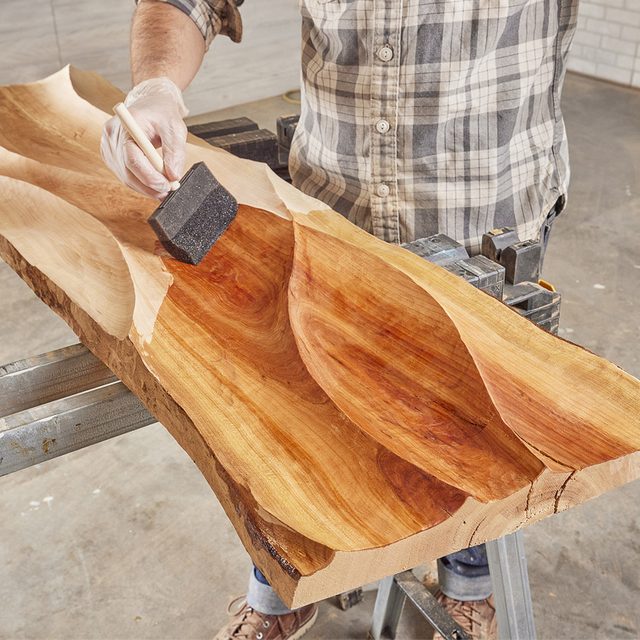
Brush off the dust and wipe the surface with a damp microfiber cloth. When the wood is dry, apply your favorite finish.
To hang it, I marked a level line on the wall, located the studs and secured the wall cleat. Then I fastened the mating cleat on the back of the slab and displayed my new DIY wood wall art.