How to Build Custom Composite Benches
 Updated: May 06, 2022
Here's how to build maintenance-free seating out of framing lumber and composite decking.
Two days
Intermediate
$501-1000
Introduction
We all want to sit back and enjoy the best weather in our backyards. That’s why we chose to build this custom-fit bench with composite decking. No need to spend precious summer hours keeping up its appearance — there will be no sanding, re-staining or replacing warped or splintered wood.Tools Required
- Circular saw or miter saw
- Drill/driver
- hidden fastener installation tool (recommended)
Materials Required
- 3-in construction screws
- Composite decking screws
- Pressure treated 2x4s
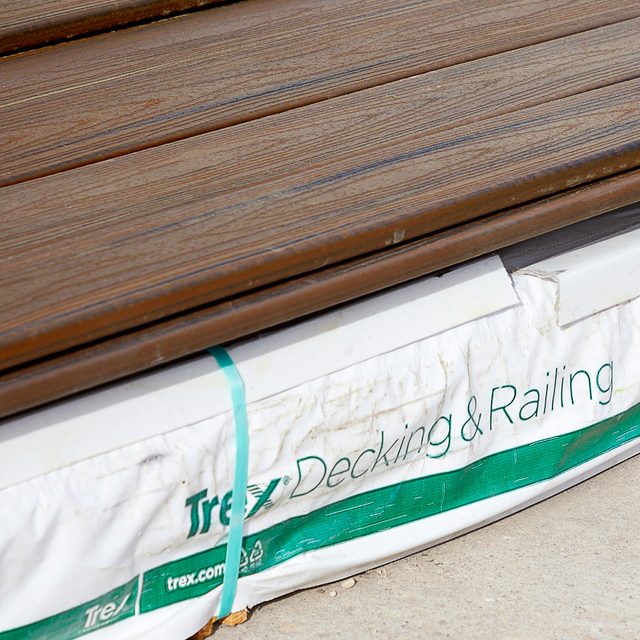
- Trex Transcend deck boards
- Wood glue
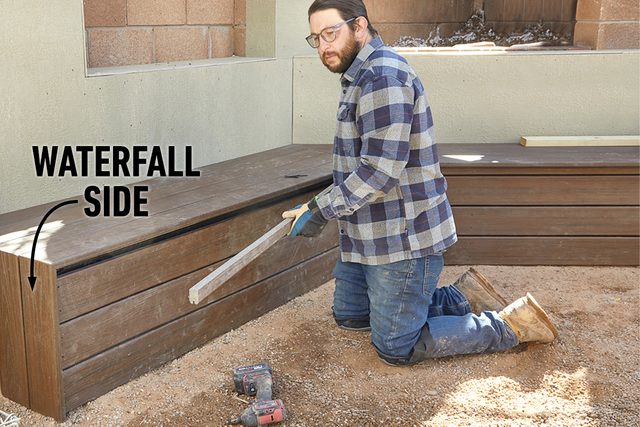
We built our bench to fit against an angled wall and between two gabion walls, but you can modify the plans to fit your own space. We designed the bench to have waterfall sides to hide the cut ends, but you could change this detail to simplify it further.
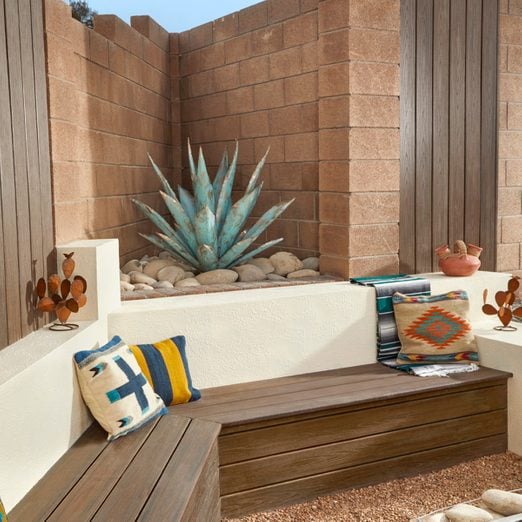
The bench can be built in just a couple of days, and the composite decking has the beautiful look of hardwood — without the hassles.
These benches are built against this angled block wall and in between two gabion structures. But they can be easily modified to fit your own space and to stand alone. Our surface was level, so all we needed to do was compact it with a tamper before we began.
Project step-by-step (12)
Lay Out the Bench With 2x4s
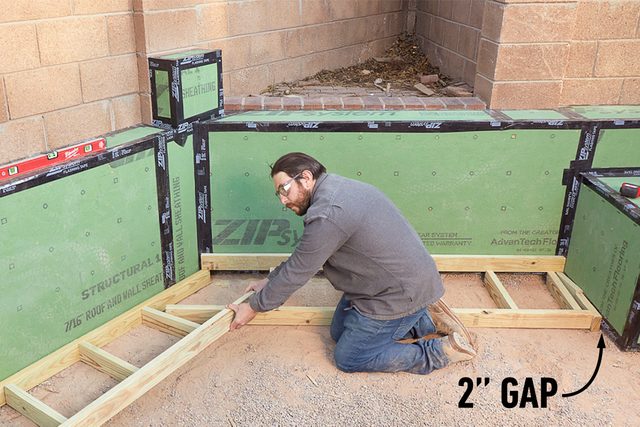
To determine where to place your bench and its approximate size, lay out 2x4s to outline the base. This will give you a good visual for the bench’s placement and length.
- Pro tip: We left a two-inch space between the framing and the abutting walls to allow room for decking and to make installation easier.
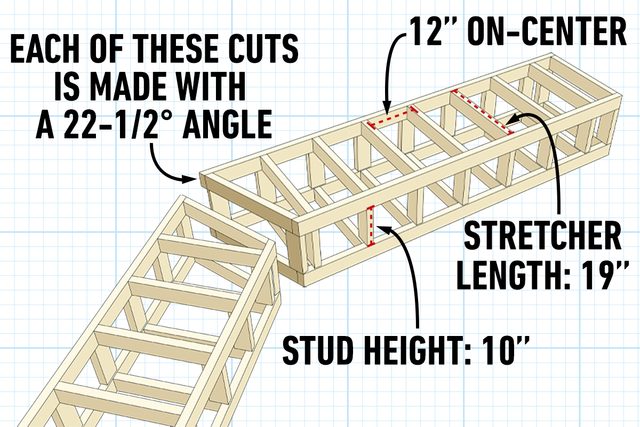
Determine the Miter Angle
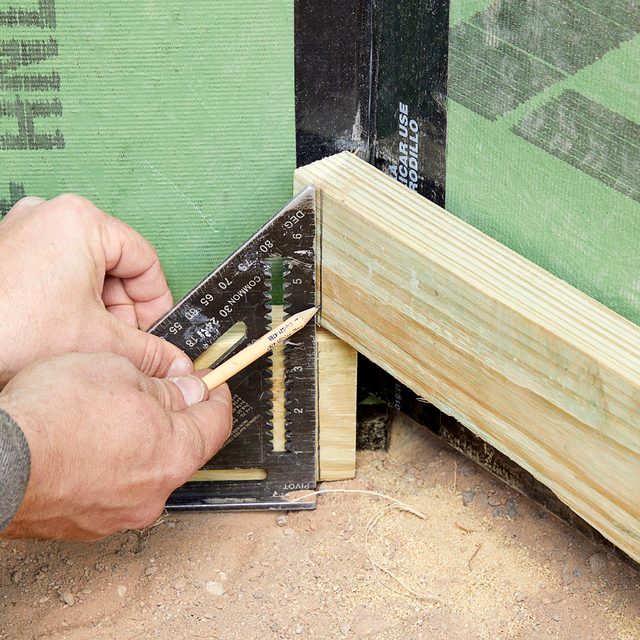
Find the intersection
- Stack the 2x4s so their corners fit into the angled wall.
- With the boards pressed against the walls, hook the fence of a speed square under the bottom board and slide it toward the corner until it contacts the adjacent board. Then trace a line on both faces.
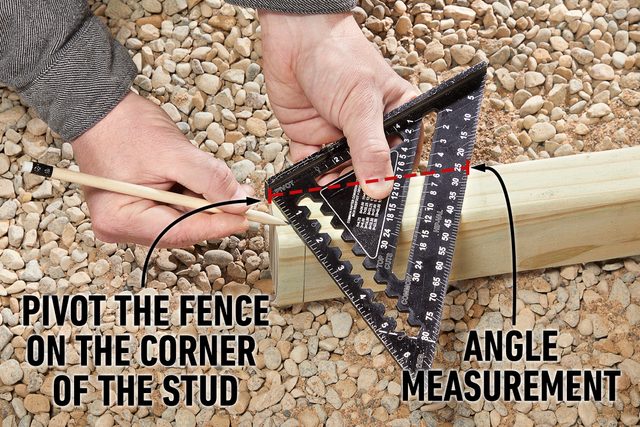
Connect the Dots
- Remove one of the 2x4s from the corner and align the square’s fence with the corner that was against the wall.
- Pivot the fence until the opposite edge of the square lines up with the mark, then trace a line. The square works like a protractor to give you the angle measurement.
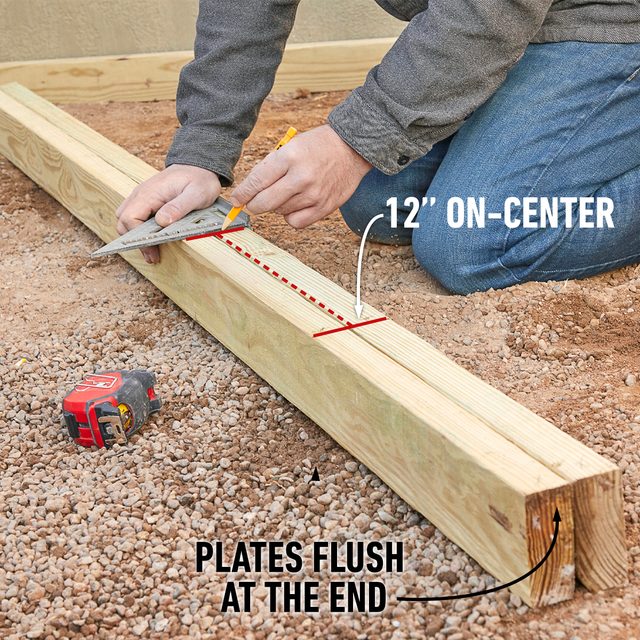
Mark the Plates
The top and bottom of the bench are identical, and each is built like a really short wall. We started by marking the stretcher locations on the plates.
- With the plates cut to length (and miter angles cut), flush the end and mark stretcher locations 12 inches on-center with a Speed square. Repeat this for all four pairs.
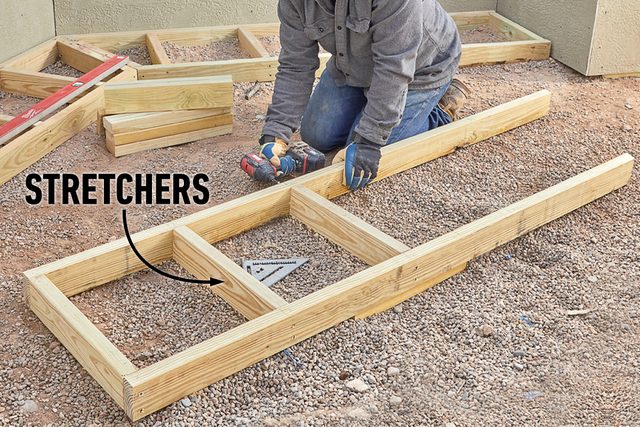
Build the Base and Top
- Space the two plates apart and nail or screw the stretchers through the plates.
- Pro tip: With our angled bench design, we built two matching pairs and then placed them against the corner to make sure they fit. If the miter is tight when the two sides are against the wall, cutting the deck boards to fit will be much easier.
Attach the Studs
- Place one of the top sections on a work surface, and then align the studs with the stretchers and flush with the edge.
- Toe-screw each stud into the top/bottom with 3-in. construction screws.
- Once the studs are attached to the top, align the bottom with the studs and toe-screw the bottom to the studs.
- When the section is flipped upright, all the screws will face upward, preventing water from entering and rotting the wood.

Add Worry-Free Cladding
To clad the bench, we chose the Transcend line of decking by Trex. It’s a wood/plastic composite without a scalloped bottom. The solid bottom makes it easy to secure composite fasteners through the face. It also lets us achieve a small overhang along the edge of the decking.
Miter-Fold the End
For this bench, we wanted to avoid three things: a picture frame design; ugly cut ends; and gaps at a mitered edge, which would collect debris over time. We decided to try a folded-miter technique to create a waterfall look on the sides.
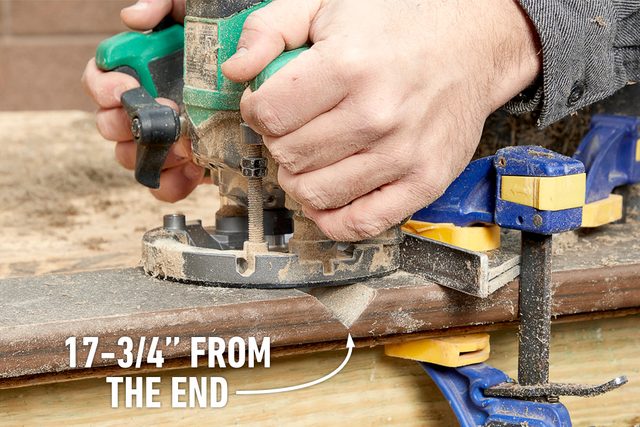
- Trace a line 17-3/4-in. from the end of the decking and lined up the point of a large 2-in. V-groove bit with the line.
- Make several passes, cutting with a Speed square guide, to make a deep groove on the underside of the board. Leave just under 1/8-in. of thickness at the deepest part of the groove.
- Pro tip: You can also achieve this with a circular saw with two precise, opposing 45-degree bevel cuts.
Heat Up and Fold the Corner
- Hold the board over the edge of the bench and slowly warm the surface with a heat gun until it folds by itself. Don’t overheat it; the cap of the decking will melt or break while folding.
- Once you get the board to bend, apply wood glue and then install the deck boards.

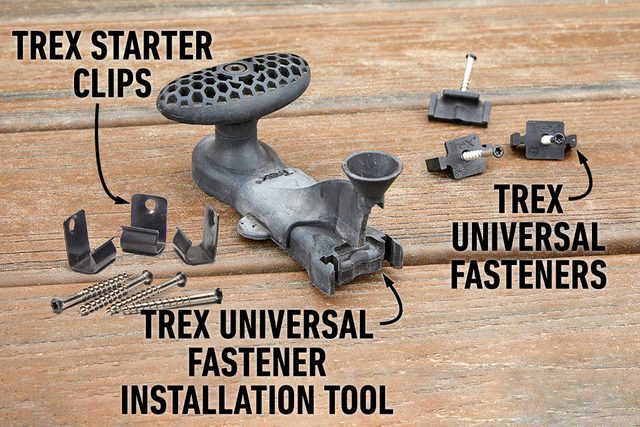
Proper Fasteners Are Key
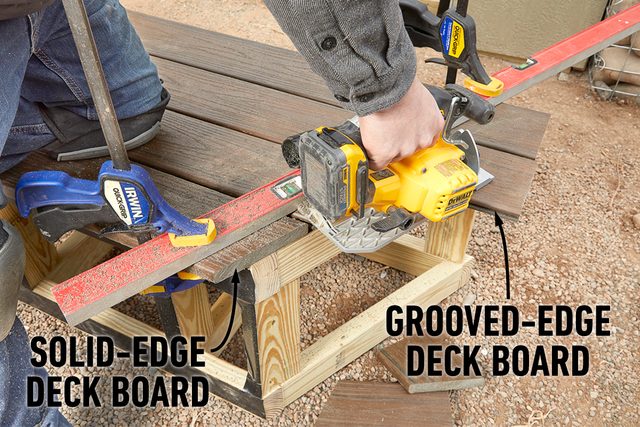
- To clad the bench with decking, start with the top and fasten a solid-edge (no groove) board, letting it overhang the front framing by two inches.
- Solid-edge deck boards are fastened with composite screws and matching plugs through the faces of the boards.
The next board is grooved and slides into a J-shaped clip fastened to the framing to maintain a 3/16-in. gap. T-shaped hidden fasteners hold down the boards “in the field.”
Trim the Angle
- Leave the boards on the bench top long until the entire top is fastened.
- Then set up a straightedge and cut the boards flush with the framing using a circular saw or a track saw.
Finish the Front
- Once we built both sides of our bench, we dropped them into place, joined them with a few construction screws, then attached the deck boards on the front.
- We placed starter clips 1/4-in. from the bottom of the framing to fit the bottom course of decking and worked our way up the front.