How to Create This One-Of-A-Kind Children’s Growth Chart
 Updated: Nov. 03, 2022
Learn how to make custom wood inlays while creating this unique growth chart.
Two days
Intermediate
$100 - $200
Introduction
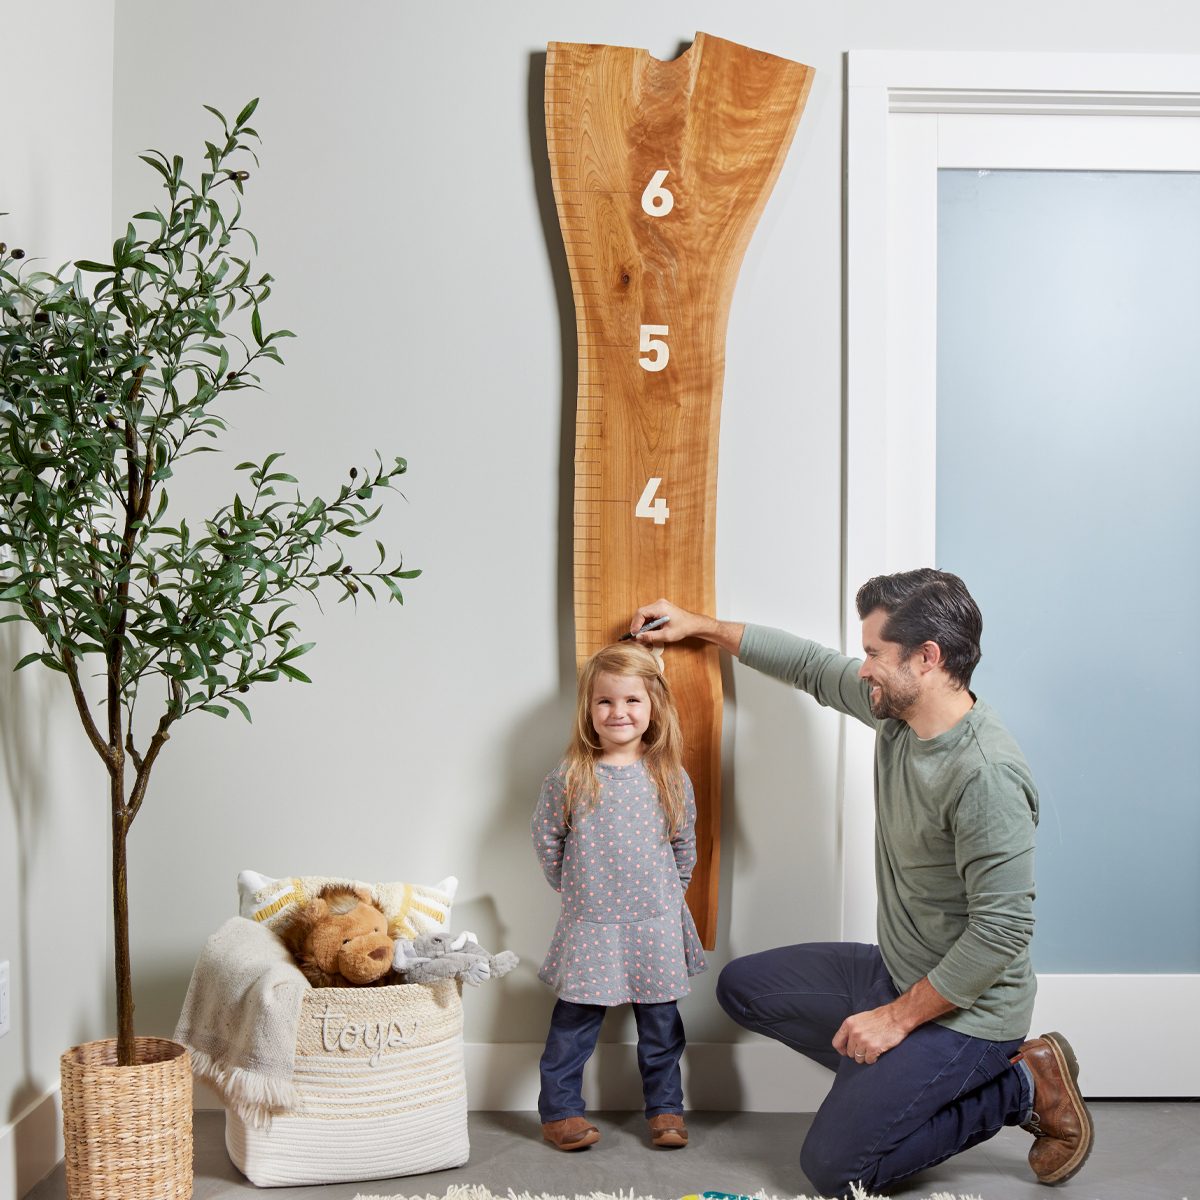
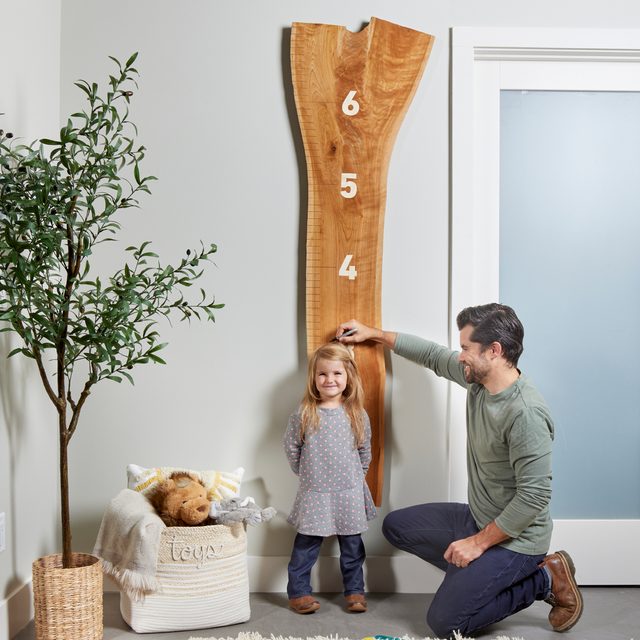
As with many projects on my ‘want to do’ list, this growth chart has been on the books for a long time. I planned this one six years ago when my first child was born. Now that I have three kids who need heights recorded, I figured it was about time to get after it.
I wanted something unique, so I designed this chart to fit a live edge slab of cherry wood and added custom maple inlays to mark each foot measurement. You can apply this custom inlay technique to make inlays of any shape for various personalized projects.
Tools Required
- 1/8-in. downward spiral bit
- Basic hand tools
- Chisel set
- Clamps
- Compact router
- Drill/driver
- Marking knife (optional)
- straight edge
Materials Required
- ¼-in x 6” x 4’ maple board
- Cherry wood slab
Project step-by-step (18)
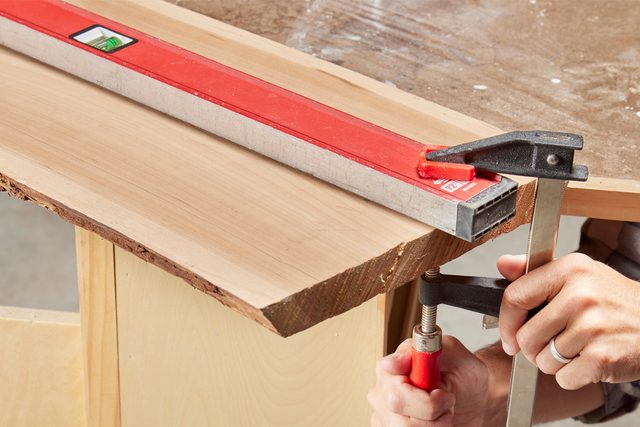
Clamp a Straightedge Down the Center
Establish a line near the center of the slab from the bottom to the top and clamp a straightedge along it. This will be a straight line and a plumb reference to hang the chart on the wall, allowing you to make perpendicular hash lines to identify inches and feet.
Scribe Along the Edge
I set the combination square ruler at 2-in. and used it as a guide to scribe down the edge of the slab. This line will give you a stopping point from the edge of the slab for all the hash marks you’ll be making. You can also do this with a compass or tape measure.
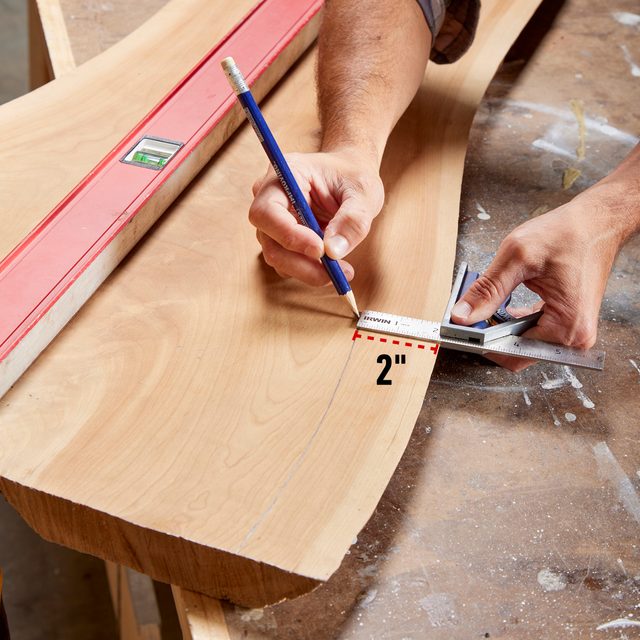
Mark the Inches
Hook your tape measure on the bottom of the slab and make a mark near the straightedge at each inch on the tape. These marks are a reference to keep the hash marks perfectly spaced. They don’t indicate where the hash marks will be, but will give you something to line up your speed square in the next step.

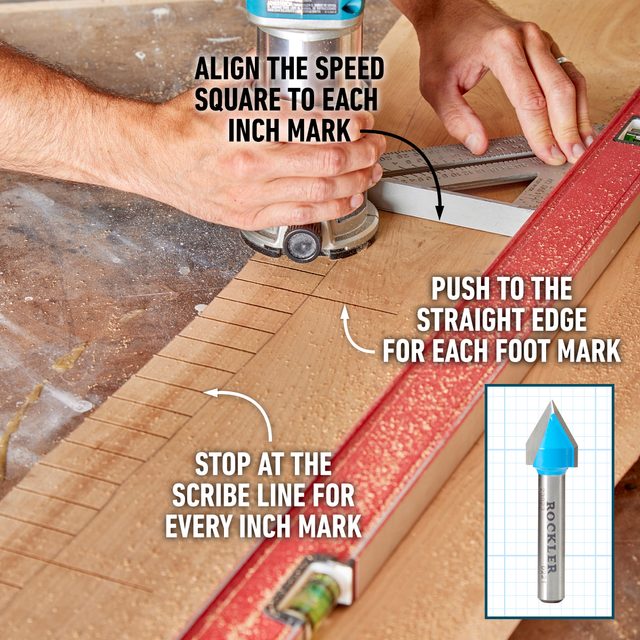
Cut the Hash Marks
I used a 60-degree V-Grove bit in a compact router to make 1/8-in. deep cuts for the inch-and-foot hash marks. I did this by aligning a speed square against the straightedge at each inch mark.
For every inch hash mark, stop the bit at the scribed line. For each foot hash mark, push the router to the straightedge.
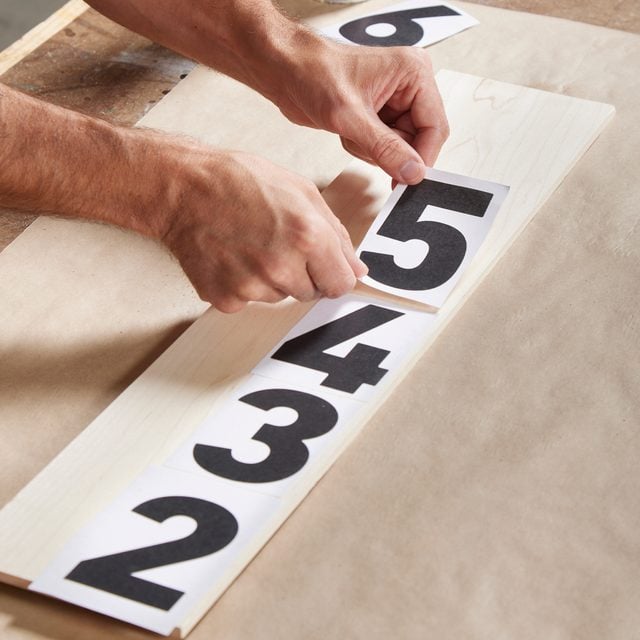
Secure the Pattern
For this project I used 1/4-in. maple to make the inlays. After figuring out the sizing of the number inlays, I printed them, cut them out and used spray adhesive to adhere the pattern to the board. This gives me a perfect pattern to follow as I cut out the inlays.
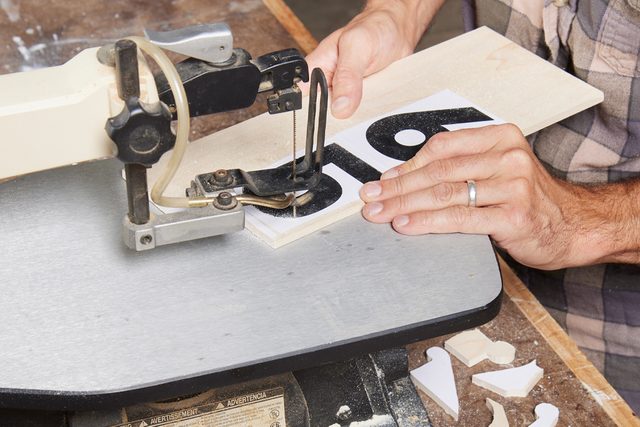
Cut Out the Inlays
A scroll saw is my preferred tool for cutting out the inlays, because the small blade makes it easy to turn tight corners and follow curves.
Moving and turning the maple board to follow the pattern is easy when moving slowly. Try to cut out the entire pattern instead of cutting it out in smaller parts. It makes a continuous outline that will require less sanding afterward.
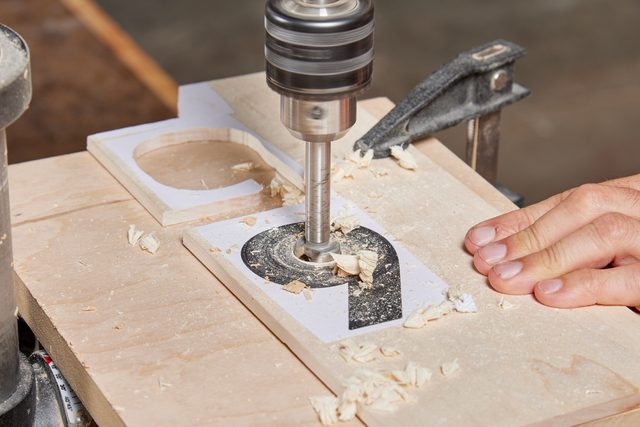
Drill Out the Holes
To cut out the enclosed parts of the pattern, I started at the drill press by matching a Forstner bit to the size of the hole. A Forstner is an essential drill bit in any woodworker’s shop. In this case, the shape I had to cut out wasn’t a perfect circle. So I removed the blade from the scroll saw, fed the blade into the hole and finished cutting out the shape.
Clean the Edges
With the shapes cut out, I needed to smooth the rough saw marks and any jagged edges left by the scroll saw. I set a sheet of 150-grit sandpaper on my workbench and ran the edges of the shapes along it until they were smooth. I used smaller strips or rolled up sections to reach the nooks and crannies of the inlays.

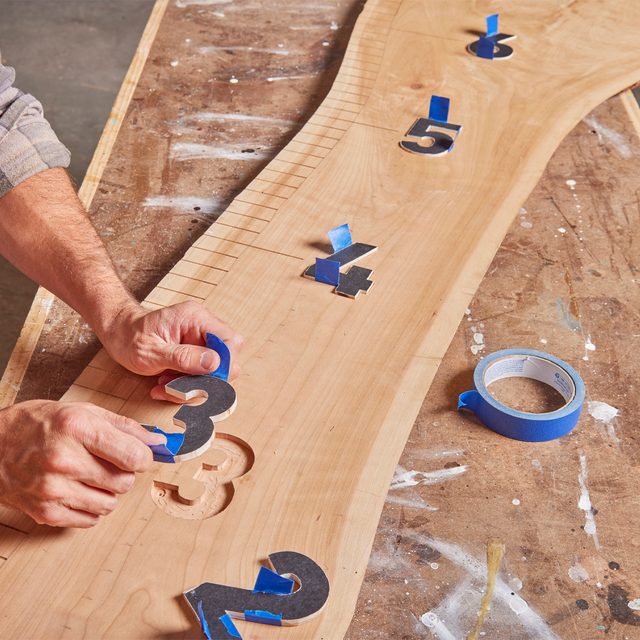
Trace the Inlays
Position the inlays on the slab and hold them in place temporarily with double-sided tape. I used a fine marking knife to trace around the inlays. The knife scores the slab transferring the shape into the wood.
Scoring the fibers of the wood like this will also help leave a clean cut when removing the material with the router. If you don’t have a marking knife, a sharp pencil will also work.

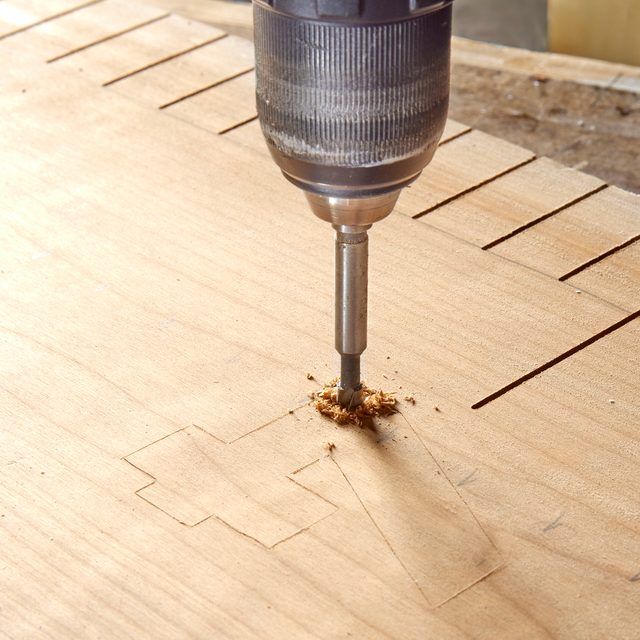
Drill an Access Hole
We’ll use a router to remove the wood to make room for the inlays. Plunging the router into the wood without an access hole like this is not safe unless you’re using a plunge base. To give the router room to remove material, I drilled a 3/8-in hole 3/8-in. deep within each of the shapes.
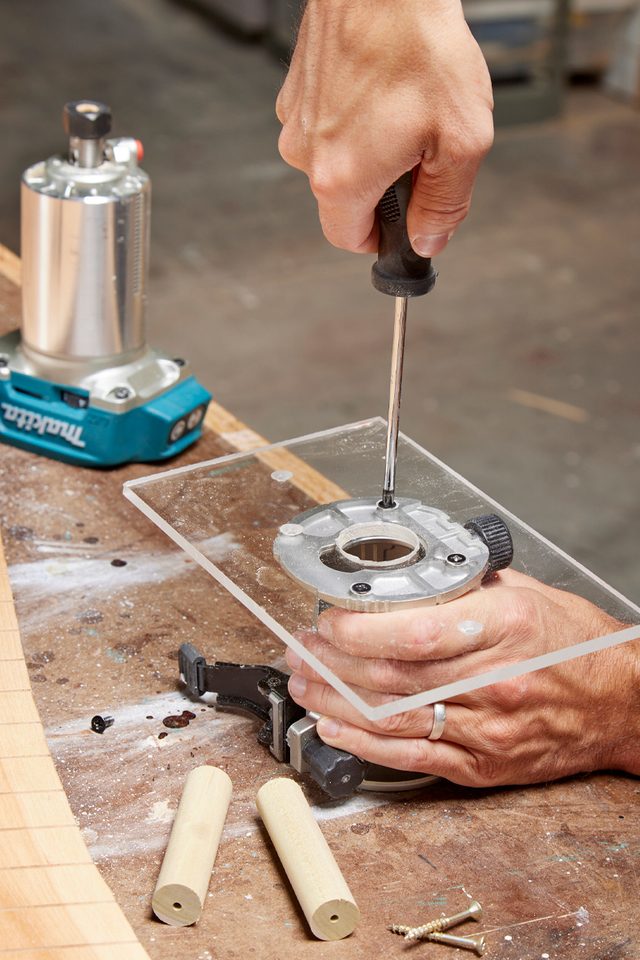
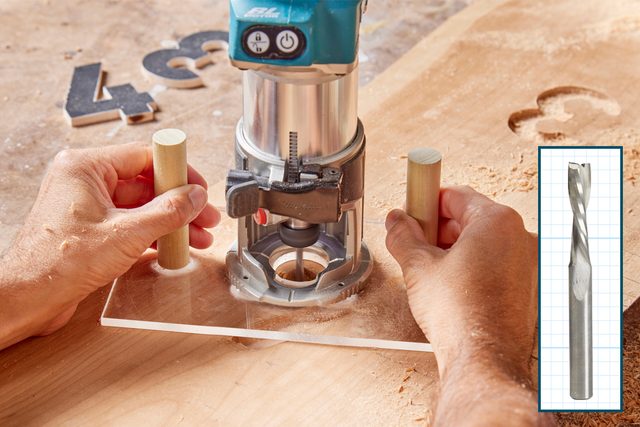
Create a Custom Router Baseplate
This fine detail routing is difficult while safely gripping even the most compact routers. So when removing material for inlays, I like to use a custom baseplate that lets me more easily see what I’m cutting and grip the tool to make more precise movements.
I started with 10-in. by 6-in. piece of 1/4-in. acrylic, placed in the router’s original base plate in the center. Transfer the screw locations onto the acrylic. Drill the mounting holes with a countersink bit and a center hole with a 1-in. Forstner bit. Use the router’s mounting screws to fasten the new baseplate to the router base.
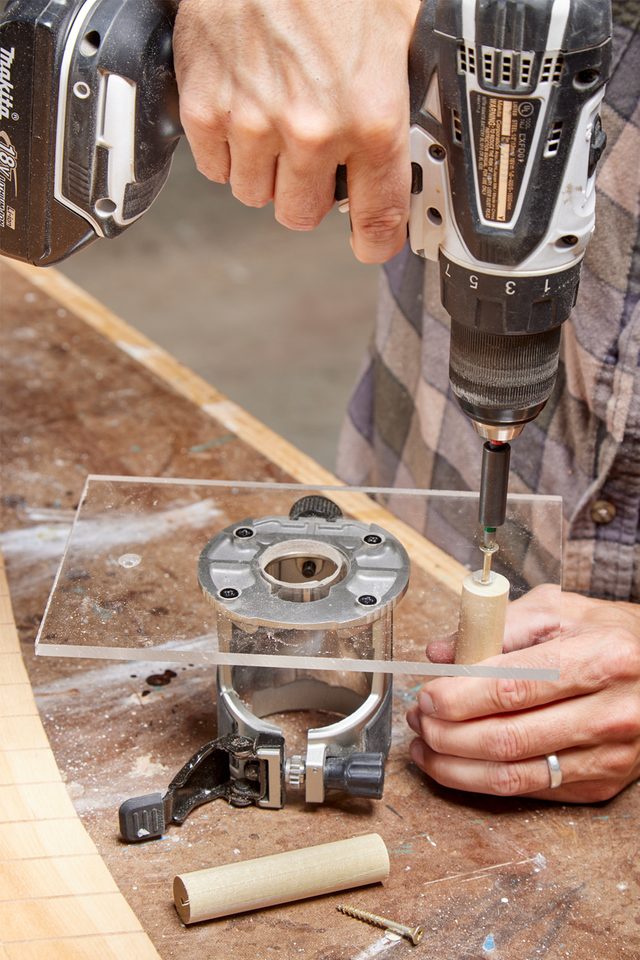
Add Handles
You can use just about anything for a handle — cabinet knobs, even just a piece of small scrap. I chose a short length of 3/4-in. dowel rod. No matter your choice for a handle, drill two more countersunk holes, one on each side of the router, and fasten the handle through the bottom of the base.
Route Out The Slab
I carved out the material within the inlay outlines in two steps.
First, I set up the router with a 1/4-in. downward spiral bit to a depth a hair less than the thickness of the inlays. Then I lowered the bit into the hole drilled in the previous step and carefully removed the bulk of the material within the inlay outline, staying well inside the outline. Next, I switched to a smaller 1/8-in downward spiral bit to get even closer to the outline.
Pro tip: Any straight bit will work for this. But a downward spiral bit pushes the wood fibers down, making clean-cut edges that are free of splinters and chip-out.
Chop the Corners
The small 1/8-in. bit can get right up to the outline of the inlay, but will always leave a rounded corner. Sharpen up the corners and any other area that need slight trimming with a set of sharp chisels. Line up the chisel with the outline, then chop downward to remove the material.

Check the Fit
Once all the material is removed and the edges and corners of the recess are cleaned up, it’s time to check how the inlays fit. Do this before gluing them in permanently.
To prevent the inlay from getting stuck inside, I made two tape tabs on each inlay. That way I can check their fit and pull them out with the tabs.
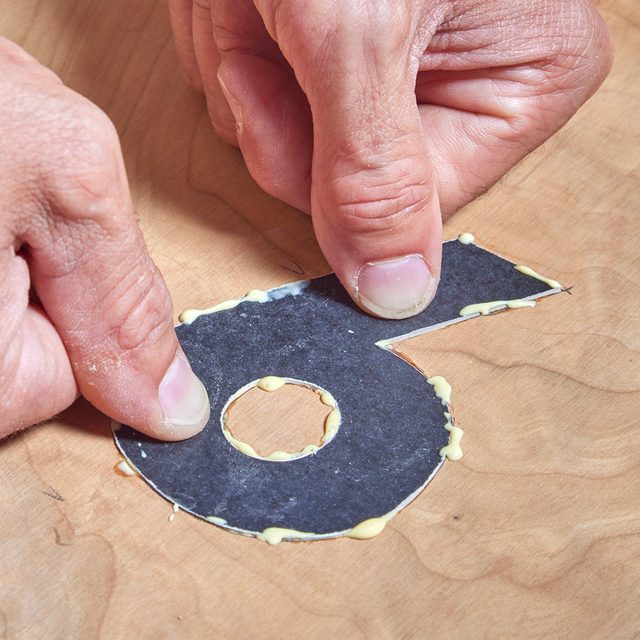
Set the Inlay
Spread a layer of glue on the bottom of the recess. Spread the glue to the corners and up the sides of the recess, then carefully press the inlay in until it sits just about flush with the surface of the slab. Wipe away any excess glue and scrape the paper off the inlay. Then sand the inlay flush.
A Better DIY Wood Filler
Let’s face it, gaps happen, especially in patterns with tight corners and curves. Many like to mix sawdust and wood glue for a homemade filler to match the wood being used. But the wood glue won’t accept stain or finish, which will stand out among the beautiful wood grain.
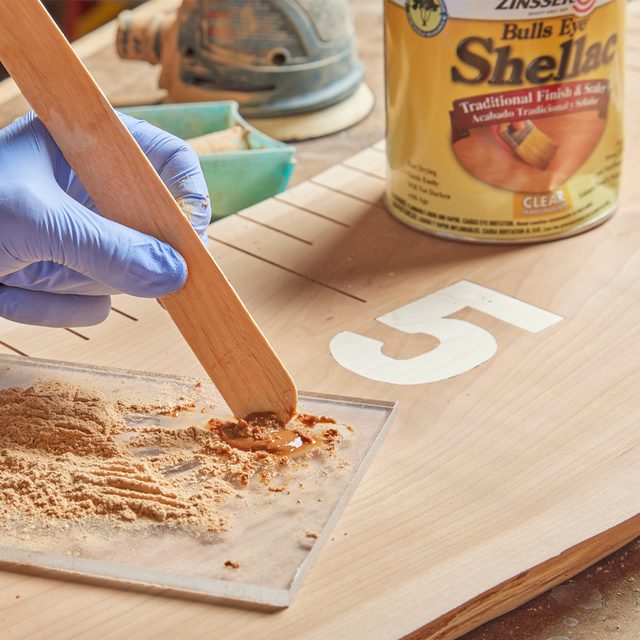
Instead of wood glue, I used shellac, which is stainable and will blend in with the rest of the wood after applying the finish.
Make the paste
Start with a pile of sawdust from your orbital sander. It works best if you empty out the dust collection container, then sand down your project.
Empty the saw dust onto a surface for mixing; I used a piece of leftover acrylic. With a small stir stick, drip shellac onto the sawdust. Mix it up until it forms a wet paste. Work quickly in small batches; shellac dries fast.
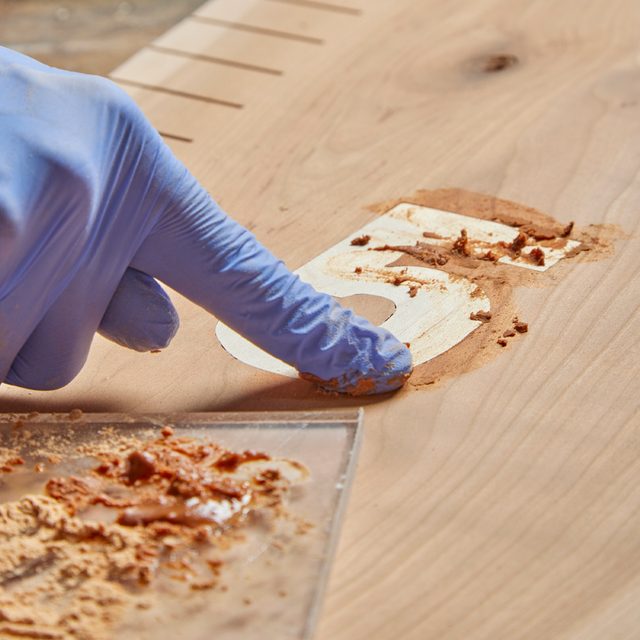
Fill the gaps and sand
Spread the paste along any gaps in your project and rub it in with a gloved finger. If the paste starts to dry, add a few drops of shellac and mix it. When the gaps are filled, wait a few minutes for the filler to dry. The filler can be sanded down during the final sanding.
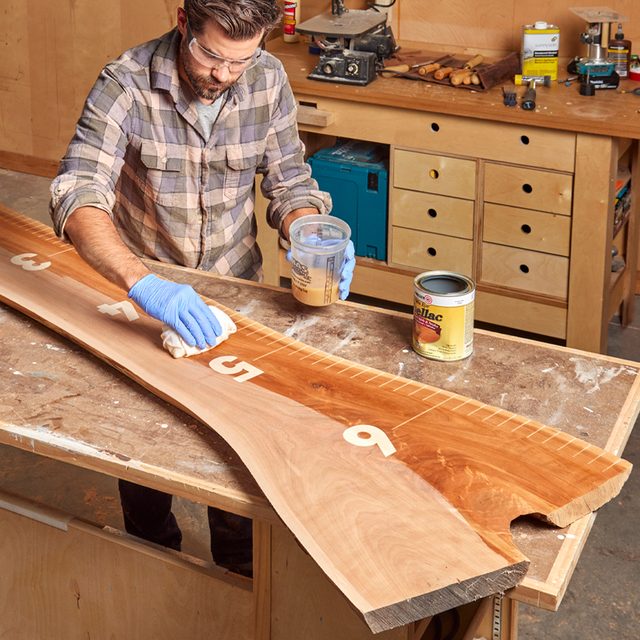
Finish
To finish the growth chart and protect it for years, I applied several coats of shellac. It works really well because it dries so quickly. I can do several coats in a day. Shellac is also an easy finish to repair, which will be necessary when hung in a kid’s room. Once the finish cures, it’s ready to hang.