
One-Day DIY Patio Garden Pond
 Updated: Oct. 08, 2022
Buy PDF & Cut List If you can build a box, you can do it!
A full day
Beginner
$101–250
Introduction
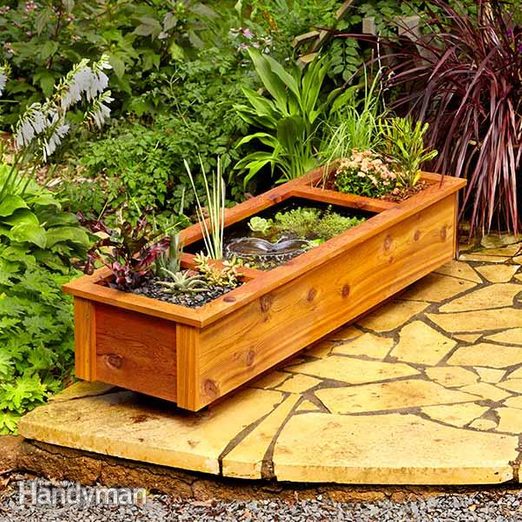
One expert shares his design for a patio pond in a wooden container that holds both water plants and regular plants.Tools Required
- Caulk gun
- Circular saw
- Clamps
- Cordless drill
- Framing square
- Hacksaw
- Paintbrush
- Putty knife
- Tape measure
Materials Required
- 1-1/4" x 1/16" x 4' aluminum angle stock (1)
- 1x12 x 12' rough-sawn cedar (2)
- 1x6 x 8' rough-sawn cedar (3)
- 2x4 x 12' cedar-tone pressure-treated lumber (1)
- Gallon of liquid rubber
- Small box of 1-1/2" exterior trim-head screws
- Small box of 1-1/4" drywall or cabinet screws
- Small box of 3" screws compatible with pressure-treated lumber
- Small box of 3/4" screws
- Tube of construction adhesive
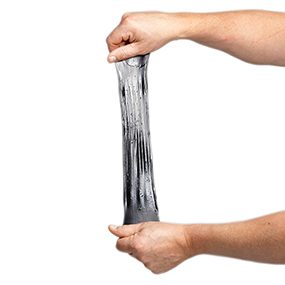
This is a super-easy-to-build water feature that just about anyone can build with basic tools. What makes it work as a pond is a paint-on rubber lining. There are a few different brands of liquid rubber—we used Rubberize It! Universal Rubber from rubberizeit.com. It’s ultra-stretchy and UV-stable, and it can be used on lots of materials, including wood, metal and concrete. It’s amazing stuff, though expensive at $75 a gallon.
You can use liquid rubber to fix leaky gutters and metal roofs, seal RVs and trailers, and for many other applications. Ranchers love it for sealing leaks in metal water tanks. And we love it because it can turn just about anything, even a simple wooden box, into a water feature.

Project step-by-step (7)
Step 1
Cut the Boards to Size
- Cut the two bottom boards (A and E) to length.
- Note: Cuts made at the lumber mill are usually rough, so trim the ends of all the boards before measuring.
- The width of 1x12s can vary slightly, so double-check the width of the bottom before you cut the ends and dividers (B and C) to length.
- Note: The rough-sawn cedar we used was 7/8 in. thick. If you’re working with material that’s only 3/4 in. thick, you’ll have to adjust the length of the sides.
Step 2
Install the Dividers
- Fasten the dividers to the bottom, and then add the sides.
- Join all the parts with both adhesive and trim-head screws.
- Scrape any excess adhesive with a putty knife.
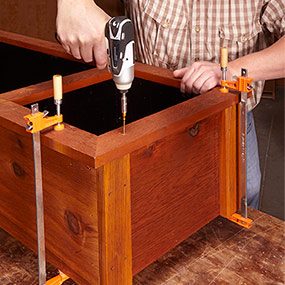
Step 3
Add Corner Brackets
- Cut aluminum angle stock to create corner brackets.
- Drill four holes in each bracket, and secure them with adhesive and screws.

Step 4
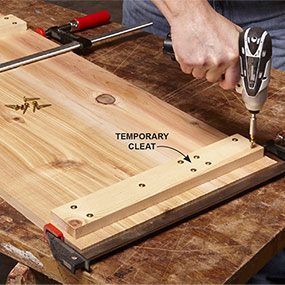
Assemble the Base
- Assemble the base with two 3-in. screws into each joint.
- Pro tip: It’s easier to center the base when the container was upside down. Hold it in place by driving in four screws at an angle. Flip the whole thing over and secure the base to the container with 3-in. screws driven down through the bottom of the container.
- After removing the temporary cleats, drill four 1/2-in. drainage holes in the corners of the outside compartments and one in the middle.
- Pro tip: If you plan to install a water pump, drill a 1-1/2-in. hole for the cord using a hole saw. Figure out which side of the container has the best-looking wood grain and drill the hole on the opposite side about 3/8 in. down from the top edge.
Step 5
Build the Face Frame
- Join the face-frame parts so that the new screws will be invisible.
- Drill pilot holes through the end of one part.
- Hold the parts together and drive in screws.


Step 6
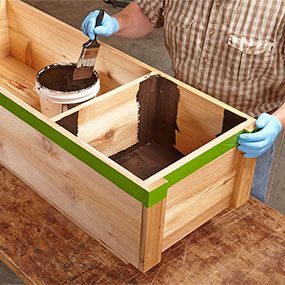
Apply the Liquid Rubber and Wood Finish
- Tape off the top edge of the container, the power cord hole and the drainage holes on the bottom.
- Glob a thick coat of the liquid rubber into all the seams, corners and defects in the wood.
- Apply one coat on the outside compartments and three on the middle.
- Note: Avoid blocking the drainage and cord holes with rubber by mopping the excess out with a cotton swab or rolled up paper towel. The rubber needs to dry for a few days before it’s ready for water.
Step 7
Finish Up and Add Water
- Clamp the face frame into place and hold it down with adhesive and trim-head screws.
- Pro tip: Leave the screw heads flush with the surface to avoid pockets where water can pool and penetrate the wood.
- If you opt to add a water pump, a pump that moves 120 gallons per hour is plenty big enough for this situation.
Originally Published: March 17, 2021