How to Build a Garden Arbor
Updated: Feb. 20, 2023Make a sturdy place to relax or a dramatic garden entrance in a weekend with this amazing garden arbor.

- Complexity
- Advanced
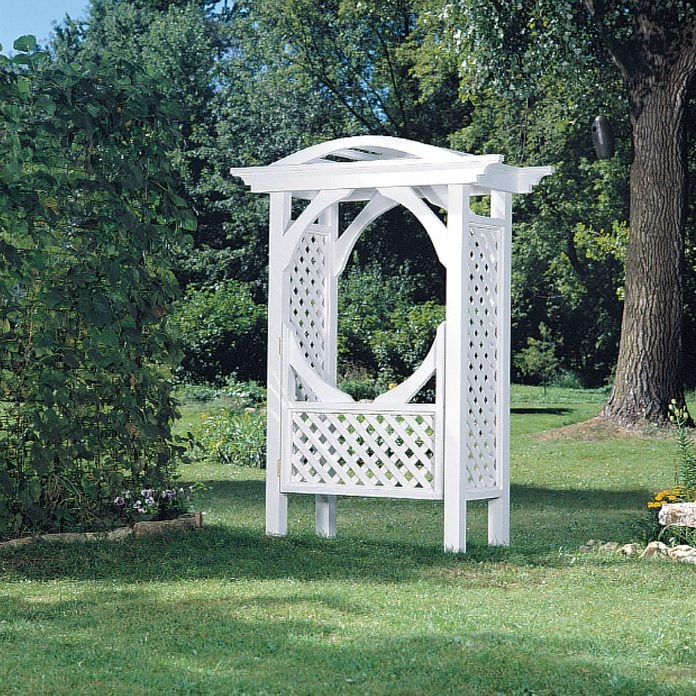
Years ago, I rented an attic apartment in an English village. The apartment itself was a dump, but one window looked over out over a flower garden, just the sort of old-fashioned garden you’d expect to find in an English village, complete with a cobblestone path. The owner of the house claimed that the arbor was more than a hundred years old. And although she had a dated photograph of a young couple in front of an identical arbor, I still can’t believe that a wooden structure could look so graceful after a hundred damp English winters.
The arbor detailed in this article may not last a century, but it is an approximate copy of the one that stood below my attic window. You can make yours a simple archway like the original, or a gateway, or if you’d just like a place to sit and relax, you can add a bench seat instead (Fig B.)
Materials List
For the archway alone:
- 4×4 x 8’ cedar (4)
- 2×4 x 8’ cedar (3)
- 2×6 x 8’ cedar (4)
- 1×4 x 8’ cedar (2)
- 4×8 lattice panel (1)
- 8’ pine door stop (3)
- 60-lbs. concrete mix bags (4)
- 1 gal. stain blocker (1)
- 1 gal. paint (1)
- Also: 2-1/2” and 3-1/2” exterior screws, 4d and 8d galvanized casing nails and exterior spackling compound.
To build the gate, add:
- 2×4 x 8’ cedar (2)
- 2×6 x 6’ cedar (1)
- Hinges (2)
- Barrel Latch (1)
To build the seat, add:
- 2×4 x 8’ cedar (5)
- 1×4 x 8’ cedar (2)
- 4×8 lattice panel (1)
Assembling The Sides
Begin by putting the posts (A) and stretchers (B) together to form the arbor’s sides. There’s no need to cut the posts, even if they aren’t exactly 8 ft. long. Just be sure to position the stretchers by measuring from the top end of each post (Photo 1).
Cedar is a very soft wood, so it usually doesn’t split when screwed or nailed. But to be on the safe side, drill 1/8-in. pilot holes before you drive in tow screws (screws driven at an angle as in Photo 1). Also drill 1/16-in. pilot holes before you nail the strips (C) that hold the lattice in place (Photo 3).
When cutting the lattice (D) with your circular saw, you may hit the staples that hold the lattice together. So along with eye protection, wear gloves to prevent flying staple fragments from lodging in your fingers.
Cutting Corners And Curves
When the sides are built and the lattice is installed, you’re ready to mark and cut the decorative patterns on the headers (Photo 4). The square notch is a cinch, but the curve might be a little tricky if you’re a jigsaw novice.
A jigsaw blade often bends one way or the other, leaving a cut that’s not quite vertical. You can minimize this beveling effect, which is especially common when cutting curves, by moving the saw at a slow, steady pace. Pressuring along as fast as you can usually leaves a rough, beveled, wandering cut.
Even the cleanest jigsaw cuts will need to be smoothed with coarse-grit sandpaper after cutting. You can do this by hand, but a finishing sander cuts down on the drudgery. It can also cut into your curves, though, so press feather-lightly and keep the pad moving back and forth across the workpiece.
Headers, Arches and Brackets
Joining the two sides of the arbor by attaching the headers (F) is a delicate process (Photo 5). First, you screw on one header, making sure it’s perpendicular to the posts. Then screw temporary X-braces to the posts (Photo 6). Next, with a helper – or better yet, two helpers – gently flip the whole flimsy assembly over and attach the other header and X-braces.
The arches (G), rungs (H) and 2×4 blocks that you screw to the inside of the headers can be installed with the arbor sitting on its side. Before you install the brackets (K), double-check the headers and posts to make sure they’re square with each other.
Finishing Touches
The trim that wraps around the headers and rails (L) is made from pine doorstop. Your jigsaw or circular saw isn’t the right tool for cutting this small stock at 45-degrees. So unless you have a power miter saw, use a wooden or plastic miter box that guides a handsaw (under $10 at home centers).
Patch all nail, screw and knot holes with exterior spackling compound, then sand and prime the arbor. Cedar is full of brownish pigments called “tannins” that bleed through latex paints, so prime your arbor with an oil-based stain blocker like BIN or Kilz.
Planting The Arbor
The arbor’s posts are set in holes about 16 in. across and 1 ft. deep. Getting the arbor to stand perfectly upright or “plumb” is a trial-and-error and throwing dirt back in another. When you get it right, firmly tamp the bottoms of the holes with a 2×4. Then hold a level on the posts on last time and make sure the outside edges of the posts are 4 ft. apart. If all is well, go ahead and add concrete.
Fig. A

Fig. B

Step 1
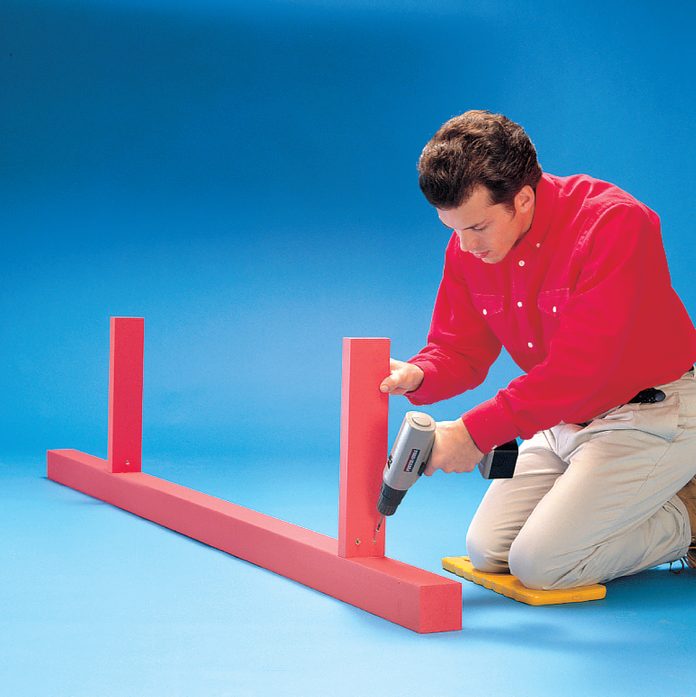
Screw the stretchers (B) to one post (A), and then attach the other post. Center a screw on one side of each stretcher and drive in two from the other side. Also attach rails (E) to the posts. Use a framing square to square the rail with the posts.
Step 2
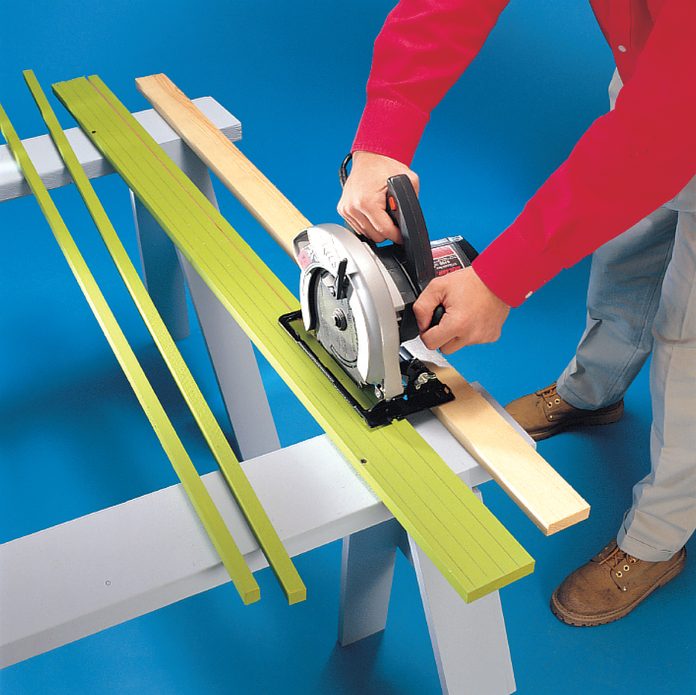
Rip strips (C) off a 1×4 that’s screwed to a work surface. A 3/4-in. thick support keeps your saw from tipping to one side. If you mark and cut as shown here, the width of your strips will be 3/4-in. minus the width of your saw blade. Use the same method to make the rungs (H) from the 2x4s.
Step 3
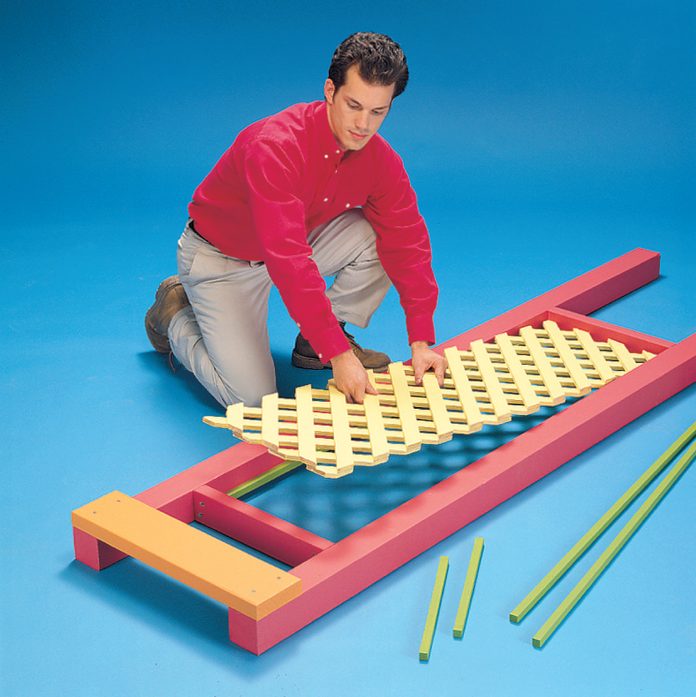
Nail the first set of strips (C) to the stretchers and posts. A spacer block helps you position the strips. If your lattice is 1 in. thick, use a 1/2-in. spacer. With 1/2-in. lattice, use a 3/4-in. spacer. Then set the lattice (D) into place, and nail on the second set of strips.
Step 4
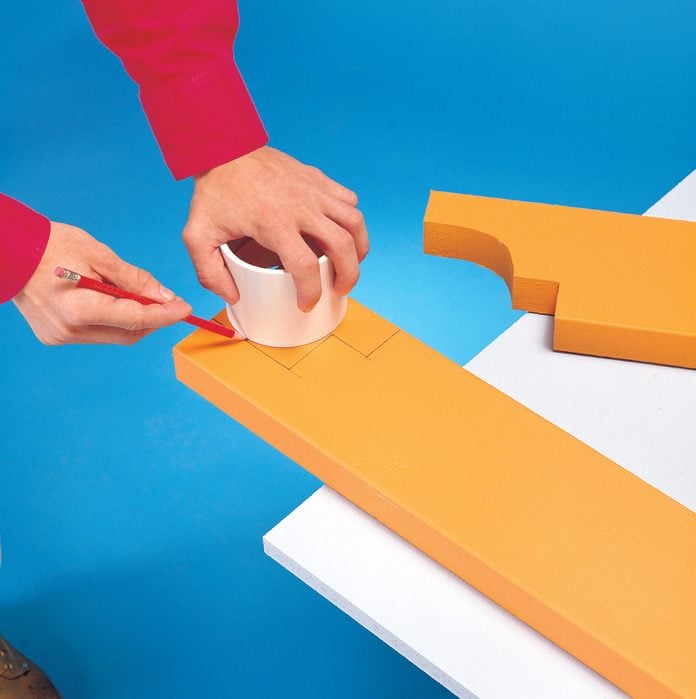
Lay out a header (F) according to the measurements in Fig. A. We used a plastic pipe coupler ($1) to draw the curve, but anything with a 4-in. outside diameter will work. When one header is cut and sanded, use it as a template for the other header.
Step 5
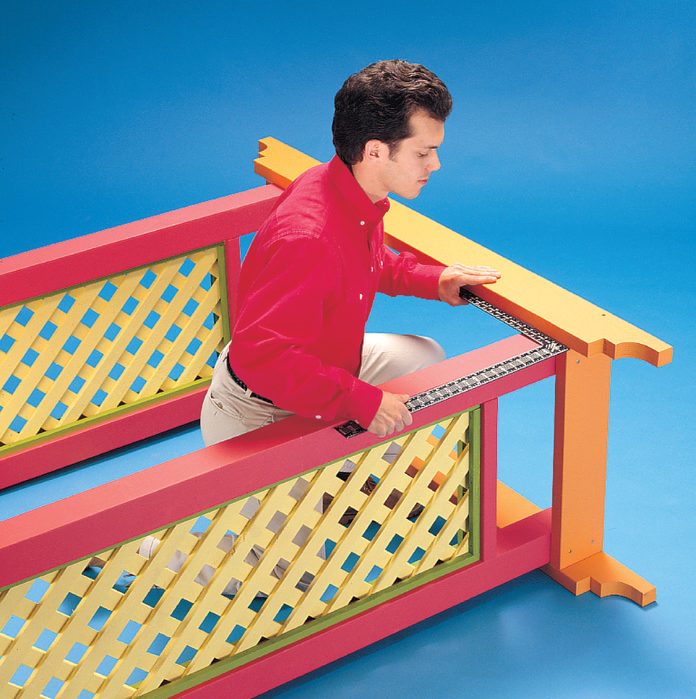
Square the posts with the headers before you screw them together.
Step 6
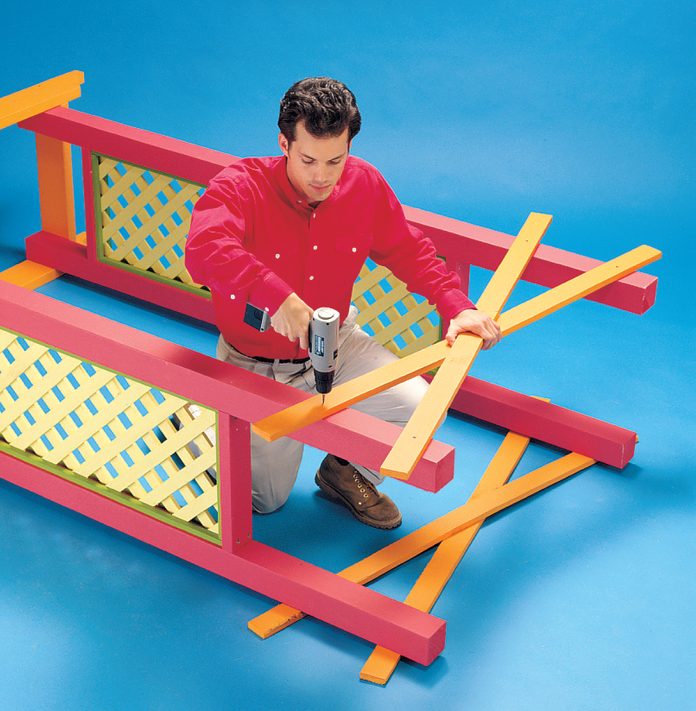
Attach temporary X-braces after you’ve double-checked to make sure the posts are square with the headers.
Step 7
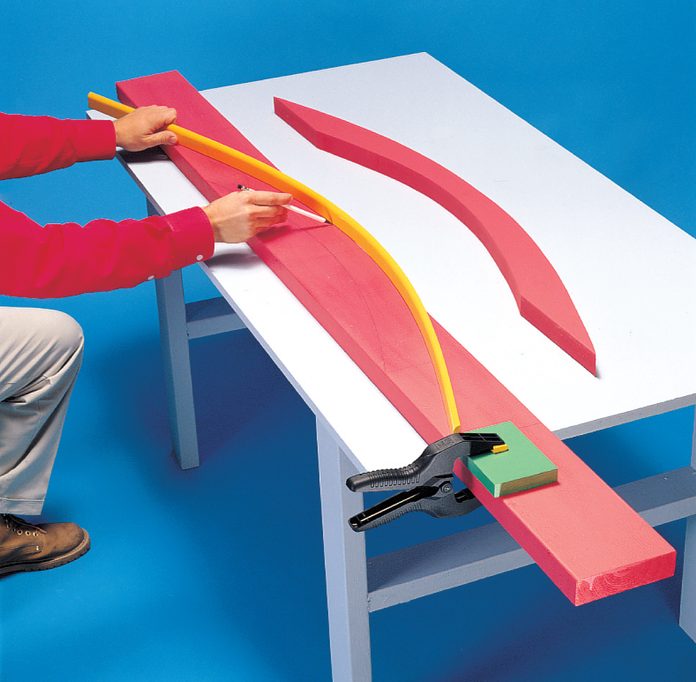
Mark an arch by bending a section of plastic door stop ($3) against a block clamped to a 2×6. Cut the arch and use it as a template for the second arch. Use the same method to mark the bracket template.