How To Make a DIY Hydroponic Garden

Buy a salad, eat for a night. Spend a couple of hours on this build and eat salad for life.
Our editors and experts handpick every product we feature. We may earn a commission from your purchases.
2 hours
Beginner
$270
Introduction
I used to think hydroponics was borderline magical, some sort of complex science that was out of my reach. Turns out it's mostly just PVC, a pump and some water. Building a hydroponic garden actually is faster and easier than preparing a soil garden bed. Plus, it produces faster-growing vegetables with a fraction of the water.
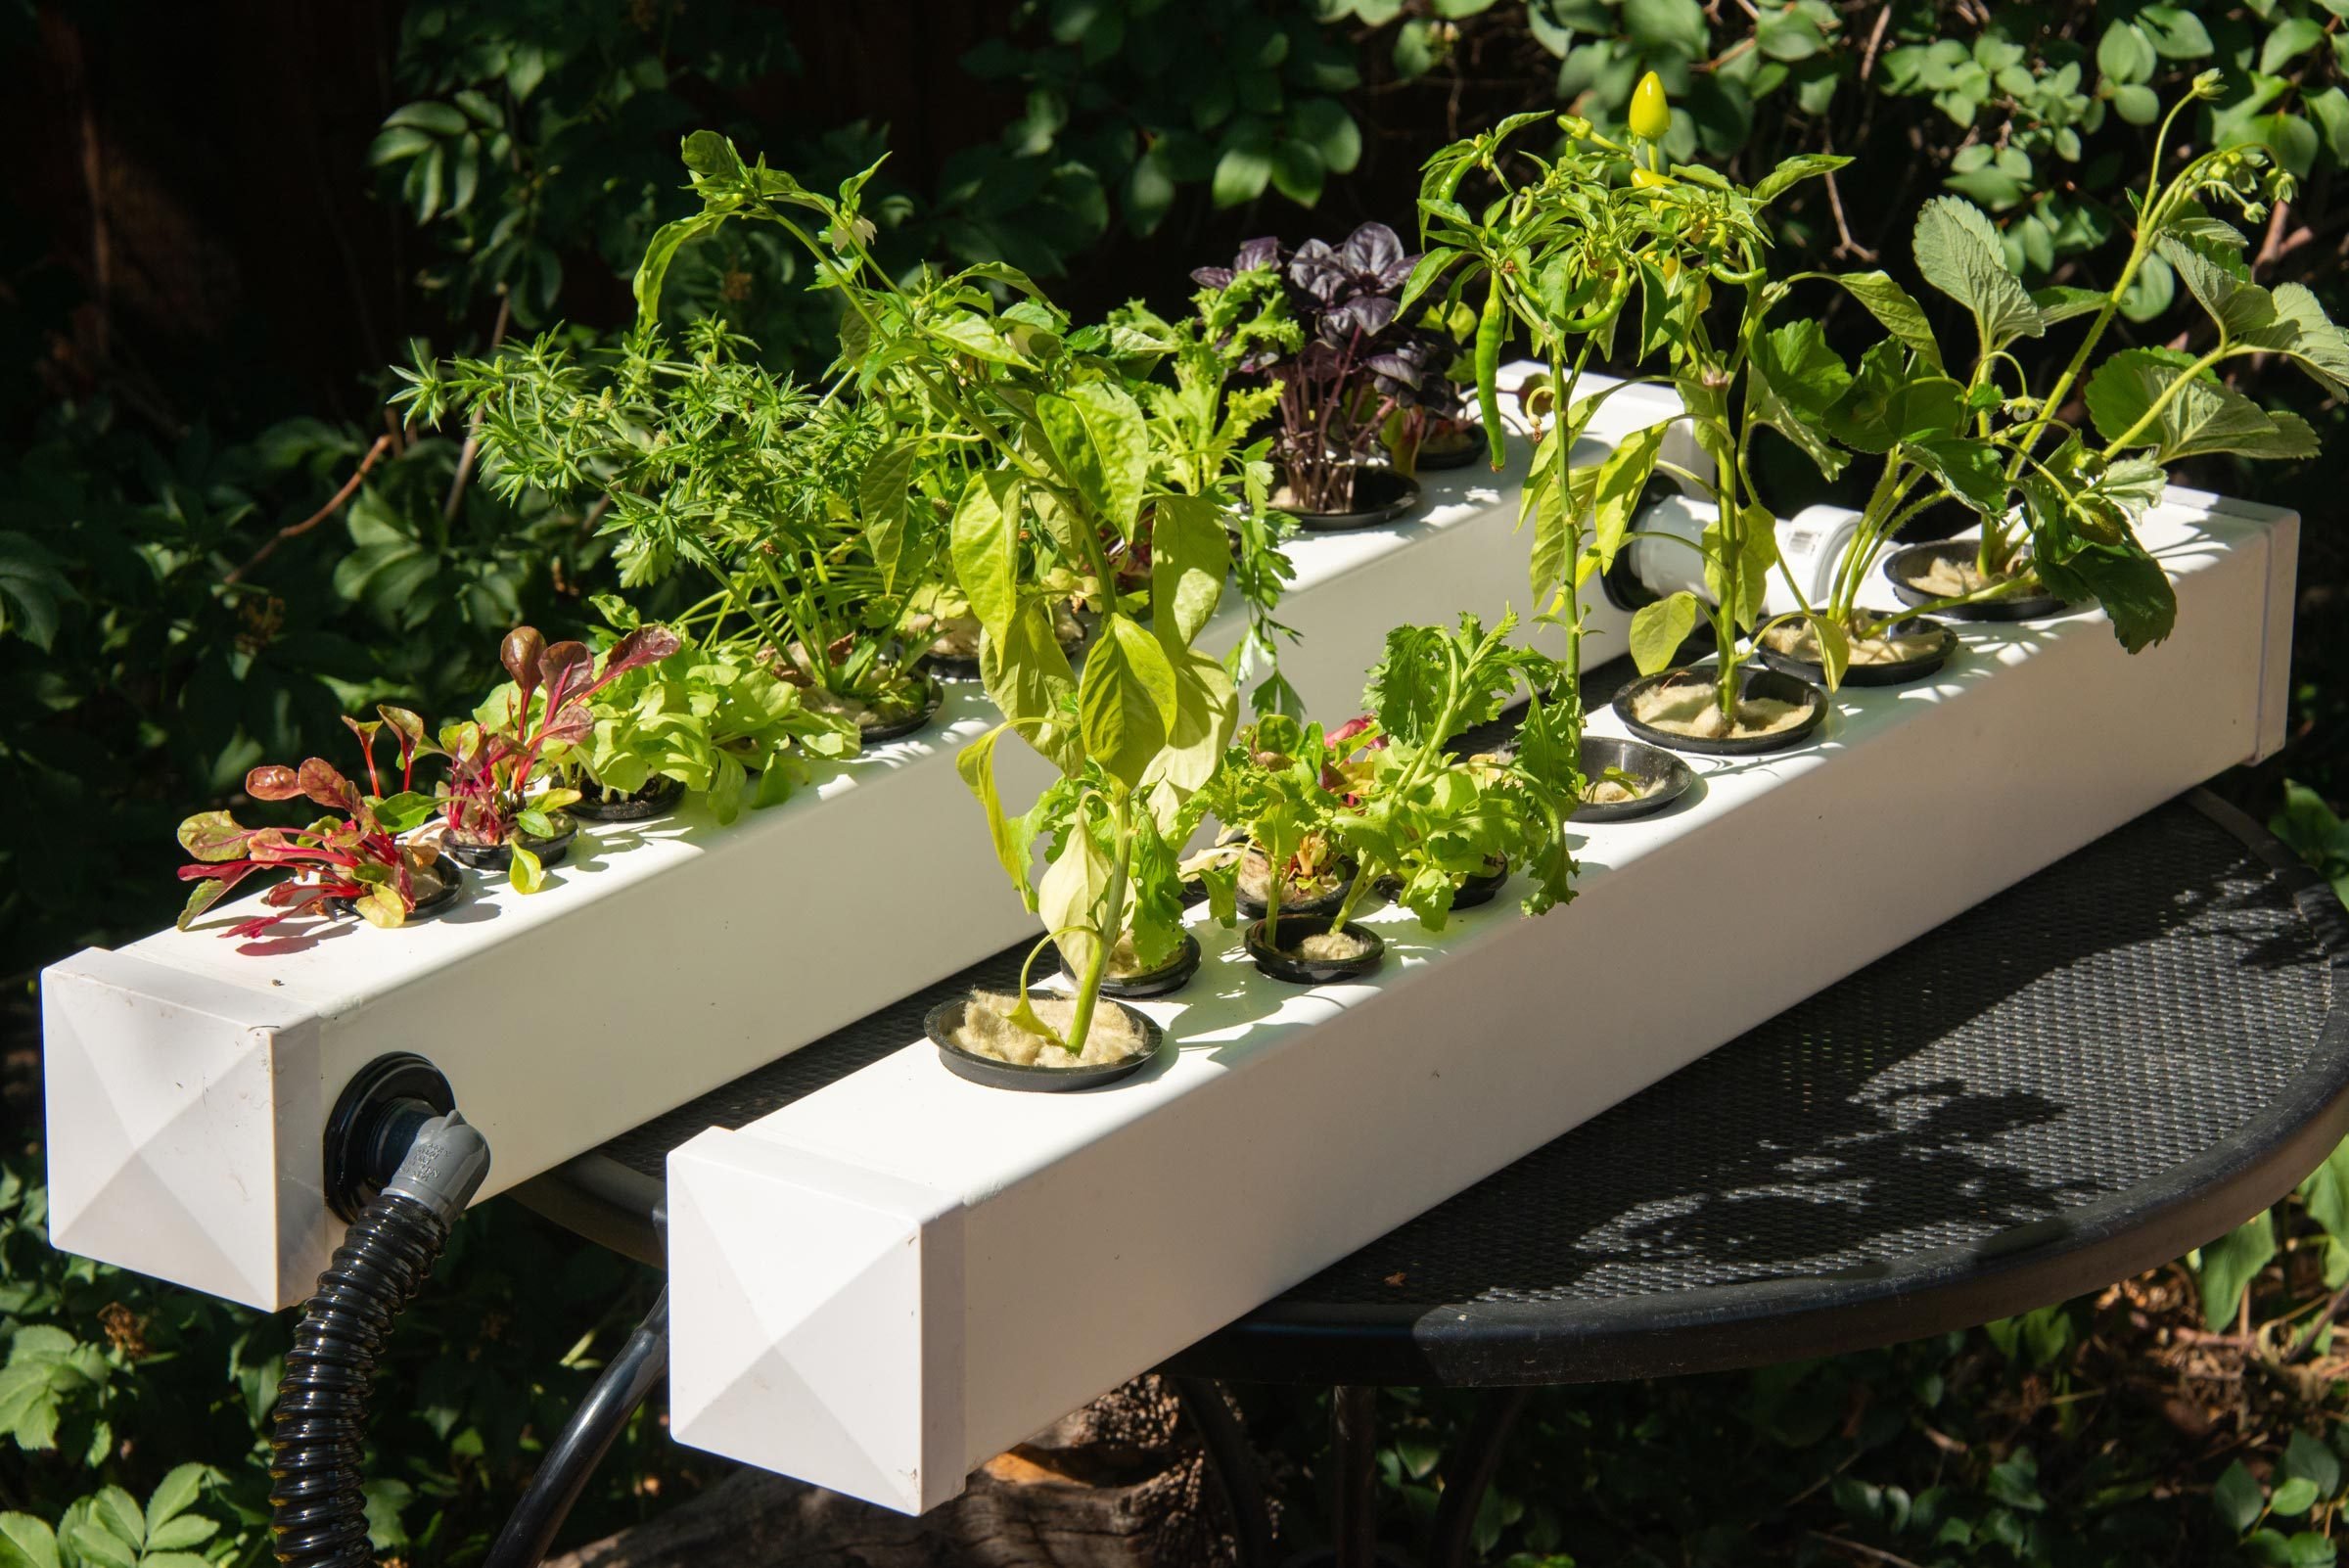
My partner Steve and I undertook this project together. We decided to make a system compact enough to rest on a table in a small house or apartment, but still large enough for nightly salads.
As a bonus, its small size makes it possible to move it outdoors for the summer and inside for the winter. You could also keep it inside year-round, but it doesn't feel logical to pay electric bills for grow lights when there's plenty of energy coming from that huge, flaming ball of hydrogen up in the sky.
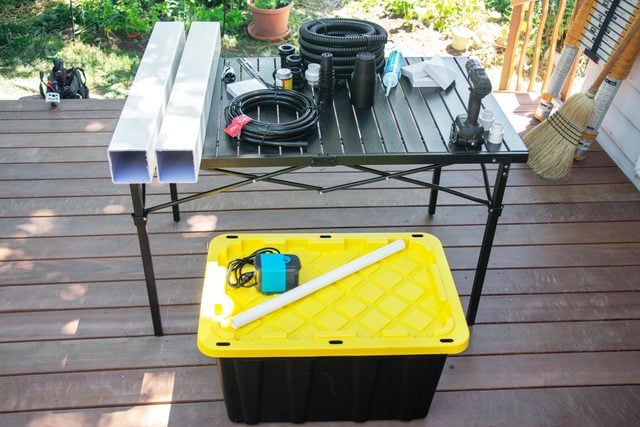
Tools Required
- 1-1/4-in.; 1-1/2-in.; 1-3/4-in.; and 2-1/2-in. hole saws
- 3/4-in. paddle bit
- Hand saw
- Measuring tape
- Miter saw
- Permanent marker
- Power drill
- Reciprocating saw or any other saw that can cut PVC
Materials Required
- (1) 1 ft. length of 1-in. PVC sched 40 pipe
- (1) 10-piece package 3-in. net cups for hydroponics
- (1) 10.2 oz. clear aquarium silicone sealant
- (1) 27-gallon tough storage bin with lid (should not be solid color: not translucent)
- (1) 4 oz. Gorilla Clear PVC Primaglue
- (1) 4-in. square PVC fence post - 6 ft. long
- (1) 50-piece package black plastic slotted mesh net plant cups for hydroponics
- (1) Boshart 1-in. insert x 1-in. D MPT Polypropylene 90-degree elbow
- (1) Boshart 1/2-in. insert x 1/2-in. D MPT Polypropylene 90-degree elbow
- (1) Kedsum 660 gph submersible ultra-quiet water pump with 6-ft. lift height
- (1) Lifeguard aquatics 1/2-in. double-threaded bulkhead
- (1) Package Totalpond vinyl tubing: 1/2-in. diameter
- (1) Plant nutrients
- (1) PVC tube fitting: sched 40
- (1) Sealproof 1-in.-diameter corrugated pond tubing: 20 ft. length
- (1) Sheet of 120-grit sandpaper
- (1) Sheet of 28 small plugs: 1.5-in. Rockwool starter plugs for hydroponics
- (2) Charlotte pipe 1-in. sched 40 male adapter MPT x S pressure
- (3) Lifeguard aquatics 1-in. double-threaded bulkheads
- (4) 4-in. white vinyl pyramid-style fence post caps
- 90-degree elbow: 1-in. barbed x NPT male
Project step-by-step (13)
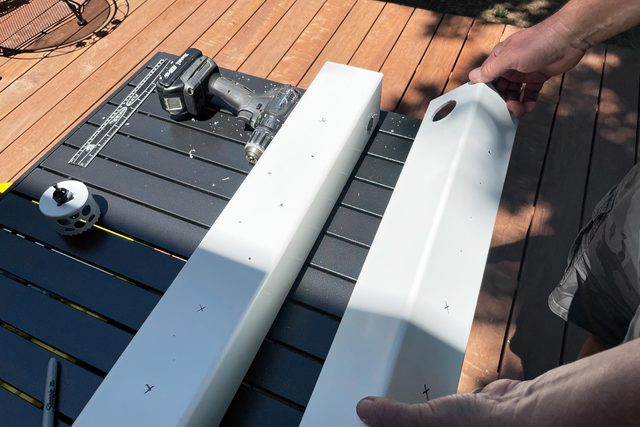
Cut Your Fence Posts
- Cut a 4-in. PVC Fence Post Into Two 36-in. Pieces
- Be careful to cut the ends as straight as possible so the end caps fit tightly.
- Also cut two 2-1/2-in. pieces of 1-in. schedule 40 pipe.
Drill the Connection Holes
- Drill the connection holes into your 4-in. PVC fence post sections.
- Three of the holes have a 1-3/4-in. diameter and one hole has a 1-1/4-in. diameter. (See diagram below for hole locations.)
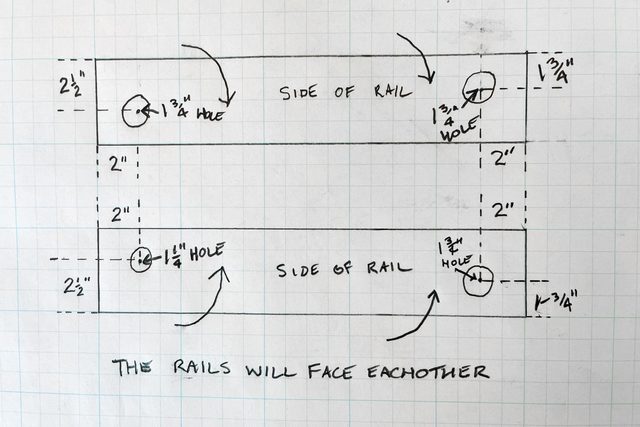
- These will face each other on the inside vertical edges; they connect the two rails.
- Pro tip: The hole saw may grab on the PVC when you begin to drill. Some people run the hole saw in reverse, but it depends on the saw’s teeth.
Lay Out the Pattern for Your Plant Net Cups
- Use a permanent marker to indicate the center for each hole.
- Leave at least three inches from each end so you don’t interfere with the fittings to be installed later.
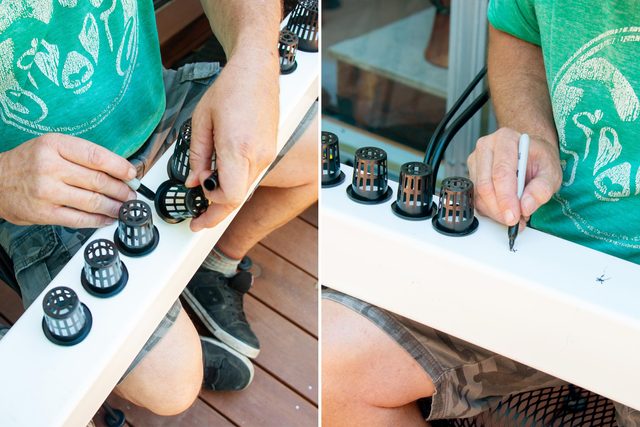
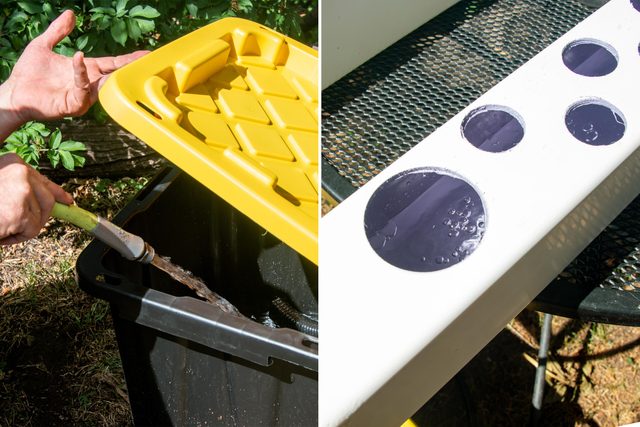
Drill Holes for Plant Net Cups
- Drill these on the top sides of the rails.
- Drill 1-1/2-in. holes for the small cups and 2-1/2-in. holes for the large cups.
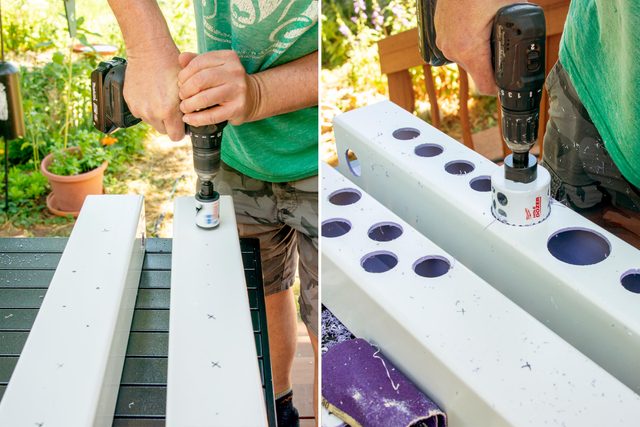
- After drilling the holes, use the sandpaper to smooth away loose PVC from the openings.
- This makes a formidable mess, so have the broom handy.
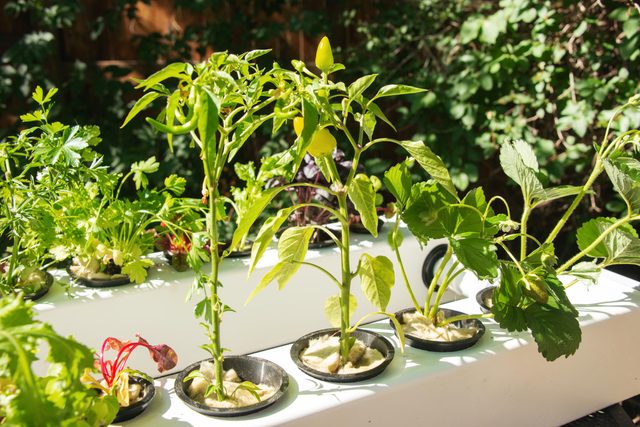
- Pro tip: Smaller net cups are good for shorter-term plants like lettuce, while larger ones are good for longer-term plants like peppers and strawberries.

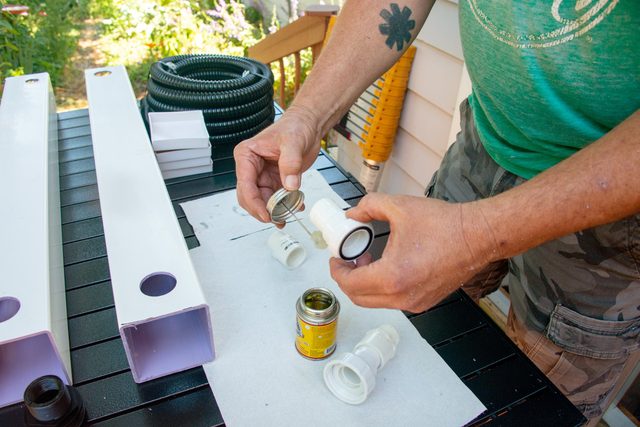
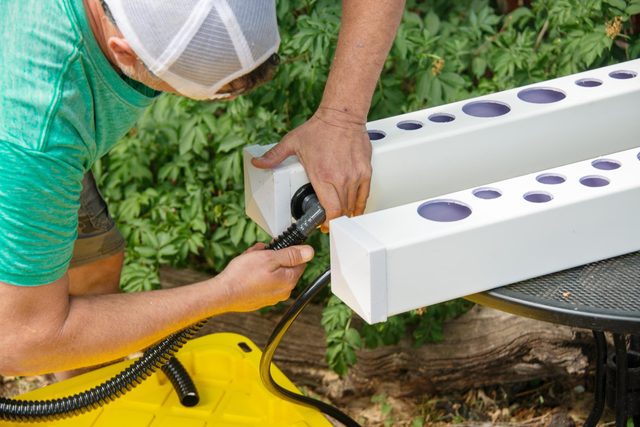
Glue the Rail Connection Fittings
- Assemble the fittings and 1-ft. PVC lengths in the order shown in the photo below (union fitting and adaptors).
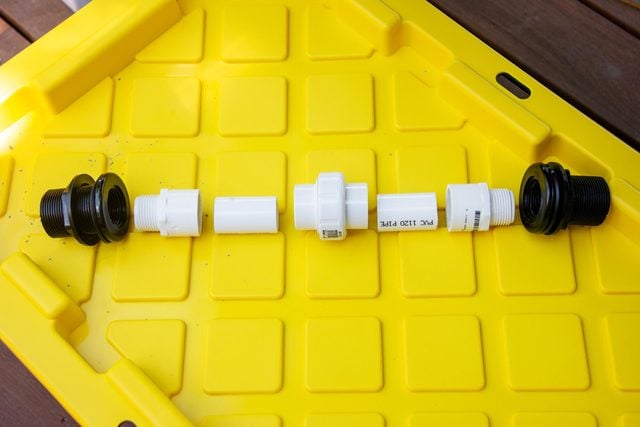
- Apply the glue to the inside of the receiving fitting and the outside of the inserting fitting.
- Push the pieces together while giving them a slight twist, about one quarter turn. Hold pressure for 30 to 45 seconds, or until the fittings don’t push apart.
Insert the Bulkhead Fittings
- These are the bulkhead fittings: 1-in. fitting and 1/2-in. fitting.
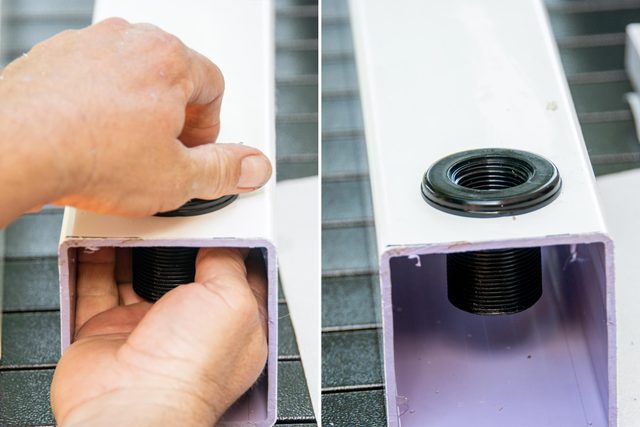
- These go into the connection holes you drilled in Step 3.
- The threads go inside the 4-in. PVC fence post. The gasket seal goes on the outside.
- Tighten the nut onto the threads until the fitting is tight.

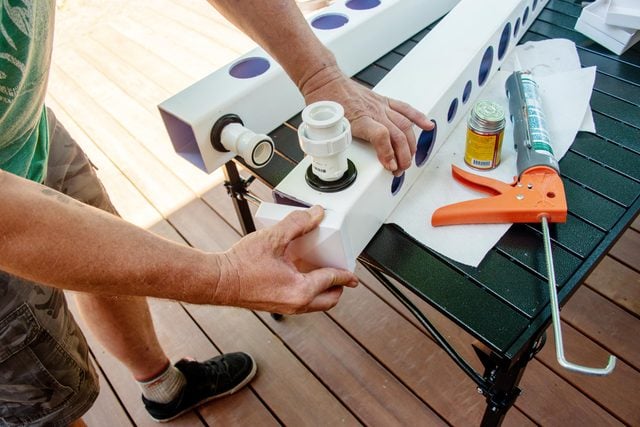
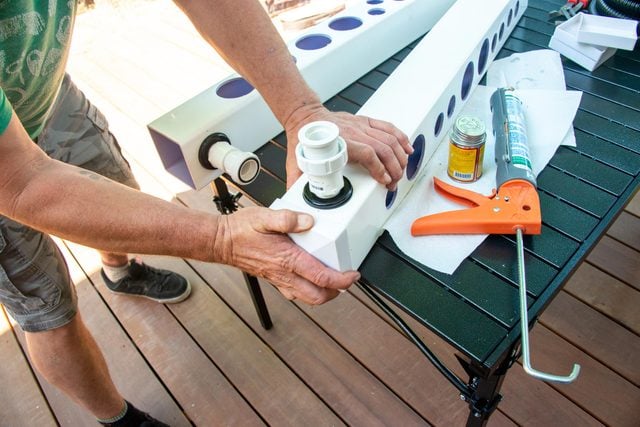
Insert the Connection Fittings and Elbows
- Insert the 1/2-in. elbow into the 1/2-in. bulkhead fitting.
- Insert the 1-in. elbow into the 1-in. bulkhead fitting directly across from the 1/2-in. fitting.
- Angle these elbows downward at a 45-degree angle, since they’re the connections to the water reservoir.

- Unscrew the union connection and thread each half of the connection fittings into the remaining two bulkhead fittings.

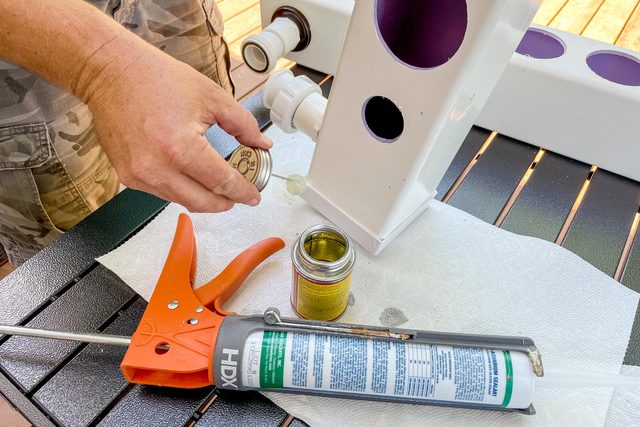
Seal and Glue End Caps
- Apply the silicone sealant to the inside of each end cap along the entire perimeter.
- Apply extra silicone in the corners, which are more prone to leaking.
- After applying the silicone, apply PVC glue along the inside edge of the cap, adjacent to the silicone.
- Apply glue to the outside of the post.
- Push the end cap in place and hold for 30 to 45 seconds, or until the cap doesn’t push away from the rail.
- After the caps are set, look at the exterior connections in the corners. If there’s a small space in the corner, apply some glue to fill the gap to insure a watertight seal.
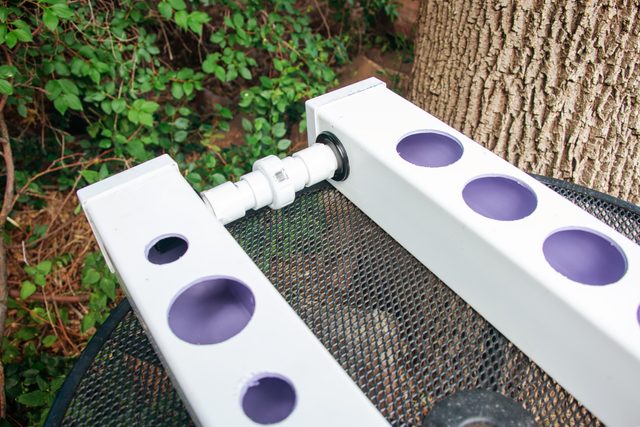
Connect Rails
- Place your rails next to each other with the union fittings aligning with the other half.
- Tighten the union fitting as much as you can with your hands.
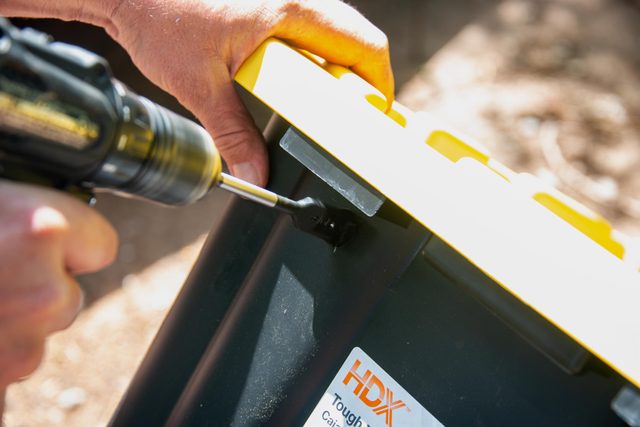
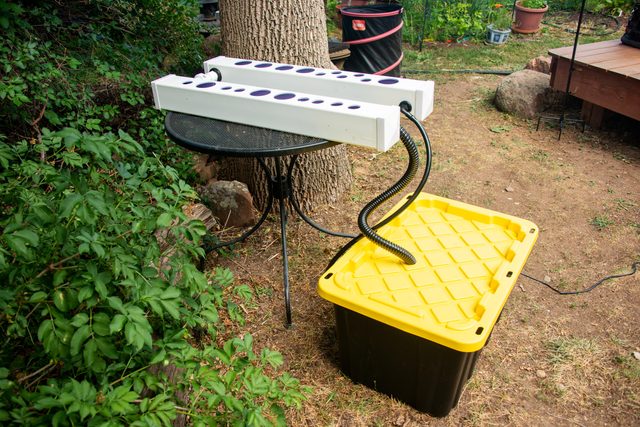
Prepare Water Reservoir
- Drill a 1-1/4-in. hole through the lid for the outflow tubing.

- Drill a 3/4-in. hole through the side of the reservoir near to the top of the sidewall. This is the hole for the inflow water line that will connect to the water pump.
- Drill another 3/4-in. hole next to the inflow water line. That’s for the cord to pass through.
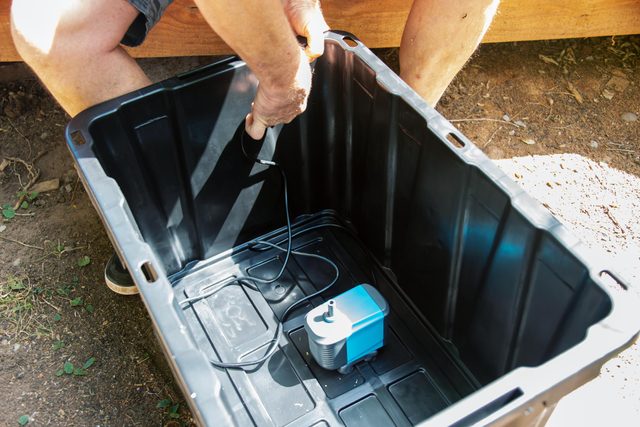
- Place the water pump in the center of the reservoir and route the cord out of the 3/4-in. hole next to the inflow tubing hole.
Attach Inflow and Outflow Tubing
- Push the corrugated tubing onto the 1-in. elbow barb.
- Route the 1-in. corrugated tubing through the top of the reservoir in the 1-1/4-in. hole.
- Leave about eight inches in the reservoir and cut off the remaining length.
- Push the inflow 1/2-in. tubing onto the elbow barb and route through the 3/4-in. hole in the side next to the cord.
- Cut to appropriate length. Push the inflow tubing onto the pump barb until it is fully seated.
- Fill the water reservoir to approximately three-quarters full.
- Add nutrients according to the manufacturer’s instructions.
Prepare Net Cups
- You can use seeds, seedlings or starter plants from a nursery.
- If your plants came in soil, remove as much of it as you can from the roots before inserting them into the Rockwool.

Finish It Up
- Plug the pump into a wall receptacle or extension cord.
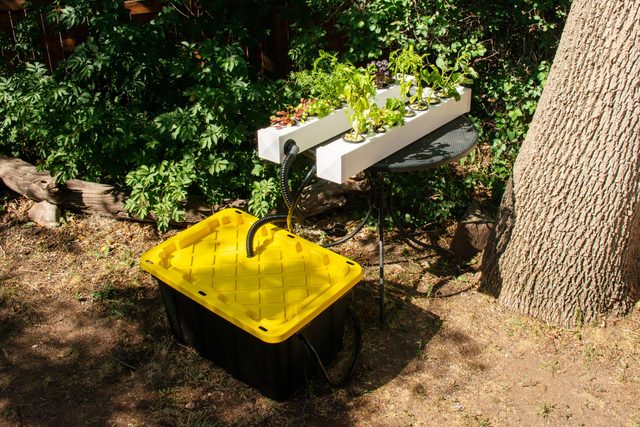
- Insert the plant cups into the holes in the rails.
- Don’t leave any holes empty. This allows sunlight into the system, which promotes algae growth.