Christmas Decor From Nature: How to Make DIY Porch Pots

Create DIY Christmas decor from nature with winter container plants that will look beautiful well into the new year.
Our editors and experts handpick every product we feature. We may earn a commission from your purchases.

An hour or less
Beginner
$20-50
Introduction
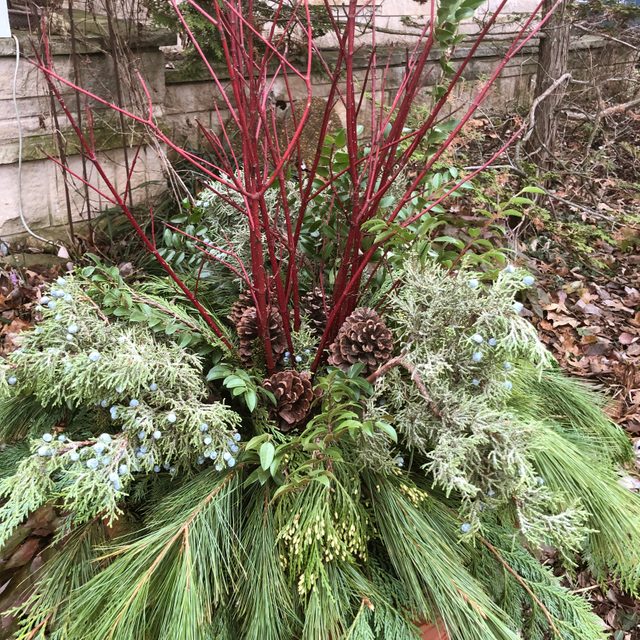
With just a few evergreen branches, you can create the perfect winter porch pots. Add festive ornaments, lights or ribbons and the arrangement takes on a decidedly festive look. The holiday extras can be removed after New Year's Day and the porch pots will retain their winter beauty for several weeks.
How many branches you'll need depends on the width of the container and the type of greenery you use. If the container is 12 inches wide, each layer should have about six to eight branches. The container can have as many layers as needed to make it look full. That's usually four to five. It's better to have a few extra branches than too few. You want to add as much greenery, pine cones or ornaments as needed to cover the soil.
Part of the fun of Christmas decor from nature is that you're not really planting anything. It's easy to stick branches in the soil, pull them out to move them to another spot as many times as you want. No digging required!
Here you'll see how to build the layers of greenery, suggestions for which evergreens to use and tips to help you to create your perfect winter porch pots. If you get on a roll and want to keep going, you can make a coordinating wreath for your front door.
Tools Required
- Garden knife or screwdriver to break up frozen soil
- Hand pruners or snips (make sure the blades are sharp)
Materials Required
- Gloves because some of the greenery may have sap which can stain your hands and pine needles can scratch and irritate skin
- Huckleberry branches (You can also use salal branches shore pine eucalyptus or southern magnolia)
- Incense cedar branches (You can also use cone cedar branches or southern magnolia branches)
- Juniper branches (You can also use dried hydrangea flowers which can be spray painted)
- LED lights
- Pine cones
- Port Orford cedar branches (You can also use trimmings from your Christmas tree such as Fraser fir Scot's or Scotch pine eastern pine or blue spruce)
- Red stem dogwood branches (You can also use flame willow Scotch broom white birch poles or winterberry holly)
- White pine tips or branches (substitute shore pine)
Project step-by-step (11)
Gather holiday greenery
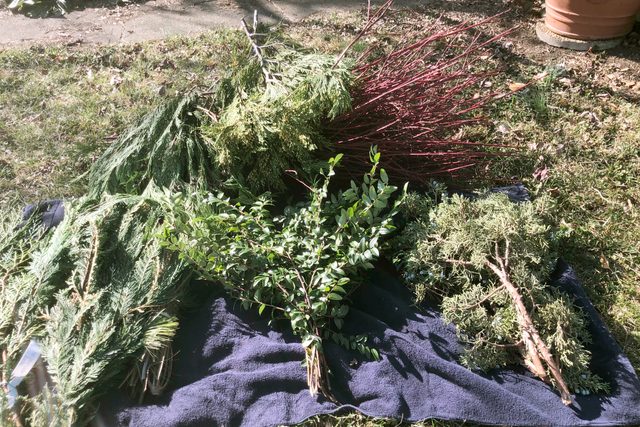
Branches should be 12 to 24 inches long. Select branches with different textures and shades of green or blue. You can also save money by snipping a few branches from plants in your landscape. Branches from juniper, yew, dogwood shrub, evergreen or winterberry holly, and evergreen trees (pine, hemlock, fir and arborvitae) are all good choices. Be selective when snipping branches. You are not pruning the shrub. Don’t take more than three or four branches from each plant. Snip from locations where nearby branches will naturally hide the missing ones.
- Having all of your materials in one place helps you see what you have to work with.
- Lay out the greenery, keeping each type separate.
- Keep the greenery near the container so it’s easy to reach.
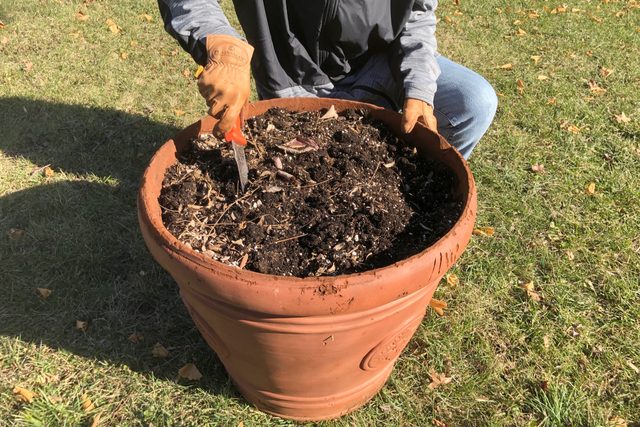
Loosen or break up frozen soil
- If you have time and a place to do it, bring the container of frozen soil inside and let it thaw before you begin. If you’re in a hurry, move the container to a sunny area. Pour boiling water onto the soil and work it in with a garden knife or screwdriver.
- Remove any seasonal plants in the container and lightly loosen the top three to four inches of soil. This makes it easier to insert the greenery.
- If you’re creating the winter arrangement in a new pot, add mulch or soil up to about two inches from the rim.
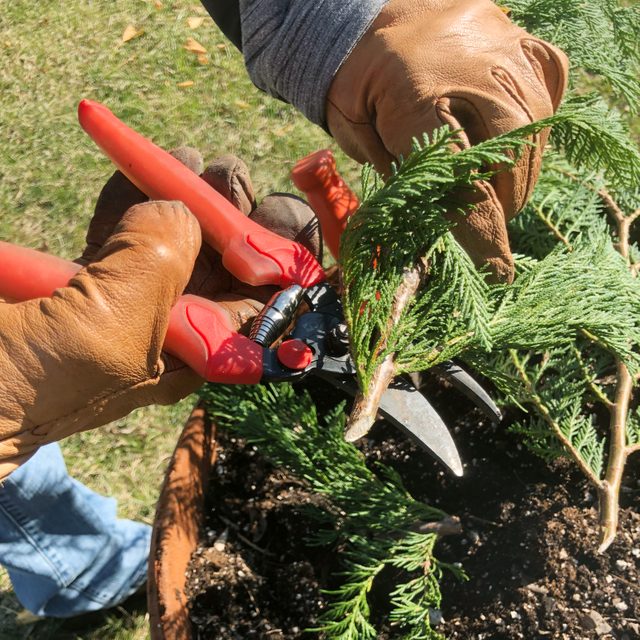
Snip greenery branches
- Snip the cut end of branches at a 45-degree angle to make it easier to insert them into the soil.
- You also may need to snip branches to make them shorter. Branches 12- to 24-inches long work well when designing and planting a holiday container.
- Pro tip: Sometimes, branches can be cut in half to fill in empty spots.
Arrange the first layer of greenery
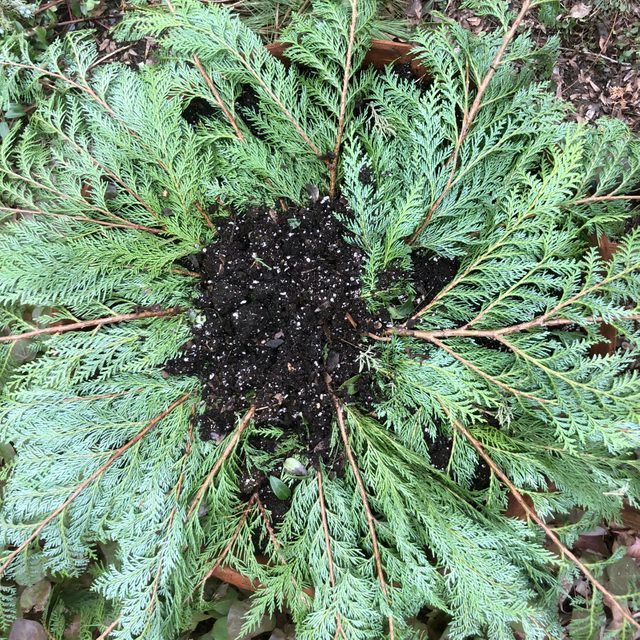
- Port Orford cedar is the first layer of greenery shown here.
- This layer should drape slightly over the rim of the container. Draped branches soften and camouflage the edge.
- The first layer is usually the widest.
Add the second layer of greenery
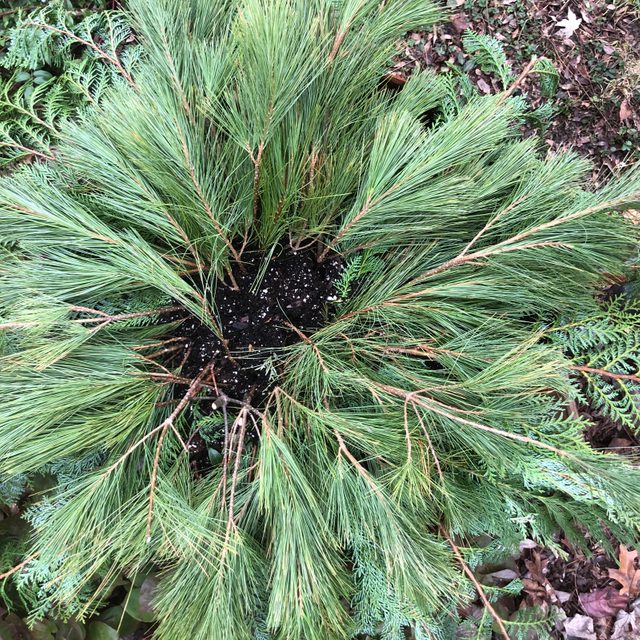
- White pine tips add a soft texture density over the flat Port Orford cedar.
- Arch this layer slightly to add soft height.
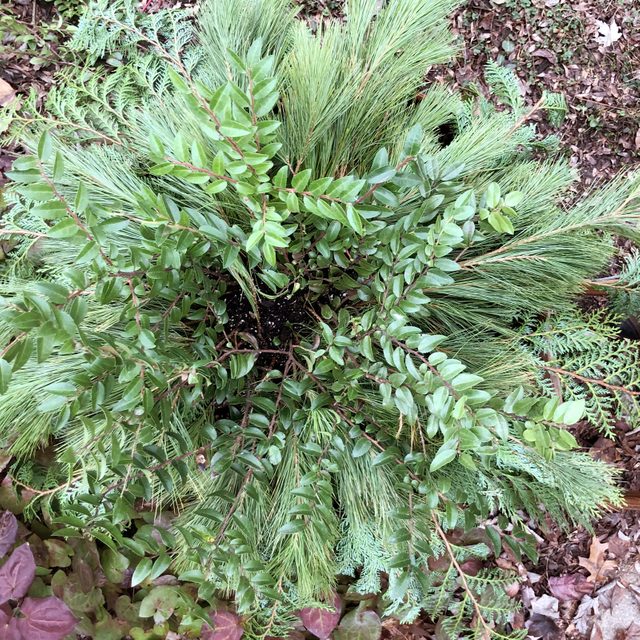
Fill in with huckleberry
- Huckleberry adds height and shiny leaves to the perfect winter container arrangement. However, it’s not so dense that it hides the other greenery.
- Huckleberry turns dark brown after several weeks but retains its glossy leaves.
Show off the junipers
- Add junipers branches. Their texture and ice-blue needles and berries contribute an interesting visual flair to the winter container.
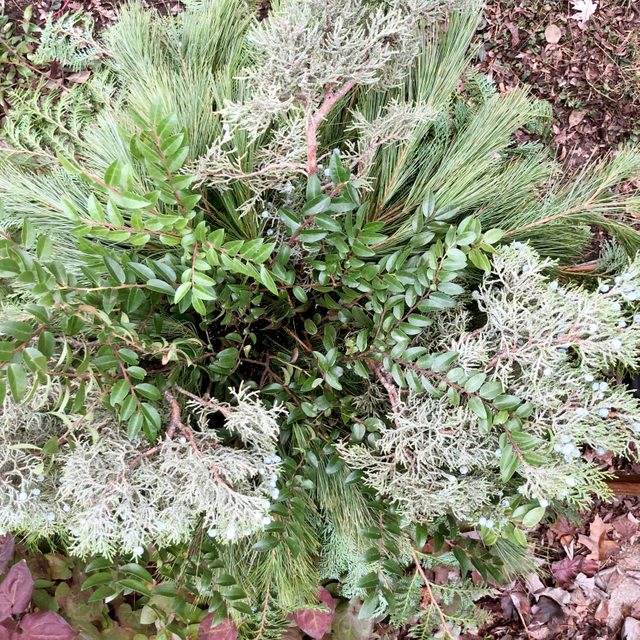
Add incense cedar
- Next, add incense cedar. With their soft green-with-white tips, incense cedar drapes nicely to cover any open spaces.
- By this time, the container should look full and little soil should be showing.

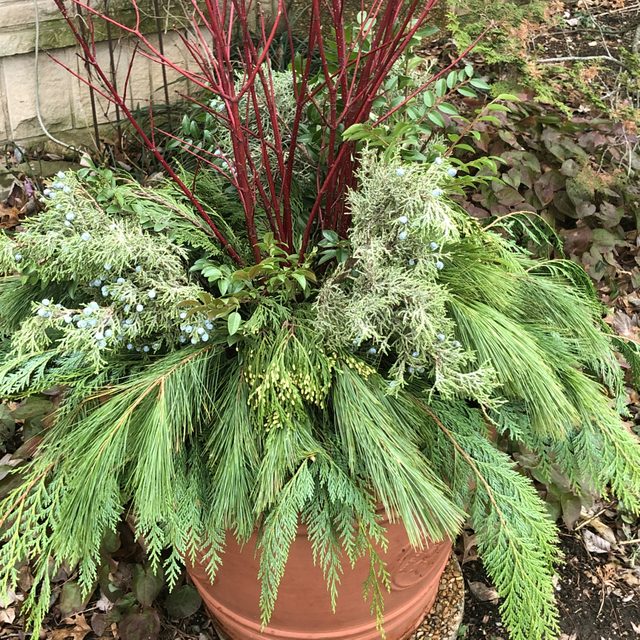
Use colored stems to add height
- Red-stem dogwood stems are the perfect choice to add height to the container. They have enough red to remind you of the holidays, but won’t look out of place once the holidays are over.
- Flame willow branches also work well as the centerpiece for height.
Festive lights brighten holiday cheer
- Branches or twigs of LED lights in white or other colors enhance the container’s beauty.
- The lights make the container visible at night.
- The lights can be removed after the holidays and the container will retain its natural beauty.

Final touches
- Drop in a few pine cones for a finished look.
- Round holiday ornaments can also be used this way.
- Place the container where it will be seen and enjoyed by all.