10 Most Common Flooring Installation Mistakes
 Updated: Apr. 28, 2021
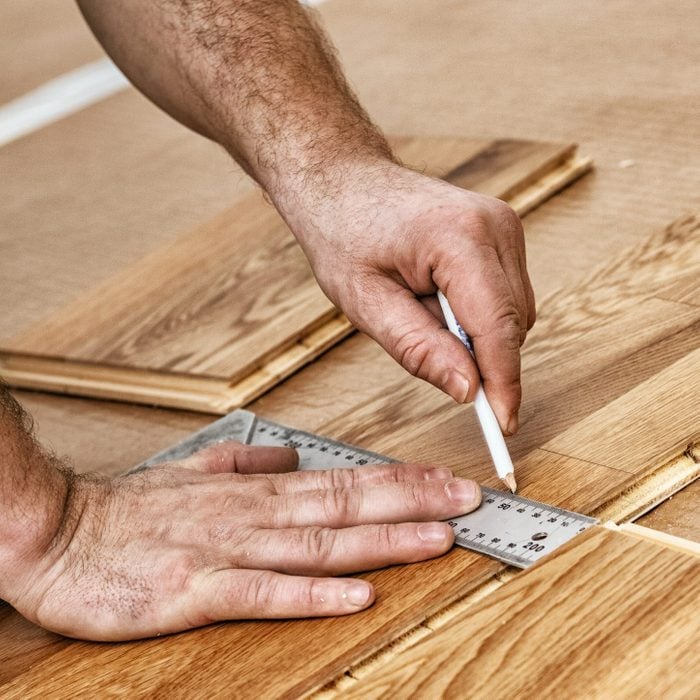
Seasoned installers call out common shortcomings when installing flooring of all kinds.
Our editors and experts handpick every product we feature. We may earn a commission from your purchases.
Quality flooring installation can challenge even the most experienced pros. Each material can be problematic in its own way. Mishandling these trouble spots can trap an installer into attempting a cosmetic cover-up, or require a return call to address a quality issue. Heed the advice of these seasoned installers when laying floors and avoid these 10 common flooring installation mistakes.
On This Page
Tiling Directly on Concrete
As a substrate for tile installation, concrete presents more issues than you might think. The Tile Council of North America (TCNA) warns against reflective cracking that happens when concrete cracks through shrinkage related to curing, or because of shifting sub layers below it. These cracks can create stress that cracks the tile layer too.
Laurent “Frenchy” Billaud, whose tile installation company operates in the greater Los Angeles area, says he often sees floors where the installer skips putting down a crack isolation membrane. As its name implies, the membrane isolates the concrete (or plywood) from the tile layer, allowing it to float unaffected by whatever movement and stresses happen below. Per the TCNA, when properly installed underneath an entire floor, manufacturers “will often warrant the entire installation, including the cost of replacing and installing new tile.”
Beware: A crack isolation membrane does not take the place of expansion joints in a tile flooring installation. It works in tandem with them.
Insufficient Subfloors Below Natural Stone
Billaud also notes a preparation mistake common to natural stone installations. “If you have a subfloor composed of regular 3/4-in. plywood and you install your stone directly on that, chances are that it will crack,” he says. “You need a second layer of plywood, glued and screwed.”
Furthermore, the upper layer should be offset so the joints in the two layers do not match up. The screws for the top layer should only anchor into the layer below, not penetrate the joists.
Cheating Curing Time
Tile sealants, caulk and grout all require curing time, according to industry training and manufacturer instructions. Billaud says some contractors are too anxious to move on with the project.
“In tile, there’s a lot of curing time,” he says. “And you’ve got to be a stickler for the rules. If a product calls for 24 hours, then wait a full 24 hours. That doesn’t mean finishing application at 5 p.m., then coming back the next morning and continuing the installation. That’s not 24 hours.”
Billaud even advises monitoring climate conditions at your jobsite and increasing cure time in cooler, wetter environments.
Starting a Wood Floor in the Wrong Place
Joe Sheehan, owner of Minnesota Woodwork in the Twin Cities, says he often sees this wood floor installation mistake. “Many people look for the longest, straightest wall,” he says. “I always start at the focal point of the floor.” That could be near a door jamb, a stair nosing or a floor register.
Starting somewhere easy and finishing at the hard spot can leave you in a difficult place, with little flexibility and few options. Sheehan says by starting in these highly visible or difficult locations, you can call the shots on row positioning and where joints fall. That results in a much more attractive floor.
Cutting Around the Door Jamb
As a transition between rooms, doors create specific challenges in a wood-flooring installation. Floor boards need to be cut to fit properly through the doorway, but too many installers fail to undercut the jamb, says Sheehan. Rather than trimming the end of the door jamb, casing and trim, they cut around it. That often leaves visible gaps that need to be covered with caulk.
“That doesn’t look good,” he says. “It’s not professional.”
All that cutting actually costs installers more time and effort. Using a scrap board to mark the top of the flooring on the jamb sets the stage for a simple straight cut, according to Sheehan. Then, one easy cut with a multi tool (Sheehan uses one by Fein) allows you to slide the floor board underneath it and your work is done.
Failing to Glue
In a finished wood floor, the outermost rows near the walls need to remain secure so that the entire floor remains tightly fitted.
“A lot of people just don’t use glue,” says Sheehan. “I always glue at least three rows, maybe four — anything that I cannot get with my stapler or my cleat nailer. When the floor is sanded there is a lot of chatter and the floor jumps a lot. There’s a lot of movement in those last couple of rows, so I always glue all my start rows and all my finishing rows.”
Failing to Prepare Your Laminate Layout
For any type of plant or board flooring, don’t rush careful measuring and planning. “In older homes, many people pick the longest wall and start laying flooring,” Sheehan says, “but that wall could be out of alignment with the rest of the house.”
He recommends taking multiple measurements and checking each room before starting.
“Usually the sub floors are pretty straight,” he says. “They snap a line when they install it, so the seams are pretty straight with all the walls. Then you can find the longest area of the house that you can snap a line through by measuring off the plywood seam and check the walls off that line.” The whole process takes him just 15 or 20 minutes and sets up the floor for the best presentation throughout the house.
Trimming Out Floating Floors With Baseboard Only
All floating floors require a gap at the walls to account for expansion and contraction of the floor. Sheehan says the recommended gap often measures 1/4-in. to 3/8-in. Common baseboard trim widths also measure 1/4-in. to 3/8-in. and therefore may not adequately cover the flooring edge as the seasons change.
Many homeowners, however, demand the installer not use any extra trim in addition to the baseboard. “They are asking you to keep that gap tighter because they don’t want to put an extra shoe or piece of trim along the baseboard,” he says. Unfortunately, that improper gap size often voids the warranty on the floor. “I’ve actually been denying jobs when they say they only want baseboards there,” he says.
Improper Tack Strip Installation for Carpet
Kevin Ryan, carpet installer for Erskine Floors in the Twin Cities, Minn. area, sees far too much inconsistency in tack strip placement and pad installation at the edges of a room. “Tack strips need to be 3/8-in. or less from all the walls and around door jambs,” he says. “A lot of times I see them at 3/4-in. or even a full inch away. And the pad has to be perfectly fitted, right up to the strip.”
Improper installation of the strip and pad transition can result in the tacks protruding through the carpet (ouch!) or a greater chance of the carpet edge coming loose. Either way, Ryan says, the installer will likely be called back to address the problem.
Failing to Start ‘On Pattern’
Patterned carpets pose additional challenges for carpet installers. In addition to fitting the flooring to the room, the pattern needs to appear oriented properly within the room. Ryan says that begins by trimming a roll on-pattern.
Each pattern in carpet has rows running both ways that you can identify. Once located, he uses a tool such as a screwdriver to part the pile, exposing the top surface of the backing in a straight line. “You trim it on-pattern there and it will follow the pattern straight all the way down,” he says.
Ryan then uses this edge to lay out the room and cut the rest of the perimeter. “It’s really simple to do, and then when it’s all trimmed in, I always go over it and fine tune it,” he says.