Advanced Home Framing Techniques
 Updated: Nov. 30, 2022
Check out these forward-leaning framing techniques we used for building our Getaway.
On This Page
Floor Framing
Until recently, floors and roofs were supported by beams, floor joists, and roof rafters made of dimensional lumber, typically 2×6, 2×8, 2×10, or 2×12. In new homes, it’s increasingly common to see engineered wood products such as floor trusses, I-joists, structural composite lumber, or glulams. These modern wood products allow longer spans and wider spacing than the conventional 16-in. on center (OC).
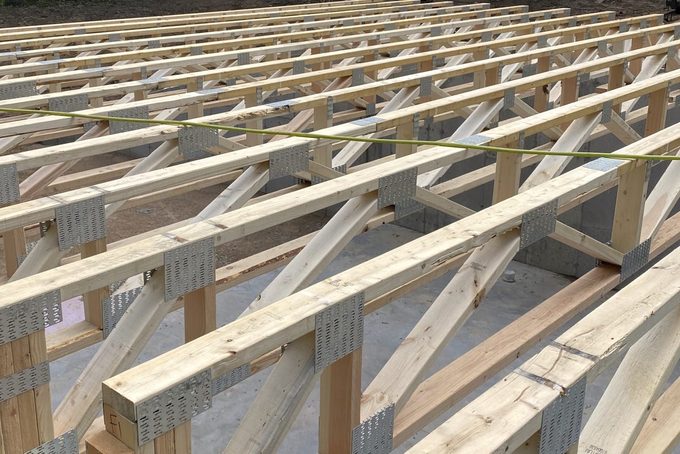
Floor trusses and I-Joists typically have a wide top and bottom chord that makes for optimal nailing and gluing of subfloor and easier drywall installation for ceilings. We used floor trusses at the Getaway set at 19.2-in. OC. We could have spaced them at 25-in. OC, but we wanted a stiffer floor given their 24-foot span.
Plumbing, electrical and mechanical contractors appreciate truss-built floors and ceilings because their open design means no hole boring through solid joists when running pipes, wires, and ductwork.
Wall Framing
Wood wall studs make up 25 percent of the exterior wall framing on a typical home. This decreases energy efficiency through thermal bridging that happens when the outside temperature is thermally transferred to the interior through the structural framing elements.
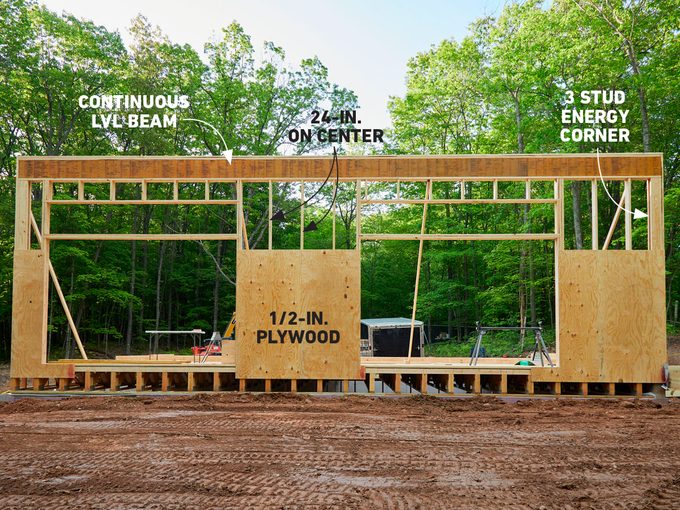
To reduce thermal bridging, we chose to place LVL beams across the entire front and back of the Getaway. This allowed us to use fewer 2×6 studs, placing them at 24-in. OC, as opposed to the conventional 16-in. OC. We were also able to reduce the structural framing components around windows and door openings because our LVL beams did that work.
Because of the wider stud spacing, we choose 1/2-in. plywood over OSB for added structural bracing. For our exterior wall corners, we used a three-stud design to provide more insulation space and eliminate the isolated cavity found in conventional corners.
Stacked Studs and Insulated Headers
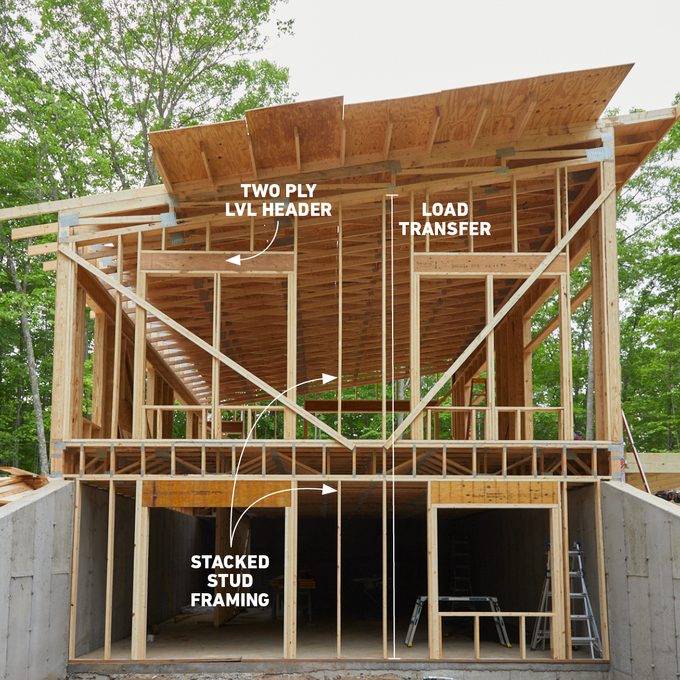
On our tall sidewall with the basement walkout, we used the more conventional approach with headers above each window. Instead of solid dimensional lumber headers, we used a two-ply LVL which left us space for 1-1/2-in. of rigid insulation on the interior side of the header.
We were able to maintain 24-in. OC with this wall by “stacking” our studs from one level to the next to create a direct load transfer to the foundation.
Roof Framing
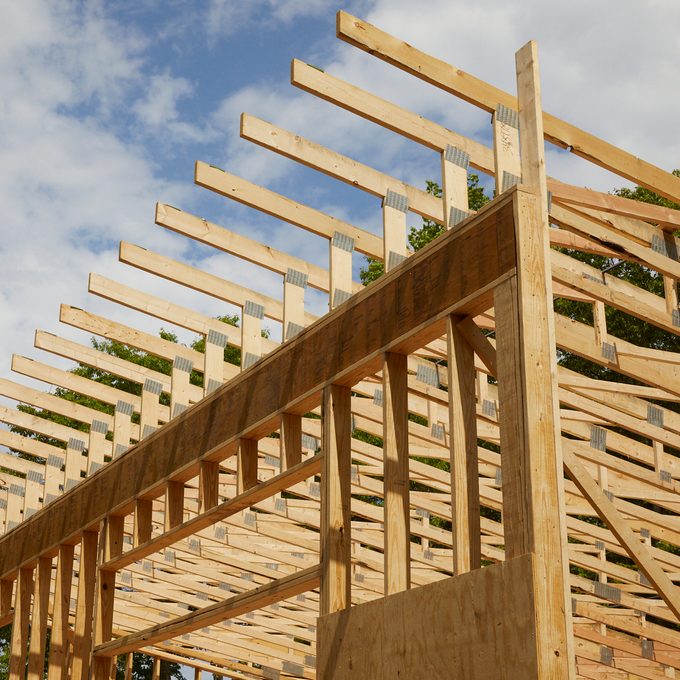
For our shed roof at the Getaway, we had roof trusses specially designed and engineered to be placed at 24-in. OC. These combined with 5/8-in. plywood decking and spray foam insulation made for a strong and energy-efficient roof.
One of the savings using floor and roof trusses is in labor costs. Setting trusses at a wider spacing than 16-in. OC means fewer pieces to install. Our crew of four was able to set the roof trusses and floor trusses in less than half a day each. We realized further labor savings because our truss design incorporated much of the “lookout” framing for our three-foot-wide soffit, leaving little work to be done for its completion.