Upgrade Your Backyard with Gabion and Stucco Walls
 Updated: Apr. 28, 2022
Give your backyard a new look with these two DIY projects.

Multiple Days
Beginner
Varies
Introduction
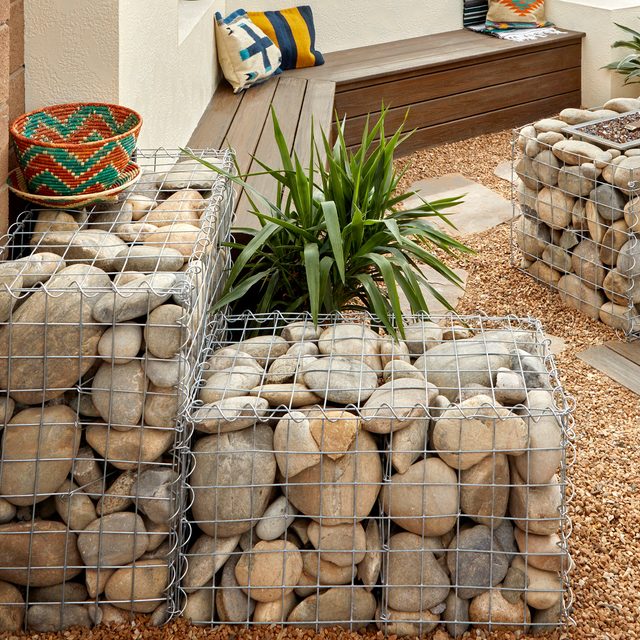
You can add beautiful stone and stucco-look walls to your patio without being a skilled mason. Gabion baskets provide the structural support for stacking any type of stone. These steel baskets can be used as retaining walls, landscaping structure or decorative elements. James Hardie architectural panels over simple framing make quick work of adding the look of stucco.Tools Required
- Angle grinder
- Circular saw
- Drill/driver
- Level
- Pick-axe
- Putty knife
- Rake
- Shovel
- Straightedge
- Tamper
- Tin snips
- ZIP tape roller
Materials Required
- 2x4s
- Gabion baskets
- Hardie panels
- Rocks
- Screws
- ZIP Sheathing
- ZIP tape
Project step-by-step (10)
Gabion Baskets
Plot Gabion Locations
This step is important if you’re setting several baskets in a line. You’ll need stakes and masonry string to keep everything straight. We used single gabion baskets in this installation, so alignment wasn’t an issue.
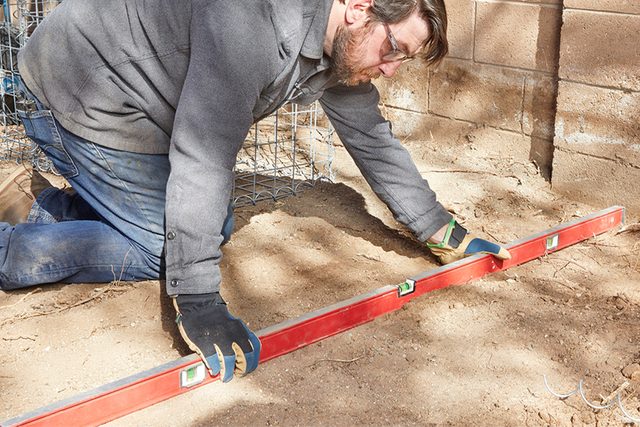
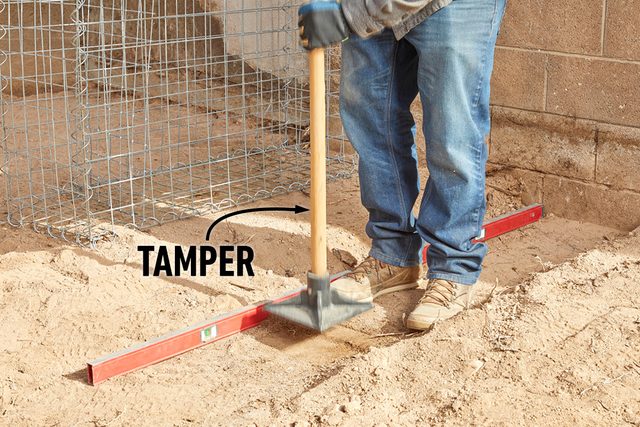
Establish Your Footing
Level the area where your baskets will sit to keep them from leaning. If you’re placing the baskets on soft soil or clay, dig down about one foot and add a gravel base, or footing, to prevent sinking. Our site in New Mexico was firm so it only needed leveling and tamping.
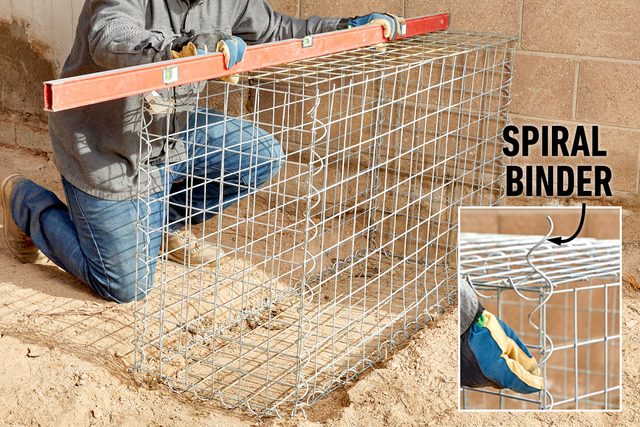
Assemble the Baskets
Your gabion baskets may come partially assembled with the sides connected to the basket bottoms. You fold up the sides and secure them with special wire or easy-to-use spiral binders. Close the top to ensure the basket is level, but don’t secure the top in place yet.
Fill the Baskets
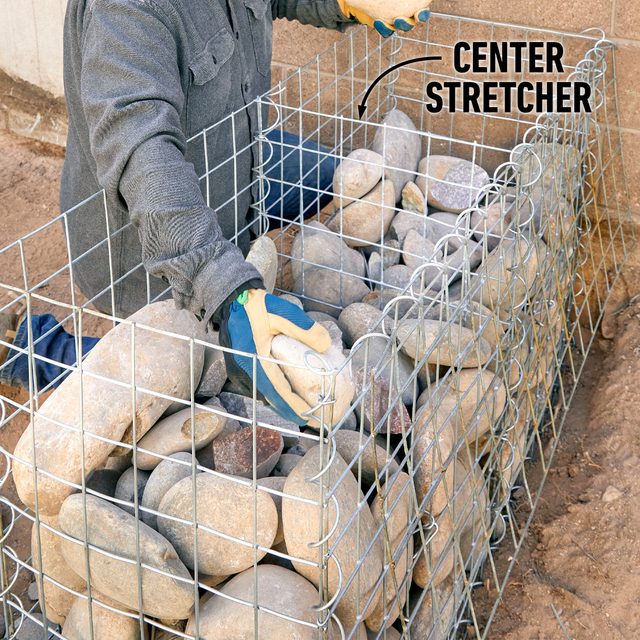
With your basket level and in place, add the center stretcher to keep the sides from bulging.
There’s more to filling a basket than just dumping in rocks. Be sure to “face” the basket, placing the best-looking stones where they can be seen and filling in the center with smaller and/or less attractive stones. As you build up the faces, let the interior fill stones support the face stones.
Cap the Baskets
When you’ve filled the basket level with stones, set the top in place and fasten it with wire or the spiral binders. Crimp these tight at the corners and file or grind off sharp edges.

Stucco-Look Walls
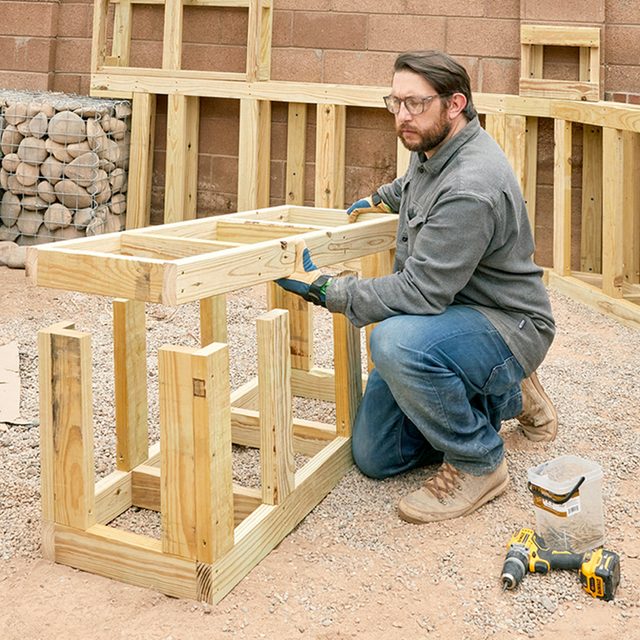
Build the Framing
Assemble the wall framing to your specifications, using standard stud-wall construction to form rigid boxes. These are exterior installations; go with treated dimensional lumber or steel studs for the framing.
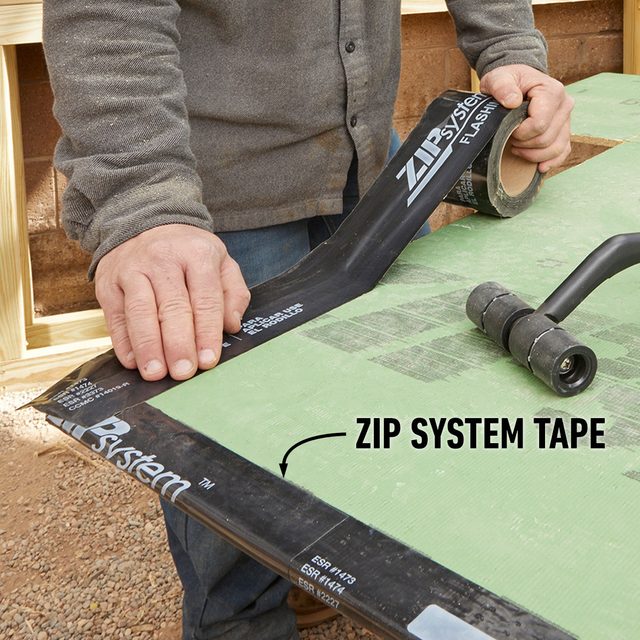
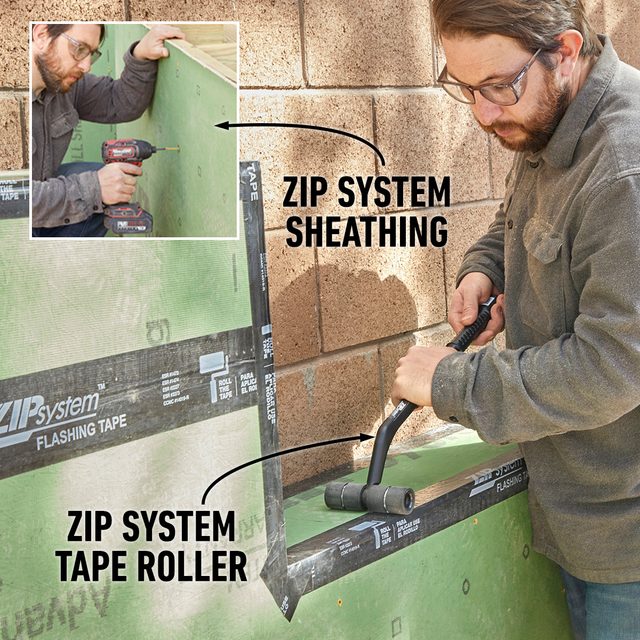
Wrap Sheathing Edges
You’ll need sheathing that will stand up to the elements; we used ZIP System sheathing panels. Because the bottom edges of this sheathing will contact the ground, the panels could wick moisture and swell. To prevent that, after you cut the parts to size, wrap the bottom edges of each panel with ZIP tape or another adhesive-backed moisture barrier.
Attach the Sheathing
Fasten the sheathing with construction screws. Then tape all the seams — including corners — with ZIP tape. Be careful not to sink fasteners more than halfway through the thickness of the sheathing.
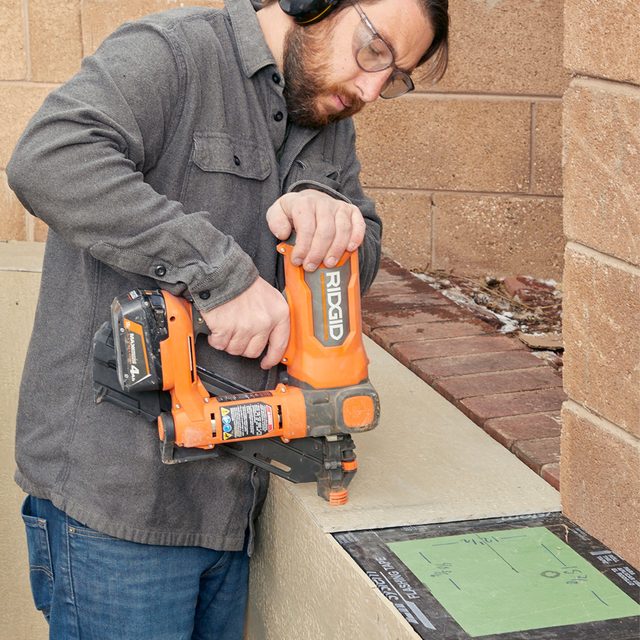
Attach the Hardie Panels
With your box frames built and sheathed, cut your Hardie panels to fit. Attach the panel parts using approved fasteners, such as ring-shank nails. Fill any nail holes with an exterior putty.
The manufacturer stipulates the edges of Hardie panels need to be six inches above grade or one inch above hardscape. Because this isn’t a dwelling, we were comfortable voiding the product warranty to get the look we wanted.
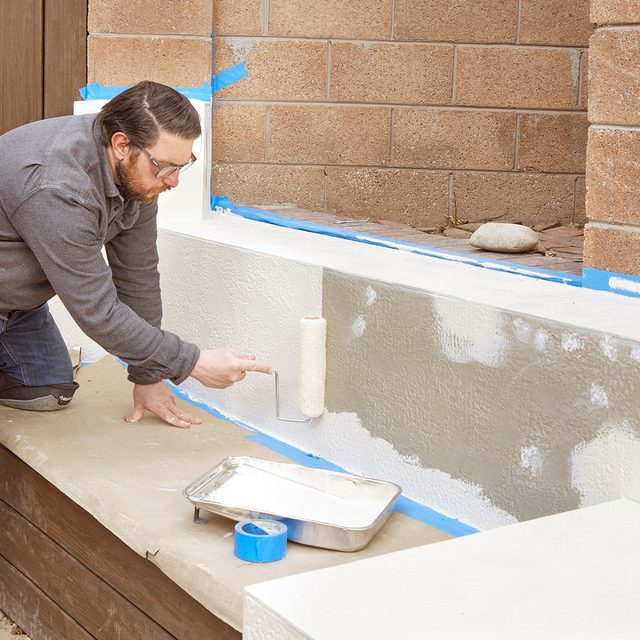
Paint the Boxes
These Hardie panels come primed and ready for paint. The only prep: Filling nail holes and seams, and giving sharp edges a slight round-over with a sanding block. Apply an exterior paint with a brush or 1/2-in. nap roller.